You can edit the text in this area, and change where the contact form on the right submits to, by entering edit mode using the modes on the bottom right.
123 Street Avenue, City Town, 99999
(123) 555-6789
email@address.com
You can set your address, phone number, email and site description in the settings tab. Link to read me page with more information.
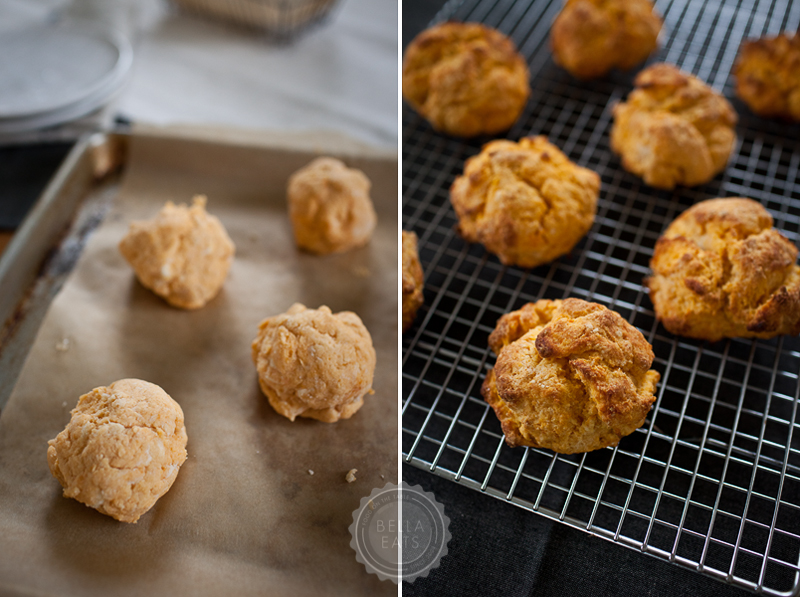
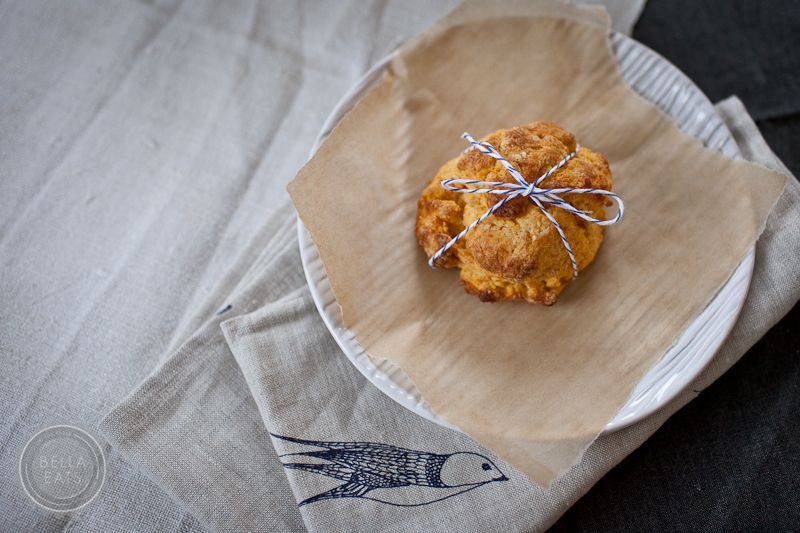
I have had this post queued up and ready to go for the last two weeks. Two. Weeks. The problem is, two weeks these days feels more like two hours. Time is flying faster than Harry Potter chasing the golden snitch. (Can you tell that my Thanksgiving plans include a trip to The Wizarding World of Harry Potter? That's pretty much all I can think about in between shooting and editing and shooting some more.) These biscuits were meant to welcome November and the sweet potato madness that comes with it but, instead, they're being offered up as a potential Thanksgiving morning breakfast. That works too, right? I think it is a brilliant idea.
Imagine Thanksgiving morning: the too-early wake-up call, the hours of cooking laid out in front of you, the stress of making sure the turkey is cooked just right. Now, picture the container of freshly (as in the night before) baked biscuits waiting for you as you start the coffee. The thin slices of salt-cured ham in the refrigerator. The pairing of that salty ham with those barely-sweet biscuits, which are easy to hold in one hand as you pull out celery and carrots and onions for chopping. Not bad, right? Make it come true, friends. Take a bit of time Wednesday night to whip up these beauties so they'll be ready to fuel you Thursday morning. You'll be oh-so-glad you did.
1 stick cold unsalted butter, cut into small pieces
Method
Preheat your oven to 425℉ with the rack in the middle.
Prick the sweet potatoes in several places with a fork, then bake on a baking sheet until very tender, 1 to 1-1/4 hours. Cool slightly, then halve lengthwise and discard skin. Purée sweet potato in a food processor. Transfer 1 cup purée to a bowl (reserve any remainder for another use) and stir in milk. Chill until cold, about 30 minutes.
Preheat oven to 425℉ again. Grease a large baking sheet or line with parchment paper.
Whisk together flour, sugar, baking powder, and salt in a large bowl. Blend in butter with your fingertips or a pastry blender until mixture resembles coarse meal. Add sweet potato mixture and stir just until a dough forms.
Drop dough in 10 equal mounds onto greased baking sheet, spacing them 1-1/2 inches apart.
Bake until lightly browned and cooked through, 18 to 22 minutes. Transfer biscuits to a rack to cool.
I'll admit...I've shared this recipe before. It was a long, long, time ago, way back in the first few months of Bella Eats' existence. I claimed then that this was the best quick bread I'd made...ever. And now, 2 years and many loaves later, I'm sticking to that statement. This recipe is at the tippy top of my list of favorites, loved so much that the old photographs just didn't do it justice. And so, when the baking urge hit me mid-afternoon last week (as it does most afternoons these days) I decided to capture new images of this old friend.
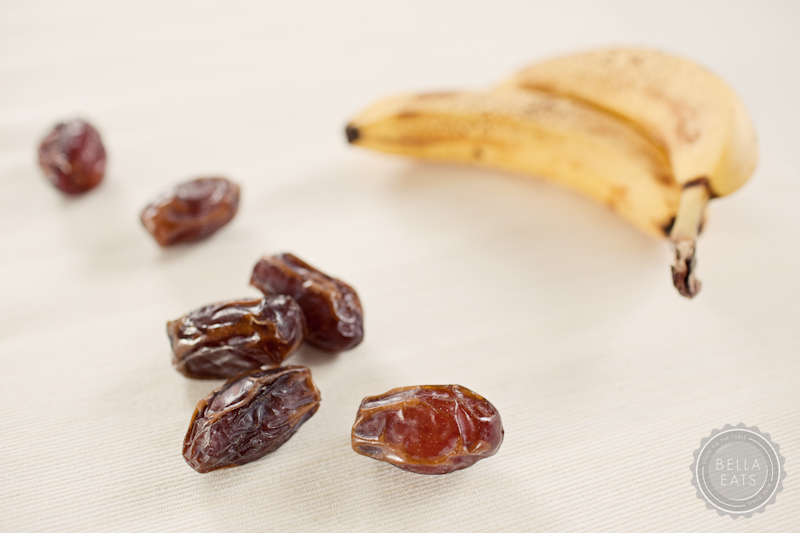
I love the melded scents of banana and cinnamon punctuated by sweet dates, which take on an almost caramel flavor. Diced apple keeps the bread wonderfully moist while adding its own, very subtle, sweetness. Made without oil, with whole wheat flour, and sweetened naturally, it is not absurd to have several slices of the loaf in one sitting without feeling guilty. Add a smear of almond butter to a thick slab and you have quite the hearty and filling breakfast or afternoon snack, while a quick zap in the microwave and a thin sliver of butter make for a lovely not-too-sweet dessert.
Happy Friday, Friends!
If you've been around since the beginning and already added this recipe to your repertoire, you might notice that I've made a small change in the ingredients. Instead of the 1/2 cup of applesauce previously present, I've substituted non-fat Greek yogurt. I've found that the overall texture is improved and the bread has a better, more shapely, rise.
This loaf freezes quite well for up to 3 months if wrapped tightly in plastic wrap and again in foil.
Banana Date Bread
makes 1 loaf
Ingredients:
2 very ripe bananas, mashed
1/2 cup fat free, vanilla, Greek yogurt
1/2 cup turbinado sugar
1 egg
1/2 cup peeled, chopped, tart apple
6 medjool dates, chopped
1-1/4 cup white whole wheat flour
1 tsp baking soda
1/2 tsp salt
2 tsp ground cinnamon
1/4 tsp nutmeg
Method:
Preheat oven to 350*F. Grease a 9x5 loaf pan.
In a large bowl, combine the bananas, yogurt, sugar, egg, apple, and dates.
In a medium bowl, combine the flour, baking soda, salt, cinnamon, and nutmeg.
Add the dry ingredients to the wet and stir until just combined. Pour batter into prepared pan.
Bake for 45-55 minutes, until a toothpick inserted into center of bread comes clean. Cool in pan on rack for 10 minutes. Remove loaf from pan and cool on rack completely before slicing.
Hello friends. Things have been a little bare around here lately, haven’t they? I am having a hard time believing that April slipped by with only two posts on Bella Eats. Two posts? How did that happen? We’ve been cooking and eating, I assure you, and I have a long list of recipes that I was planning to share last month. The photographs are all edited, and most are even loaded into drafts in my Wordpress dashboard. So what, you ask, is the deal?
I’ll spare you the list of excuses because really, what it comes down to, is that life is just plain busy. I’ve tried my best to become a very good juggler, to keep all of the plates soaring high above my head with a flick of my wrist and the occasional impressive behind-the-back catch but, alas, one of those plates fell.
The Bella Eats plate is a tough one to keep in the air when time is running short at the end of the day, mostly because of the words that accompany each meal that I share here. My time for writing comes after work, after running and yoga, after dinner and dishes, after free-lance photography edits and marketing projects. Lately when that time is upon me, the time to sit behind my computer and let the words seep from the well in my brain, down my arms and out through my finger tips...I find myself with an empty well.
And so I go to bed. I cuddle in next to Brian with the sheets wrapped around my shoulders and two dogs crowding my feet. The ceiling fan whirs overhead and I attempt to match my breath to its subtle rhythm, incorporating techniques from my yoga practice in an effort to fall asleep as quickly as possible. But my mind, the mind that failed me for an entire hour prior to my giving in and coming to bed is now racing. There are 'to do' lists and emails to write and recipes and workout plans swirling around on their own paths, making a terrible knot of jumbled thoughts that only the clarity of morning will untangle.
When sleep finally overtakes my body it is not without its own side effects. Suddenly my mind, not deterred by slumber, has all kinds of ideas about writing and work and life, weaving intricate stories through my dreams that are exciting and fascinating and inspiring. The scenes are so vivid that I find myself waking up multiple times in the night, tossing and turning as characters new and familiar wind their way in and out of predicaments that oh-so-loosely resemble my waking hours. I find myself hitting 'snooze' on the alarm multiple times each morning, trying to catch the tail-end of these thoughts before they fizzle out and leave me with only a hazy shadow of something that I think, maybe, if I could just remember, might have been good. It seems that this is the only time I have for creative wandering, the only time not bogged down by obligations and responsibility. I relish in it, until I realize the time and jump from bed in a panic, beginning the daily process all over again.
These extended 'snooze' sessions have caused me to rely heavily on grab-and-go breakfasts. The kind that, after hastily rising from bed and jumping in the shower, darting around the house looking for this shirt or that shoe, feeding dogs and packing a lunch allow me to simply reach into the freezer or pantry for a single item to stash in my bag and eat at the office. Gone are the mornings of leisurely breakfasts that involve turning on the oven and dirtying a pot, bowl and spoon. These days I am simply happy that I thought to freeze the leftover Carrot and Pineapple muffins I made weeks ago, and hopeful that soon, very very soon, my schedule will slow down to its normal pace. I am ready for that Bella Eats plate to soar again, to form high arcs above my head as words flow from my fingertips into this little space on the 'net.
Until then, thanks for being here. I am so happy you're reading.
These muffins are incredibly moist, even after a 3-week stay in the freezer. They have a hearty crumb fortified by the whole wheat flour, and a subtle sweetness provided by the pineapple and the agave nectar. I find them quite filling when paired with a piece of fruit or a cup of yogurt for breakfast.
Carrot Pineapple Muffins
makes 12 whole grain, no added fat, naturally-sweetened muffinsadapted from Sweet and Natural Baking, by Mani Niall
Ingredients
2-1/2 cups whole wheat pastry flour
3 tbsp oat bran
3/4 tsp baking soda
1/2 tsp ground cinnamon
1/4 tsp ground ginger (I will bump this up to 1/2 tsp next time)
1/4 tsp salt
4 large egg whites
1/2 cup light agave nectar
1/2 cup skim milk
1-1/3 cups grated carrots (I peeled the carrots into long ribbons first, then chopped them finely)
3/4 cup diced pineapple (I used canned, but will definitely use fresh next time)
12 chunks of fresh or canned pineapple, about 1 x 1 x 1/2 inch in size
Method
Preheat oven to 350*. Lightly spray a standard 12-cup muffin pan with vegetable oil spray.
Sift together the flour, bran, baking soda, cinnamon, ginger and salt into a medium bowl and make a well in the center.
In another medium bowl, using a handheld electric mixer set at high speed, beat the egg whites with all the agave nectar until soft peaks form. Reduce the speed to low and gradually beat in the milk. Pour into the flour well and stir with a wooden spoon just until combined. Stir in the carrots and the diced pineapple.
Spoon the batter into the muffin cups, filling about 3/4 of the way full. Top each muffin with a pineapple chunk. Bake the muffins until a toothpick inserted in the centers comes out clean and the tops spring back when pressed with a finger, 20 to 25 minutes. Cool for 2 minutes, run a knife around the inside of the cups to release the muffins, and remove from the cups. Serve the muffins warm or at room temperature.
To freeze, wrap each muffin individually in plastic wrap or aluminum foil. Place the muffins in a Ziplock bag in the freezer. They should keep for up to 3 months.
Last week, while sharing lunch with a friend, standing in line at the post office, answering phones at work, passing a stranger on the sidewalk, Charlottesville folks were discussing snow. Big snow...at least for our little city. The forecasters were predicting another huge storm, rumored to rival the December 19th event that pushed its way into the #4 slot on Charlottesville’s list of historic snowfall totals. It was all very exciting, and a tad bit scary. We were warned of the heaviness of this snow, expected to be so much wetter than the last accumulation. We were told to prepare for power outages and potential roof collapse, to be ready to spend days in our homes and to have the supplies required to get us through that time.
The city was a flurry of activity (ahem...pun intended) as residents scrambled to buy stores out of their supply of milk, eggs, and toilet paper. Snow shovels were a hot commodity, with those shops that managed to receive shipments putting a one-shovel-per-customer limit on purchases. We bought ice melt and candles, bread and cans of tuna, charcoal for our grill and meat and potatoes to place over the flame should we lose power and the use of our oven. We settled in, prepared for the worst, ready to weather the storm.
In the end we wound up with nearly 15 inches of snow, 10 inches less than predicted after sleet clinked against our windows and prevented substantial accumulation for most of Friday night. We were lucky enough to lose power only once, and then for only an hour. Although the city did a fine job of clearing primary roads during and after the storm, we still chose to remain at home, warm and cozy, for the entire weekend.
Brian and I have become quite adept at preparing for long periods of isolation in our house. We stock up on the necessities already mentioned, along with certain items that help to keep us entertained and pass the time - wine, multiple disks of Entourage, magazines and books, baking supplies. The last is the most important for me, as I take comfort in the fact that even if the sky were to dump 48 inches of snow across our lawn and we were to lose power for 7 full days, I could still make bread and cookies in our Big Green Egg. Also, I really like to bake, and the thought of three, uninterrupted days to do so makes me very, very happy.
And so, along with the necessary non-perishables and paper goods, my grocery bags contained milk and eggs, flour and yeast as I left the market Thursday afternoon. I browsed through my cookbooks that evening, imagining each one of my mixing bowls tucked into various corners of the kitchen, plastic wrap stretched tight across their tops, plump balls of dough slowly rising within. Brian requested something sweet, a dessert-ish bread to smear soft butter across as an after-dinner snack. Not one to ever pass on the suggestion of something sweet, I dove right into thoughts of a bread swirled with cinnamon and sugar, laced with figs and walnuts, the crumb sweetened by a touch of honey.
The loaf I was hoping for emerged from the oven just as the snow started to lighten Saturday evening. The intoxicating mélange of fresh-baked bread, sultry cinnamon, earthy walnuts and syrupy figs will forever bring to mind the vision of a silver-cloaked sun setting behind frosty trees, their limbs glimmering with a mask of tiny diamonds. A lovely ending, indeed.
1/2 cup buttermilk (or whole milk), at room temperature
2 tbsp honey
3-1/2 cups unbleached bread flour, plus extra
1-1/4 tsp salt
2 tsp instant yeast
1-1/4 tsp ground cinnamon
1 large egg, slightly beaten
2 tbsp vegetable shortening, at room temperature
3/4 cup water, at room temperature
1 cup dried figs, chopped
1 cup walnuts, chopped
1/2 cup turbinado sugar (for cinnamon sugar swirl)
2 tbsp ground cinnamon (for cinnamon sugar swirl)
2 tbsp butter, melted
Method
Dissolve the honey in the buttermilk by heating both over low heat. Allow to cool to room temperature.
Sift together the flour, salt, yeast and cinnamon in a large mixing bowl. Add the egg, shortening, buttermilk mixture and water. Stir together with a large spoon (or mix on low speed in a stand mixer with the paddle attachment) until the ingredients come together and form a ball. Adjust with flour and water if the dough seems too sticky or too dry and stiff.
Sprinkle flour on a counter and transfer the dough to the counter. Knead (or mix on medium speed with the dough hook). The dough should be soft and pliable, tacky but not sticky. Add flour as you knead (or mix), if necessary to achieve this texture. Knead by hand for approximately 10 minutes (or by machine for 6 to 8 minutes). Sprinkle in the figs and walnuts during the final 2 minutes of kneading (or mixing) to distribute them evenly. If you are kneading with a mixer, you'll want to finish kneading by hand to avoid crushing the figs and walnuts, and to be sure to distribute them evenly.
Lightly oil a large bowl and transfer the dough to the bowl, rolling it to coat it with oil. Cover the bowl with plastic wrap and allow to ferment at room temperature for approximately 2 hours, or until the dough doubles in size.
Mix together the 1/2 cup turbinado sugar and 2 tbsp ground cinnamon. Set aside.
Butter two 4x8 loaf pans.
Divide the dough into 2 equal pieces. On a lightly floured surface, roll one piece into a 5x8 rectangle. Sprinkle half of the cinnamon sugar mixture over the dough, leaving a small border around the edge of the dough.
Starting at the short end, carefully roll the dough into a tight log*, sealing the seam as best you can. Tuck the ends up towards the seam, sealing as best you can. Place the log in a buttered loaf pan, seam-side down. Repeat with the second piece of dough. Spray the tops of the loaves with spray oil and cover loosely with plastic wrap. Place in a warm, draft-free location to proof for 60 to 90 minutes.
Preheat the oven to 350* with the rack in the middle of the oven. Uncover the loaves and brush the tops with melted butter. Sprinkle the tops with turbinado sugar.
Bake the loaves for 20 minutes. Rotate the loaf pans 180 degrees and continue baking for another 20 to 30 minutes, until the loaves are golden brown on top and lightly golden on the sides and bottom. They should make a hollow sound when thumped on the bottom.
Immediately remove the loaves from their pans and cool on a rack for at least an hour before slicing and serving.
*I'm guessing that my loaf pulled apart along the swirl because it wasn't rolled tightly enough. It is still perfectly textured and delicious, the slices just don't hold together well as you bite into them.
The landscape during and after a winter storm is an amazing sight, always changing, different from one minute to the next. Every few hours I piled on layers of warmth, tucked my jeans into my boots, forced a hat over unruly hair, and trudged outside in the swirling snow to capture some of the magic.
As Brian and I prepare to host Christmas, my mind has been transported to the past. To holidays spent in my childhood home. Where there are three trees laced with ornaments positioned around the house. One with the automated Hallmark variety that buzz and hum (Dad’s tree), one with the sentimental decoration handed down for generations (Mom’s tree), and one in my own room filled with trinkets that symbolize those things that are important to an adolescent girl; horses, soccer, kittens, music, turtles, Winnie the Pooh. We rarely turn on an overhead light, relying instead on the soft glow from the multi-colored bulbs wrapped carefully around each branch of the three trees.
The dark blue-green front door to our home acts as the backdrop for an elaborate wreath hung with artificial fruit. On the mantle are candles of all sizes and shapes interspersed with greenery and every one of my little girl stockings (I am an only child, and have several). There are little dishes of candy dressed in jewel-tone wrappers scattered around the house for sneaking when my parents aren’t looking and, outside, a light display that rivals Clark Griswold’s abode.
On Christmas Eve we host a party, providing a stop for friends and family visiting our neighborhood to view the houses strung with lights and the luminaries lining the streets. We dress up and fill the dining room table with an assortment of cheese and crackers, sliced fruit, miniature cheesecakes and fresh cookies baked and decorated by my momma and I earlier that day. Christmas carols spill from the stereo as the adults mingle inside and the children busy themselves outside. I run around the yard with my friends, playing hide and seek behind Santa’s workshop and even Santa himself, and think that no little girl can be as lucky as I, who gets to live in this holiday wonderland.
Over time these holiday traditions have shifted with the changed structure of my family. Decorations were divided and dispersed between two different houses, those two piles having been joined by the piles of new family members years ago. My childhood home is still owned by my daddy, and Brian and I still visit for at least a portion of most Christmas’, but there are only aspects of the place that are familiar this time of year. Little reminders of the past that pull at my heartstrings and remind me of the little girl running amongst wooden elves and twinkling trees.
Part of me is sad for her, the young Andrea who still believes in Santa and his magic sleigh. She who thinks that all future holidays will be just like this one, who doesn’t know that the wonderland she is experiencing is meant just for her, at that moment in time.
And yet, another part of me feels the joy of a challenge - a challenge that Brian and I are tasked with together. To invent our own traditions, to collect our own meaningful decorations, to create our own wonderland. For ourselves, and for our future children.
I think we're off to a good start.
Although this tradition is borrowed from my momma and stepfather, we've adopted it for our Christmas morning breakfast as well, sharing it two years ago with Brian's family. In fact, we've expanded the tradition to not only include Christmas morning, but also at least two weekends between Thanksgiving and the 25th of December.
Panettone is an Italian dessert bread containing candied orange, citron, lemon zest and raisins. It makes for an incredible French toast. You'll find it in boxes at most grocery stores from Thanksgiving through the New Year.
Whisk together eggs, milk, maple syrup, vanilla and salt. Pour into shallow dish.
Melt 1/2 tbsp butter in nonstick skillet over medium heat. Test to see if the butter is hot enough by dropping a bit of egg mixture onto the skillet. When it sizzles, the pan is ready.
Lay a slice of panetone in the egg mixture. Pick up the slice, turn it over, and lay it back in the egg mixture. Remove the slice immediately and place in the skillet.
Fry the panetone for about 3 minutes on one side, until nicely browned. Flip the slice and brown the other side, another 2-3 minutes. Remove from skillet and set aside while you fry the other pieces. (I place an oven-safe dish in the oven and turn it to 170*. The slices keep warm in the oven while I fry the others.)
Repeat for other 3 slices. Serve with powdered sugar or pure maple syrup.
Looking for a gift for a foodie family member or friend? Check out some of my favorite things in the Bella Eats Store powered by Amazon. There are books for cooking, baking and pleasure. My favorite kitchen and photography gadgets. Even a little bit of music to set the cooking mood. Just click on the categories in the upper right corner of the page to find that perfect gift. Enjoy!
When I bought three raspberry plants (two red, one golden) from my local nursery last year I had no idea what to expect. We’d had mixed luck with berries - the blackberry bush we’d planted the year before was showing a lot of promise for its second summer but the blueberry bush we’d put in 3 years prior hadn’t grown a bit and typically yielded a harvest of only one dozen berries each season. I was taking a chance, but the raspberry plants were inexpensive and I was determined to have long branches loaded with berries twining through the fence surrounding our garden.
We got lucky. Their first year the raspberries didn't do much. We were rewarded with a couple of small handfuls of fruit - really only enough to snack on as you wandered through the garden checking on other plants, certainly not enough to actually do something with. But this year - the berries' second year - has been quite the surprise. Maybe its because I wasn't expecting much from them, or maybe its that their location in the garden is a bit out of the way, but just a few weeks ago I was shocked (shocked!) to discover that the raspberry branches had reached clear out of their intended boundaries and were loaded (loaded!) with plump berries. I wish I could show you photos of their progress, but the general unruliness of the garden has left me embarrassed to share the evidence.
Its hard to not get excited about being in the kitchen, concocting new recipes when your fridge has a constantly rotating bowl full of red raspberries, golden raspberries and blackberries. Unless, like me last week, you come down with a bug right in the middle of berry season. It was nothing too serious, but provided enough sour feelings to keep me completely out of the kitchen and away from the blog. I had no interest in cooking food, writing about food or editing images of food for five full days. It was all I could do to get the tomato soup post up Tuesday night, and the next day I couldn’t even bring myself to read comments because the mere thought of tomatoes gave me a queazy feeling. Finally, on Saturday, as I was laying on a towel in the middle of our living room floor after a particularly hard 4-mile run, thoughts of homemade muffins popped into my head.
I jumped up, so excited to have the urge to bake without a queazy feeling following along behind that urge. It was getting worrisome, this lack of desire to stand at my kitchen counter, because I had promised some dear friends that I would make cupcakes for their daughter’s third birthday party the next day. And, we had raspberries. Several bowls of raspberries freshly picked from our garden just waiting to be folded into muffin batters and buttercream frostings and made into jam (peach + raspberry = yum!). The opportunities were endless, yet until Saturday I’d done nothing to seize them.
These little raspberry almond muffins pulled me out of my funk, with some help from Ellie Krieger, whose book I had picked up at the library a few weeks prior. They are hearty, made with a mix of all-purpose and whole-grain flours, and pack nice little raspberry punches into each bite. Made moist by applesauce instead of butter, and topped with a crunchy cinnamon and almond topping, they provide an adequate amount of sweetness countered by the slightly tart raspberries - a sure pick-me-up for any slow morning or afternoon. I've frozen a bunch of them to use as my own little weapon against future kitchen blues...
Raspberry-Almond Muffinsmakes 16 muffinsadapted from Ellie Krieger's The Food You Crave, Apple-Pecan Muffins, pg 22
Ingredients:
3/4 cup plus 2 tbsp light brown sugar, packed
1/4 cup sliced almonds, chopped finely
1/2 tsp ground cinnamon
1 cup all-purpose flour
1 cup whole-grain pastry flour
1 tsp baking soda
1/2 tsp salt
1/4 cup canola oil
2 large eggs
1 cup natural unsweetened applesauce
1 tsp vanilla extract
3/4 cup fat free buttermilk
1 cup fresh raspberries
Method:
Preheat the oven to 400*. Coat a 12-cup muffin pan with cooking spray, along with 4 wells in a second muffin pan.
In a small bowl, mix together 2 tbsp of the brown sugar, the almonds and the cinnamon. Set aside.
In a medium bowl, whisk together the flours, baking soda and salt.
In a large bowl, whisk the remaining 3/4 cup brown sugar and the oil until combined. Add the eggs, one at a time, whisking well after each addition. Whisk in the applesauce and vanilla. Stir in the flour mixture in two batches, alternating with the buttermilk, just until combined. Gently stir in the raspberries.
Pour the batter into the prepared muffin tins, filling each about 2/3's full, and sprinkle evenly with almond mixture. Bake until a toothpick inserted in the center of one of the muffins comes out clean, about 20 minutes.
Let cool on a wire rack for 15 minutes before removing from pan.
After asking you all what your favorite summer produce is (as part of the Saucy Mama Giveaway - see bottom of post) Brian and I had a discussion to sort out our favorites. I didn’t realize what a tough decision it would be to make! There are so many options, and I feel that my mind changes every few weeks as a new fruit or vegetable ripens into its season. We settled on tomatoes and peaches as our top two, and an entertaining debate ensued. In the end Brian’s number one was tomatoes and mine was peaches, and although the results are questionable (peaches and tomatoes are at their peak right now which brings up the issue of bias...) we each appreciated the merits of the other’s argument.
I’ll spare you the tomato argument today - it will have its place in the weeks to come, I promise. Instead, lets focus on peaches. Those perfect, plump, juicy globes with all the colors of the sunset splattered across their fuzzy skin. I love them - absolutely and with all the fervor deserved after waiting ten months for their reappearance in my daily diet. In their season, allowed to ripen on the tree and consumed within a couple of days of picking, fresh summer peaches are nothing like the bland, grainy imposters that fill bins in the supermarket during the off-season months.
The peaches themselves played strongly into my final decision. Those flavorful bites - sweet with a little bit of tart - that result in juice running down your arms to your elbows are pretty hard to beat. But the clincher, that final argument that sealed peaches firmly into the number one position on my summer produce scale, was their procurement. The actual act of wandering the orchard, ducking into the dappled shade provided by row after row of trees, finding the perfect peach and picking it with my own hands. Brian and I have been to Chiles Peach Orchard three times already in the six weekends that pick-your-own peaches have been available, coming home with 25 pounds after each visit.
What does one (or in this case, two) do with 75 pounds of fresh peaches? Many wonderful things, dear readers. You’ve already heard about one, the slow-rise peach pancakes that graced our table one Sunday breakfast. There have been peaches in smoothies, oatmeal and on top of cereal. They’ve been baked in the folds of buttery pastry, grilled to perfection on the grill and simmered with blackberry puree’ to form the most delicious jam. I’ve even frozen half-a-dozen quarts for future cobblers and milkshakes during the off-season. I hope to share all of these recipes with you, but for now, I leave you with my newest addiction - Peach Bread.
I’ve made variations of this recipe several times in the last few weeks, tweaking a bit each time until declaring this final version my favorite. It is based loosely on a recipe of my momma’s, with a bit of influence from Molly’s banana bread in A Homemade Life and a lot of gut instinct. Dense and moist with an almost cake-like crumb, this bread has all the flavors of a classic peach cobbler. I love it icy cold, taken straight from the fridge and paired with a cup of coffee for breakfast, but it is also delicious for dessert after being warmed briefly and topped with french vanilla ice cream.
Peach Breadmakes 1 loaf
Ingredients:
1/4 cup butter, room temperature
3/4 cup sugar
2 large eggs, room temperature
1/4 cup vanilla yogurt (I used 0% fat Oikos Greek yogurt)
2 cups peaches (about 2 large peaches), peeled and diced
1 large peach, peeled and sliced thinly (for top of bread)
1-1/2 cups all-purpose flour
1/2 tsp salt
1 tsp baking soda
1/4 tsp nutmeg
1 tsp cinnamon
1/3 cup dried ginger, chopped finely (optional)
Method:
Preheat oven to 350*. Spray a 9x5 loaf pan with cooking spray.
Cream the butter . Gradually add sugar and mix to combine well. Add eggs, one at a time, beating well after each addition. Stir in yogurt and diced peaches.
Combine flour, salt, baking soda, nutmeg, and cinnamon together in medium bowl. Add ginger, if using. Add the wet mixture to the dry, stirring until just blended.
Spoon batter into prepared loaf pan. Place peach slices across top of batter, in decorative pattern. Bake at 350* for 45-50 minutes, until a toothpick inserted into the center comes out clean.
Cool in pan for 10 minutes on wire rack. Remove loaf from pan and let cool completely before slicing.
Saucy Mama Giveaway!
Congrats to Shelby of La Belle Vegan and Rose of On A Lobster Placemat for being the winning commenters picked by Random.org! Send me an email at bellaeats@gmail.com with your full name and address so that I can get your Lime Chipotle Marinade out to you. Congrats ladies!
Zucchini has been gracing the booths of the farmer’s market for several weeks now. I’ve picked some up each Saturday, usually to use in simple pasta dinners or grilled alongside chicken or fish. This week I decided it was time for some zucchini bread, and knew just the recipe I wanted to modify to accommodate the green squash - Molly Wizenburg’s banana bread from A Homemade Life, which I made several weeks ago.
Now, admittedly, I didn’t substitute zucchini in this recipe for its flavor. Its so mild on your palette that the stronger flavors of dark chocolate, ginger, cinnamon and cloves overpower its delicate scent. What I wanted from the zucchini was the moisture that the banana typically provides without adding an additional competitor to the mix. You see, while Molly’s recipe was quite good, for me the combination of banana, chocolate and ginger was a bit overwhelming. Maybe its because I am a banana bread purist, and want the banana to be the center of attention even when complimented with another ingredient like apples or dates.
I did, however, love the idea and taste of chocolate and dried ginger combined together in a loaf, and decided to seek out another way to utilize it. Enter the zucchini, and a few other substitutions that I like to make to any bread recipe I re-create. White whole wheat flour in place of all-purpose, turbinado sugar in place of refined, fat free greek yogurt in place of regular whole milk yogurt. Throw in a couple of additional spices (cinnamon and clove) and a 12-cup tin instead of a loaf pan and the result is a muffin that is perfectly moist, not too sweet, hearty enough for breakfast yet satisfying as a dessert with a tall glass of milk or hot cup of tea.
Because these muffins are very moist, I suggest eating them within 3 days if you’re going to keep them on your countertop in an airtight container. Refrigeration would probably save them from mold for a few days longer, but I didn’t try that so I can’t tell you what happens to their texture. I did freeze 1/2 the batch though, and am hoping that Molly’s claim that her bread freezes extraordinarily well will extend to my muffins.
If you’re interested in the original banana bread recipe, you can find it reviewed here.
If you fill the cups to the tip-top, you will be left with 12 delicious yet oddly-shaped muffins. Fill them 3/4’s of the way full, and you’ll probably have enough batter left for two additional muffins if its worth it to you to dirty another pan. I didn’t mind their appearance, since they were just for Brian and I to share.
Zucchini Muffins with Dark Chocolate and Gingeradapted from the banana bread recipe in A Homemade Life by Molly Wizenburg, pg 26
Ingredients:
6 tbsp unsalted butter
2 cups white whole wheat flour
1 cup turbinado sugar
3/4 tsp baking soda
1/2 tsp salt
1 tsp cinnamon
1/4 tsp ground cloves
1 cup semisweet chocolate chips
1/3 cup finely chopped dried ginger (not crystalized, although I'm sure it would work fine too)
2 large eggs
3 cups coarsely shredded zucchini (about 2 medium zucchini)
5oz container of fat free vanilla-flavored greek yogurt (I used Oikos)
1 tsp vanilla extract
Method:
Set a rack in the center of the oven and preheat to 350*. Grease a 12-cup muffin tin with cooking spray or butter.
In a small bowl, microwave the butter until just melted. Set aside to cool slightly.
In a large bowl, whisk together the flour, sugar, baking soda, salt, cinnamon and ground cloves. Add the chocolate chips and ground ginger and stir well to combine.
In a medium bowl, lightly beat the eggs with a fork. Add the yogurt, melted butter and vanilla and mix well. Add the zucchini and stir to coat.
Pour the zucchini mixture into the dry ingredients and stir gently with a rubber spatula until just combined. Make sure to incorporate all flour but do not overmix.
Spoon the batter into wells of muffin tin, using spoon to pack it down. If you don't want your muffins to overflow like mine did, just fill the wells to 3/4 of the way to the top. This will leave some batter leftover, but only enough for maybe 2 muffins. If you don't mind oddly shaped tops, just fill the wells evenly until you've used all of the batter.
Bake for 25-30 minutes (mine took 28 minutes), until a tester inserted in the middle of a muffin comes out clean. Cool in pan on wire rack for 10 minutes, then remove muffins from pan to cool completely on rack.
Summer is officially here. We started her off right with a barbeque at our place last weekend, complete with pulled pork sandwiches, homemade pickles, an assortment of salads, cupcakes, backyard games and conversations with many good friends. Preparation started early. The carrots and sugar snaps were jarred with their spicy brines on Monday, to give them plenty of time to soak in the flavors that would take them from fresh-from-the-garden goodness to out-of-this-world “you made pickles?!?” delight. Friday night the kitchen was a flurry of dough mixing and fermenting, buttercream whipping and iced tea steeping. Rugs were vacuumed, the floor was mopped and the bar was stocked with all of the favorites for summer cocktails.
On Saturday, the weather was perfect - sunny and a bit too warm out in the open but perfectly comfortable in the shade of our apple trees with a light breeze whispering across bare skin. The smoker worked all day on a 10-pound pork shoulder, flavoring it and the air with the sweet scent of hickory, which, when mixed with the smell of freshly-mown grass (to make bocce and croquet a bit more manageable) should be bottled and sold with the simple descriptor of “summer”. Drinks were poured, games were played, and finally, as the sun started to dip behind the trees we all settled down in the grass with plates in our laps and vinegar dripping down to our elbows.
Sadly, I was so caught up in the great company and delicious fare that I failed at what I thought was my biggest goal for the day - to get photographs of people as well as the food. I have a depressingly small amount of photos from the festivities, a few from before our guests arrived and even fewer during the time that they populated our back yard. But I’ve realized that, while physical documentation of the event would have been nice, I’m so very glad that the day was relaxing enough to elicit deep and distracting conversations with some very good friends. And, the lack of photos gave Brian and I an excuse to have a smaller, quieter picnic under our apple trees the next day, complete with leftovers (although sadly, no pork) and the company of our dogs.
I have several recipes to tell you about from our barbeque menu, but am going to post them separately in short installments. Since we’re on the subject of yeast breads and Peter Reinhart, I think I’ll start by telling you about the homemade kaiser rolls that sandwiched the vinegar-laden slivers of 10-hour smoked pork from the Big Green Egg. Now, I knew going in that Brian’s Eastern Carolina-style barbeque would be the star of the show, but I wanted to be sure that it was delivered to the mouths of our guests via a vehicle worthy of the task.
I can't even describe to you how good these rolls were. I'll try, but I promise, mere words won't do them justice. When they first came out of the oven I was worried that they were too big, and would require mouths to be overextended in order to get a bite that would be too bread-y. When the filling of a sandwich promises to be as good as our pork was, the last thing you want is a mouthful of too-chewy bread overpowering the experience. These rolls were such a pleasant surprise - once in your hands they squished down nicely, allowing for an easy bite. And once in your mouth the bread seemed to melt away, allowing the pork to maintain its role as star of the show.
If you are thinking about tackling yeast breads, try these. Please. Though they are time-consuming, they are simple, and you will be oh so pleased with yourself. Promise.
I followed Peter Reinhart's recipe precisely, so the following recipe is completely his. I wish I had more photographs of the process because they would be helpful to explain some of the techniques. If you are interested in bread baking, I highly recommend picking up The Bread Baker's Apprentice from the library or adding it to your own kitchen collection, it is an excellent resource.
For this recipe, you need to start the night before with a pâte fermentée.
Pâte Fermentée Ingredients:
1-1/8 cups (5 oz) unbleached all-purpose flour (I use King Arthur)
1-1/8 cups (5 oz) unbleached bread flour (I use King Arthur)
3/4 tsp salt
1/2 tsp instant yeast
3/4 cup to 3/4 cup plus 2 tbsp water, room temperature
Pâte Fermentée Method:
This makes enough for 2 batches of kaiser rolls.
Stir together the flours, salt and yeast in a large bowl or bowl of an electric mixer. Add 3/4 cup of water and stir until everything comes together (or mix for 1 minute on low speed with paddle attachment). Adjust flour or water as necessary, so that the dough is not too sticky nor too stiff.
Sprinkle flour on counter. Knead dough on counter for 4 to 6 minutes (or mix on medium speed with dough hook attachment for 4 minutes), until the dough is soft and pliable, tacky but not too sticky.
Pour 1 tbsp vegetable oil into large bowl and coat sides from halfway down. Add dough ball to bowl and roll around to coat. Cover the bowl tightly with plastic wrap and ferment at room temperature for 1 hour, or until the dough swells to 1-1/2 times its original size.
Remove the dough from the bowl, knead it lightly to degas and return it to the bowl, covering the bowl tightly with plastic wrap. Place the bowl in the refrigerator overnight. It will keep for 3 days in the refrigerator or can be frozen in an airtight plastic bag for up to 3 months.
Kaiser Roll Ingredients:
1-1/2 cups (8 oz) pâte fermentée (I weighed it, to be sure I got the correct amount)
2-1/4 cups (10 oz) unbleached bread flour
3/4 tsp plus a pinch salt
1-1/2 tsp barley malt syrup (or 1 tsp diastatic barley malt powder - I used the syrup)
1 tsp instant yeast
1 large egg, slightly beaten
1-1/2 tbsp vegetable oil
10 tbsp to 3/4 cup water, lukewarm
poppy or sesame seeds for topping (optional)
semolina flour or cornmeal for dusting
Kaiser Roll Method:
Take the pâte fermentée out of the refrigerator 1 hour before making the dough.
Stir together the flour, salt, malt powder if using, and yeast in a large bowl or bowl of a stand mixer. Add the pâte fermentée, egg, oil, malt syrup if using and 10 tbsp water. Stir (or mix on low speed with paddle attachment) for 1 minute, until the ingredients form a ball. Add extra water if necessary.
Lightly dust the counter with flour and transfer the dough to the counter to begin kneading (or mix on medium speed with the dough hook). Knead for about 10 minutes (I kneaded for about 8 minutes with my stand mixer) adding flour if needed, until the dough is soft and supple, tacky but not too sticky. The dough should pass the window pane test*, pictured below on the right. Lightly oil a large bowl and transfer the dough to the bowl, rolling it to coat it with oil. Cover the bowl tightly with plastic wrap. Ferment at room temperature for 2 hours.
Remove the dough from the bowl and divide it into 6 to 9 equal pieces (I made 6, 4-1/2 oz rolls). Clear the counter of all flour and wipe with a damp cloth to increase friction. Form the pieces into balls by placing the dough into your cupped hand. Firmly press the dough into the counter as if trying to push it through the counter, simultaneously rotating your hand in a circular motion, driving the dough with the outer edge of your hand. The dough should pop up into your palm and form a tight round ball.
Mist the rounds lightly with spray oil, cover with plastic wrap and let the dough relax for about 10 minutes.
Line a baking sheet with parchment paper, spray the paper with oil and dust lightly with semolina flour or cornmeal (I was all out, so just used bread flour).
Prepare the individual rolls by cutting them with a kaiser roll cutter, if you have one. I do not, so I used Peter Reinhart’s knotting method instead. Roll out the dough ball into an 8” log (about 3/4” to 1” in diameter). Tie a simple knot, pulling the ends so that you have enough length to wrap them back through the knot again. I know this is a little confusing without a picture, I promise to document better the next time. Basically, after you’ve tied the simple knot, one of the ends will wrap down around the outside of the ring and up through the middle, while the other will wrap down through the middle of the ring to be secured at the outside.
Place the rolls, cut or knot side down, on the parchment paper. Mist lightly with spray oil and loosely cover the pan with plastic wrap.
Proof the rolls for 45 minutes at room temperature. Flip them over so that the cut or knotted side is facing up. Mist again with spray oil, cover with plastic and continue proofing for another 30-45 minutes, or until the rolls are double their original size.
Preheat the oven to 425*F with the oven rack on the middle shelf. Uncover the rolls and prepare them for baking. I brushed mine with a bit of water and sprinkled poppy seeds over the top. My finished rolls weren’t nearly as shiny and golden as Peter’s when they came out of the oven, so I’ll probably brush them with an egg wash next time to get the same finish.
Place the pan in the oven, spray the oven walls with water (or flick water from a basting brush, like I did) and close the door. After 10 minutes, rotate the pan for even baking and lower the oven temperature to 400*F. Continue baking until the rolls are a medium golden brown. The timing here is tricky. My 4-1/2 oz rolls took an additional 15 minutes to bake, but Peter says they will take anywhere from 15-30 for larger rolls and less for smaller rolls. My best advice is to watch them carefully. When they come out of the oven they will make a hollow sound if you thump them on the bottom.
Remove the rolls from the pan and transfer to a cooling rack. Wait at least 30 minutes before serving.
* After the dough has been kneaded for the suggested amount of time, break off a chunk and stretch it out with two hands. You should be able to get the dough stretched thin enough so that it becomes translucent, without it breaking. If it breaks early, it still needs additional time kneading.
A long time ago I owned a bread machine. With that machine I made my husband (then boyfriend) batches of everything bagels on a bi-weekly basis. It was so easy to dump all of the ingredients in, leave the machine unattended for 3-1/2 hours, then boil and bake the bagel dough until golden brown. Well, three years ago we bought a house. A very small house with a kitchen that lacks any kind of storage space, especially space for a clunky bread machine. So, three years ago Brian stopped getting homemade bagels for breakfast and instead made do with bagels from the local shop, sliced then frozen then thawed when desired. And, for three years he's been asking me to start making homemade bagels again.
I agreed to get rid of the bread machine not only because we had zero space for it, but also because I thought it would be a way to force myself to learn how to bake yeast breads from scratch. It seemed like a great idea since I already loved to bake cookies and muffins and quick breads - Brian even bought me a beautiful book to help in my endeavors. Unfortunately, the arrival of that book in our house coincided with my first semester of graduate school, which means that nary a loaf nor bagel was baked as I studied the affect of wind on structures and built teeny, tiny models of buildings at all hours of the night. Although I've been out of school for a full year now, I've just recently begun tackling yeast breads. And two weeks ago, much to Brian's delight, I tackled bagels.
It really wasn't a difficult task, making bagels from scratch, especially with Peter Reinhart'sThe Bread Baker's Apprentice as my tutor. Yes it was handy to have the bread machine take care of all of the mixing and kneading and resting and kneading again, without my having to keep an eye on a clock. However, with a little forethought and a a stand mixer (I'm sure you could make these with a handheld mixer and a lot of elbow grease, but I'm not that brave) the bagels can be started Saturday evening and baked up just in time for Sunday morning breakfast. And they are delicious - so much better than the bread machine bagels of our past. The overnight fermentation process adds a great flavor that you just can't match in 3-1/2 hours.
Now, I'm not from New York or Philadelphia or any other city whose residents claim that they have the *best* bagel. I didn't grow up eating bagels every week so don't have the kind of nostalgia associated with them that so many other people have. I don't claim to have had the best bagel of my life when I was growing up in such-and-such city, and certainly haven't spent my life trying to find one that compares. So, while I can't personally claim that this bagel will match the bagel of your past, I do trust Peter Reinhart when he claims that this is a bagel for the ages.
This recipe produces a bagel with a chewy exterior, soft interior and endless possibilities for toppings. I froze ours in gallon-size bags once they had cooled, and simply microwaved them for 30 seconds before slicing and toasting when we were ready to eat them. The flavor and texture were still perfect.
Before typing out the [rather lengthy] recipe, I did a quick search to see if I could find a link online. Luckily, Smitten Kitchen came through. For Peter Reinhart's bagel recipe, from The Bread Baker's Apprentice, click here.
Summer is upon us, and I have a confession to make. I don't cook much from June thru September. I blame the longer days and the evening activities that come with them. Cocktails after work with friends on the downtown mall, a few hours weeding and picking and training in the garden, fetch with the dogs and wine on the deck. By the time I start to think about dinner the sun has fallen in the sky and its past 8pm.
The fresh produce this time of year holds some of the blame as well. When you're picking sugar snaps straight from the vine outside your kitchen door and have an abundance of fresh lettuce at your feet its hard to imagine doing anything but going straight inside, dumping it all into a bowl and drizzling it with a simple vinaigrette. Or, when you've just pulled perfect little beets from the ground and realize that you still have some carrots from the farmer's market in your fridge, images of simply roasted root vegetables sprinkled with salt + pepper laid across a bed of lettuce start dancing in your head and eventually wind up on your plate (pictured above). It can't be helped, really. And how about brown rice pasta with quickly-sauteed squash from the market? The quick and simple possibilities are endless.
And then there is my attempt to follow Mark Bittman'sVegan Before 6 diet, although I hate to call it that. The d-word has such negative connotations and forces thoughts of deprivation into my head, when this new way of eating doesn't make me feel deprived in the least. I've simply been reducing my intake of processed foods and animal products by following a Vegan diet from the time I wake up until dinner time, when anything goes. If you've read about me, you'll know that Brian and I are very conscious of what we eat and where it comes from, and strive to eat as sustainably as possible. I've found that switching to a Vegan diet for two out of three meals a day (and many days for all three!) has been a very easy transition because of the way we've thought about food for some time now. And its especially easy in the summer when my appetite leans towards light salads rather than stick-to-your ribs casseroles.
So, that was a lot of excuses to say that, basically, I like to eat simply in the summertime. I love salads that I can make on Sunday and eat for lunch the rest of the week, and simple breads that become the star of the meal with very little effort put forth. The plate above was assembled on an evening when we had a few of those salads in the fridge, fresh lettuce from the garden on the counter and 30 minutes to spend making flatbread. The roasted red pepper, chickpea and quinoa salad is simple, delicious and filling...just my kind of meal. And trust me, even on a low-effort dinner night the extra 30 minutes is worth it, because this flatbread is incredible.
I haven't shared the curried tomato salad because I screwed it up the first time we made it and wasn't completely happy with the results. The concept is a good one though and I assure you that as soon as local tomatoes grace the booths at the market I'll be trying it again.
The lentil + brown rice salad can be found here.
Whole Grain Flatbreadslightly modified from Mark Bittman
Ingredients:
1 cup whole wheat flour (I also tried this with 1/2 cornmeal and 1/2 white whole wheat and didn't like it nearly as much)
1 tsp salt
1-1/2 cups water
4 tbsp olive oil
1/2 large onion, thinly sliced
2 garlic cloves, minced
Method:
Sift the flour and salt together in a bowl. Slowly add the water and whisk to eliminate lumps, the batter will resemble thing pancake batter. Cover with a towel and let sit while your oven preheats, or up to 12 hours.
When ready to bake, heat your oven to 450 degrees. Put the oil in a 12" skillet (if you use a smaller skillet use less oil and give the bread more time to cook), along with the onion and garlic. Put the skillet in the heated oven and let the oil get hot, but not smoking. It should just take a few minutes - you'll know when the oil starts to get fragrant.
Carefully remove the skillet from the oven, give the onions and garlic a stir and then pour the batter and return the pan to the oven.
Bake 30-40 minutes (I took mine out at 30 and will probably give it just a few more minutes next time) until the flatbread is well browned, firm and crisp around the edges. Let it rest for about 5 minutes and then slide it from the pan onto a cutting board to cut into wedges.
6 oz drained jarred roasted red peppers, diced (about 1 cup) - I didn't have any so just roasted a fresh red bell pepper
2 tbsp fresh parsley, finely chopped
3 tbsp lemon juice
1 tsp honey
1 tsp ground cumin
1/2 tsp cayenne pepper
salt
1/4 cup extra-virgin olive oil
Method:
First, if you don't have jarred roasted red peppers, roast your own. I sliced 1 bell pepper thinly, placed it in a small baking dish, drizzled it with olive oil, sprinkled it with salt and pepper and roasted it for about 30 minutes.
Bring 2 cups of water to a boil. Add quinoa and bring back to a boil. Lower heat to a simmer, cover pan and let cook for about 15 minutes, until quinoa is tender but not mushy. Remove from heat, drain any excess liquid and place quinoa in a medium-sized heat-tolerant bowl.
Whisk together the lemon juice, honey, cumin, cayenne and 1/2 tsp salt together in a small bowl. Whisk in the oil until the dressing is smooth.
Add the chickpeas, roasted red peppers and parsley to the bowl with the quinoa and stir to combine. Drizzle the dressing over the mixture and toss to combine.


 We got lucky. Their first year the raspberries didn't do much. We were rewarded with a couple of small handfuls of fruit - really only enough to snack on as you wandered through the garden checking on other plants, certainly not enough to actually do something with. But this year - the berries' second year - has been quite the surprise. Maybe its because I wasn't expecting much from them, or maybe its that their location in the garden is a bit out of the way, but just a few weeks ago I was shocked (shocked!) to discover that the raspberry branches had reached clear out of their intended boundaries and were loaded (loaded!) with plump berries. I wish I could show you photos of their progress, but the general unruliness of the garden has left me embarrassed to share the evidence.
 Its hard to not get excited about being in the kitchen, concocting new recipes when your fridge has a constantly rotating bowl full of red raspberries, golden raspberries and blackberries. Unless, like me last week, you come down with a bug right in the middle of berry season. It was nothing too serious, but provided enough sour feelings to keep me completely out of the kitchen and away from the blog. I had no interest in cooking food, writing about food or editing images of food for five full days. It was all I could do to get the
 I jumped up, so excited to have the urge to bake without a queazy feeling following along behind that urge. It was getting worrisome, this lack of desire to stand at my kitchen counter, because I had promised some dear friends that I would make cupcakes for their daughter’s third birthday party the next day. And, we had raspberries. Several bowls of raspberries freshly picked from our garden just waiting to be folded into muffin batters and buttercream frostings and made into
  These little raspberry almond muffins pulled me out of my funk, with some help from Ellie Krieger, whose book I had picked up at the library a few weeks prior. They are hearty, made with a mix of all-purpose and whole-grain flours, and pack nice little raspberry punches into each bite. Made moist by applesauce instead of butter, and topped with a crunchy cinnamon and almond topping, they provide an adequate amount of sweetness countered by the slightly tart raspberries - a sure pick-me-up for any slow morning or afternoon. I've frozen a bunch of them to use as my own little weapon against future kitchen blues...
 Raspberry-Almond Muffins
makes 16 muffins
adapted from Ellie Krieger's
Raspberry-Almond Muffins
makes 16 muffins
adapted from Ellie Krieger's  What about those cupcakes I mentioned before? Well, I made
  Other Bella Terra posts this season:
 I’ll spare you the tomato argument today - it will have its place in the weeks to come, I promise. Instead, lets focus on peaches. Those perfect, plump, juicy globes with all the colors of the sunset splattered across their fuzzy skin. I love them - absolutely and with all the fervor deserved after waiting ten months for their reappearance in my daily diet. In their season, allowed to ripen on the tree and consumed within a couple of days of picking, fresh summer peaches are nothing like the bland, grainy imposters that fill bins in the supermarket during the off-season months.
 The peaches themselves played strongly into my final decision. Those flavorful bites - sweet with a little bit of tart - that result in juice running down your arms to your elbows are pretty hard to beat. But the clincher, that final argument that sealed peaches firmly into the number one position on my summer produce scale, was their procurement. The actual act of wandering the orchard, ducking into the dappled shade provided by row after row of trees, finding the perfect peach and picking it with my own hands. Brian and I have been to
  What does one (or in this case, two) do with 75 pounds of fresh peaches? Many wonderful things, dear readers. You’ve already heard about one, the
  I’ve made variations of this recipe several times in the last few weeks, tweaking a bit each time until declaring this final version my favorite. It is based loosely on a recipe of my momma’s, with a bit of influence from
  Peach Bread
makes 1 loaf
Ingredients:
Peach Bread
makes 1 loaf
Ingredients:


 Now, admittedly, I didn’t substitute zucchini in this recipe for its flavor. Its so mild on your palette that the stronger flavors of dark chocolate, ginger, cinnamon and cloves overpower its delicate scent. What I wanted from the zucchini was the moisture that the banana typically provides without adding an additional competitor to the mix. You see, while Molly’s recipe was quite good, for me the combination of banana, chocolate and ginger was a bit overwhelming. Maybe its because I am a banana bread purist, and want the banana to be the center of attention even when complimented with another ingredient like
  I did, however, love the idea and taste of chocolate and dried ginger combined together in a loaf, and decided to seek out another way to utilize it. Enter the zucchini, and a few other substitutions that I like to make to any bread recipe I re-create. White whole wheat flour in place of all-purpose, turbinado sugar in place of refined, fat free greek yogurt in place of regular whole milk yogurt. Throw in a couple of additional spices (cinnamon and clove) and a 12-cup tin instead of a loaf pan and the result is a muffin that is perfectly moist, not too sweet, hearty enough for breakfast yet satisfying as a dessert with a tall glass of milk or hot cup of tea.
 Because these muffins are very moist, I suggest eating them within 3 days if you’re going to keep them on your countertop in an airtight container. Refrigeration would probably save them from mold for a few days longer, but I didn’t try that so I can’t tell you what happens to their texture. I did freeze 1/2 the batch though, and am hoping that Molly’s claim that her bread freezes extraordinarily well will extend to my muffins.
If you’re interested in the original banana bread recipe, you can find it reviewed
Because these muffins are very moist, I suggest eating them within 3 days if you’re going to keep them on your countertop in an airtight container. Refrigeration would probably save them from mold for a few days longer, but I didn’t try that so I can’t tell you what happens to their texture. I did freeze 1/2 the batch though, and am hoping that Molly’s claim that her bread freezes extraordinarily well will extend to my muffins.
If you’re interested in the original banana bread recipe, you can find it reviewed  If you fill the cups to the tip-top, you will be left with 12 delicious yet oddly-shaped muffins. Fill them 3/4’s of the way full, and you’ll probably have enough batter left for two additional muffins if its worth it to you to dirty another pan. I didn’t mind their appearance, since they were just for Brian and I to share.
Zucchini Muffins with Dark Chocolate and Ginger
adapted from the banana bread recipe in
If you fill the cups to the tip-top, you will be left with 12 delicious yet oddly-shaped muffins. Fill them 3/4’s of the way full, and you’ll probably have enough batter left for two additional muffins if its worth it to you to dirty another pan. I didn’t mind their appearance, since they were just for Brian and I to share.
Zucchini Muffins with Dark Chocolate and Ginger
adapted from the banana bread recipe in 


 I agreed to get rid of the bread machine not only because we had zero space for it, but also because I thought it would be a way to force myself to learn how to bake yeast breads from scratch. It seemed like a great idea since I already loved to bake cookies and muffins and quick breads - Brian even bought me a
  It really wasn't a difficult task, making bagels from scratch, especially with
 Now, I'm not from New York or Philadelphia or any other city whose residents claim that they have the *best* bagel. I didn't grow up eating bagels every week so don't have the kind of nostalgia associated with them that so many other people have. I don't claim to have had the best bagel of my life when I was growing up in such-and-such city, and certainly haven't spent my life trying to find one that compares. So, while I can't personally claim that this bagel will match the bagel of your past, I do trust
  This recipe produces a bagel with a chewy exterior, soft interior and endless possibilities for toppings. I froze ours in gallon-size bags once they had cooled, and simply microwaved them for 30 seconds before slicing and toasting when we were ready to eat them. The flavor and texture were still perfect.
Before typing out the [rather lengthy] recipe, I did a quick search to see if I could find a link online. Luckily,
This recipe produces a bagel with a chewy exterior, soft interior and endless possibilities for toppings. I froze ours in gallon-size bags once they had cooled, and simply microwaved them for 30 seconds before slicing and toasting when we were ready to eat them. The flavor and texture were still perfect.
Before typing out the [rather lengthy] recipe, I did a quick search to see if I could find a link online. Luckily, 
 The fresh produce this time of year holds some of the blame as well. When you're picking sugar snaps straight from the vine outside your kitchen door and have an abundance of fresh lettuce at your feet its hard to imagine doing anything but going straight inside, dumping it all into a bowl and drizzling it with a simple vinaigrette. Or, when you've just pulled perfect little beets from the ground and realize that you still have some carrots from the farmer's market in your fridge, images of simply roasted root vegetables sprinkled with salt + pepper laid across a bed of lettuce start dancing in your head and eventually wind up on your plate (pictured above). It can't be helped, really. And how about brown rice pasta with quickly-sauteed squash from the market? The quick and simple possibilities are endless.
 And then there is my attempt to follow
  So, that was a lot of excuses to say that, basically, I like to eat simply in the summertime. I love salads that I can make on Sunday and eat for lunch the rest of the week, and simple breads that become the star of the meal with very little effort put forth. The plate above was assembled on an evening when we had a few of those salads in the fridge, fresh lettuce from the garden on the counter and 30 minutes to spend making flatbread. The roasted red pepper, chickpea and quinoa salad is simple, delicious and filling...just my kind of meal. And trust me, even on a low-effort dinner night the extra 30 minutes is worth it, because this flatbread is incredible.
 I haven't shared the curried tomato salad because I screwed it up the first time we made it and wasn't completely happy with the results. The concept is a good one though and I assure you that as soon as local tomatoes grace the booths at the market I'll be trying it again.
The lentil + brown rice salad can be found
I haven't shared the curried tomato salad because I screwed it up the first time we made it and wasn't completely happy with the results. The concept is a good one though and I assure you that as soon as local tomatoes grace the booths at the market I'll be trying it again.
The lentil + brown rice salad can be found