You can edit the text in this area, and change where the contact form on the right submits to, by entering edit mode using the modes on the bottom right.
Form Block
This form needs a storage option. Double-click here to edit this form, and tell us where to save form submissions in the Storage tab.
Learn more
123 Street Avenue, City Town, 99999
(123) 555-6789
email@address.com
You can set your address, phone number, email and site description in the settings tab. Link to read me page with more information.
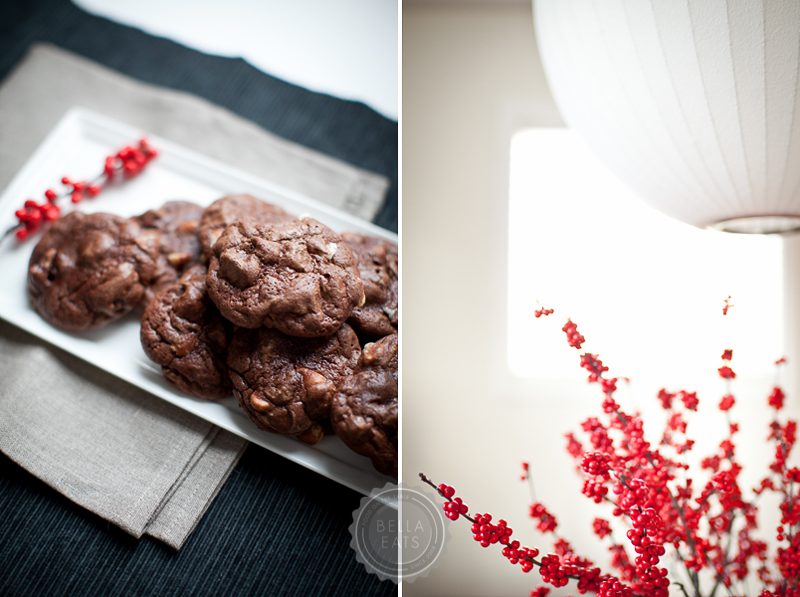
Happy holidays, friends! Wow, they sure snuck up quickly this year. Brian and I are staying home in Charlottesville after having traveled to see family in Florida for Thanksgiving, and I truly thought that there would be all kinds of time for baking and hot cocoa and homemade marshmallows in the last few weeks. But here we are, days away, and I've baked exactly two kinds of cookies and drunk exactly zero cups of cocoa. To be clear, I use the term 'baked' loosely...one of them requires no heat whatsoever. I may feel that I've failed as a holiday baking goddess this year, but the presents are wrapped and shipped, the tree is up and trimmed, and Christmas music plays from my computer the majority of the time. And, as of tomorrow evening, I'll be unplugging for 4 full days to hang out with my honey. I. Can't. Wait. That right there is what the holidays are about; cherishing those you love and taking time just to be. But, having a few cookies laying around never hurts either. :)
All things merry to you and yours!!! xoxo.
Brian is originally from Michigan, making the chocolate + cherry combination dear to his heart and stomach. I am always looking for recipes that combine the two, and this one from Baked in New York is quite perfect. The dough is very sticky and fudge-like, and the resulting cookies are super-moist and chewy. The dried cherries provide the perfect burst of tartness to counter the rich chocolate. I realized as I typed up the recipe that I completely left out the brown sugar, but the cookies were still delicious. In fact I think I like them better than what they should have been, as I really can't imagine them being any sweeter than the version I made.
Black Forest Chocolate Cookies
makes 24 large cookies, or 48 small (1 tbsp scoop)
16oz dark chocolate (60 to 72% cocoa), coarsely chopped
10 tbsp unsalted butter, cut into 1-inch pieces
6 large eggs
1-¼ cups granulated sugar
1 cup firmly packed light brown sugar
1 cup semisweet chocolate chips
1 cup white chocolate chips
1 cup dried cherries (we used tart cherries straight from Michigan)
Method
Sift the flour, baking powder, and salt together into a medium bowl and set aside.
In a large nonreactive metal bowl, combine the dark chocolate and butter. Set the bowl over a saucepan of simmering water and cook, stirring with a rubber spatula, until the chocolate and butter are completely melted and the mixture is smooth. Set aside to cool.
In the bowl of an electric mixer fitted with the whisk attachment, beat the eggs and sugars on high speed until the mixture is pale and thick, about 5 minutes.
Add the cooled chocolate mixture and the vanilla and beat until just combined. Scrape down the bowl and beat again for 10 seconds.
Add the flour mixture and mix on low until just combined, about 10 seconds. Do not over mix.
Using a spatula or wooden spoon, fold in the chocolate chips, white chocolate chips, and dried cherries. The dough will look very loose, but it will harden in the refrigerator. Refrigerate for 6 hours or overnight.
Preheat oven to 375℉.
Spread two cookie sheets with parchment paper. Using a 1 tbsp scoop or a spoon, place dough in rounded mounds on sheets, about 1-1/2 inches apart. Bake for 12-15 minutes until the tops of the cookies are beginning to crack. Let cool on sheet for 10 minutes and then move to a cooling rack to cool completely. Cookies can be stored in an airtight container for 3-5 days.
Speaking of Michigan (Brian's home state), this cookie comes from his Nana, and has been a staple since he was a little boy. I think that this may be his very favorite cookie recipe. I get the best reaction from him when I make a batch, way better than any layer cake I labor over for a full day. They take 10 minutes to whip up, another 20 to harden, and you're done. So simple. Plus, we always have the ingredients needed to pull these treats together, so they are perfect for last-minute guests or a holiday pot luck.
I tried once, years ago, to make these cookies healthier by substituting out the butter, using less sugar, etc. Big mistake. Just keep them as are and enjoy.
Chocolate No-Bake Cookies
makes 4 dozen cookies
Ingredients
¼ cup unsweetened cocoa powder
2 cups granulated sugar
½ cup butter
½ cup milk
½ cup peanut butter (go for the non-natural stuff…like Jif or Peter Pan)
1 tsp vanilla extract
3-½ cups instant oatmeal
Method
Combine cocoa, sugar, butter, and milk in a medium-size sauce pan over medium heat. Simmer for 2 minutes and remove from heat.
Add peanut butter, vanilla, and oatmeal to pan and stir to combine well.
Spoon onto waxed paper in 1 tbsp lumps (a small ice cream scoop works well for this) and let sit until the cookies are set.
When I was a very young girl, I broke a little boy's heart on Valentine's Day. It is not a moment for which I am proud. In fact, like my Momma, guilt sticks with me as tightly as my own shadow, no matter how many years have passed since the event that forced the creation of those feelings and their permanent lodging in my gut.
And so I still think of that towheaded little boy who, on February 14th, 1988 gifted me a very special heart-shaped puzzle, red with tiny white and pink flowers, that professed his adoration of a very young, pigtailed Andrea. I was only five, and still believed whole-heartedly that little boys had highly-contagious cooties, passable even by touching the same paper card. Mortified, I clutched the present, not even pausing to whisper "thank you" to the shy child, and turned as quickly as I could to the girl at the neighboring cubby.
I thrust the puzzle in her direction, saying something along the lines of "he wants me to give this to you" and fled the scene as quickly as possible. Finding comfortable ground in a nearby gaggle of little girls, I turned back towards my cubby just in time to see the devastated look on a heartbroken freckled face. Oh, the guilt.
I received quite the lecture from my Momma that night, about feelings and how not to hurt those of others. I came to embrace Valentine's Day with its red and pink decorations, the elementary school parties with tiny cards displaying cartoon characters and the frosted cookies from our Room Mom. Future Valentines found a much more amiable object of their affections, one who said "thank you" after receiving a gift and who even sometimes had one to give in return. There were flowers and balloons and candy, hand-holding and blushes and shy middle school kisses.
The holiday intensified in high school, when suddenly having a boyfriend on February 14th was a very big deal. Girls would walk around all day with balloons from their beloved tied to their backpacks, a vase of flowers in their hands. I received gold jewelry from two sweet boys two separate years, and eagerly compared the baubles to those my girlfriends had received. Gold! In high school!
Valentine's Day was a competition, full of pressure to find a date, to go out for a fancy dinner, to give and receive gifts that displayed an accurate level of affection. Until I met Brian.
When you meet your One, the novelty of Valentine's Day wears off quickly. It's corny to say, I know, but Brian and I truly do strive to make all of our days together special, to write love notes and give gifts on days other than those we're "supposed" to. We have a comfortability that comes after years of marriage, and with the knowledge that we're each other's Only. There are no expectations of flowers and heart-shaped boxes of candy, no exchange of red lingerie for boxer shorts covered in tiny Cupids, no giddy phone calls to my girlfriends to compare our jewelry, no disappointment if none of the above happens. We simply enjoy spending the evening with each other. Anything extra is just icing on the cake, or sugar sprinkled on a cookie.
These are Brian's very favorite cookies, an old family recipe slipped to us by his Aunt Lynn. So soft and moist, they very nearly have the consistency of cake. The hint of nutmeg is the perfect amount, I urge you not to mess with it.
The dough is extremely sticky and troublesome to work with, so don't be afraid to use flour liberally as you roll it out. If you'd like to decorate the cookies with icing when they are cool, I recommend Martha Stewart's Royal Icing, which, although tooth-achingly sweet, dries beautifully.
Sugar Cookies
from Aunt Lynn and Uncle Scott (thank you!)makes 3 dozen, 3-inch cookies
Ingredients
2 sticks unsalted butter (1 cup), room temperature
2 cups sugar
1 egg, beaten
1/4 tsp salt
1/4 tsp nutmeg
1 tsp baking soda
1 cup buttermilk
1 tsp vanilla
4-1/2 cups all-purpose flour
Method
In a large mixing bowl, cream the butter and sugar until light and fluffy. Add beaten egg, salt and nutmeg and blend well.
Mix together the baking soda and buttermilk in a small bowl until foamy thin. Add to the creamed mixture, along with the vanilla.
Sift the flour into the creamed mixture and blend well. Place plastic wrap in mixing bowl directly on top of the dough, and refrigerate overnight.
The next day, preheat your oven to 375* and line two sheet pans with parchment paper.
Remove 1/3 of the dough from the mixing bowl and place on a moderately-floured surface, leaving remaining 2/3 dough in refrigerator. Roll to a heavy 1/4-inch thickness, liberally flouring the dough as you go to keep it from sticking to the rolling pin. Cut quickly with cookie cutters of choice, moving cookies to sheet pans and spreading them about 2-inches apart. Sprinkle with sugar if you don't plan to ice them after baking. Repeat with remaining dough.
Bake for 10-12 minutes until cookies are just starting to turn golden at the edges. Be careful not to over-bake them, as you want to maintain the soft interior texture.
Let cookies cool on pan for 5 minutes before moving them to racks to cool completely. Store in airtight containers for up to one week (good luck keeping them around for that long...).
Coconut and Lime. A combination that brings to mind a stretch of white sand, bright hot sunshine, palm trees swaying in a warm ocean breeze, the scent of sunscreen permeating salty air. From the vantage point of a low-seated, brightly-striped beach chair I can see the topaz water spread before me, a lovely backdrop for my fuchsia-coated toenails. On my right a fruity cocktail with a lemon-hued umbrella waits patiently for my next sip. In my lap rests a delightful book, set aside for a moment while I take in the view before me.
A tropical island. Are you with me? I hope so. Pull up a chair, apply your sunscreen, grab a drink and settle in for a nice long chat. We need this, don't we? A respite from gray skies that threaten to pour ice and snow over grass that has just recently emerged from underneath the last snowfall. An opportunity to replace bulky sweaters, scarves and overcoats with swimsuits, gauzy tops and sandals. An excuse to make Mojitos and Margaritas instead of Hot Toddies and Irish Coffee.
If only I could escape to such a place. Right now. Just hours before the first few flakes of the impending snowstorm start to fall. Unfortunately, neither my bank account nor my work schedule can afford such a jaunt to the South at a moment's notice. Instead, I pushed my weekly grocery trip up by one day, stocking up tonight on items needed for a Saturday to be spent testing recipes as snow softly falls outside the kitchen window.
Rather than a polka-dot bikini and broad-rimmed hat I'll be shuffling around in slippered feet and comfy sweats. On the agenda? Spicy sausage and potato soup, some sugar cookies, a chickpea salad. All are good cold weather fare, but I can't help but think that maybe I should be thinking a little differently. That maybe I should be whipping up another pan of these Coconut Lime Bars that cured my Winter woes two weeks ago.
How does a tropically-themed dinner party in the middle of Winter sound? That's not such a bad idea, is it? We'd gather some friends, make a pan of enchiladas, a bright salad, some guacamole, and a tangy citrus dessert. We could pull the last few limes off of our little indoor tree (the only way citrus could possibly survive a winter in Virginia) and shake up some zippy margaritas. I'll load the iPod with Jimmy Buffett and Bob Marley and turn the heat way up. We'll chat about food and travel and books until the 'ritas kick in and folks start climbing on my dining table to belt out "one love...one heart...let's get togeeeeether and feel alllll right!" with their arm slung across their neighbors shoulder for support. And nobody is allowed to mention the snow outside. Nobody.
Would you come? I hope so. These bars might just be worth your trip.
I made these gluten-free and dairy-free for a friend that shared them with us two weeks ago. Feel free to substitute all-purpose flour and regular butter for my ingredients.
Coconut Lime Bars
adapted from Gourmet, January 1995makes 9 bars
For Crust
3/4 cup plus 2 tbsp gluten-free all-purpose blend flour (or regular all-purpose flour)
1/3 cup unsweetened flaked coconut, toasted and cooled
1/4 cup confectioners' sugar
1/4 tsp salt
For Custard
4 large eggs
1 cup granulated sugar
1/3 cup gluten-free all-purpose flour (or regular all-purpose flour)
1/2 cup plus 2 tbsp fresh lime juice (from about 5 limes)
1 tbsp freshly-grated lime zest (from about 2 limes)
1/3 cup unsweetened flaked coconut, toasted and cooled
Method
Preheat oven to 325* and butter and flour an 8-inch square baking pan, knocking out excess flour.
In a medium-sized bowl blend together flour, butter substitute, 1/3-cup coconut, confectioners' sugar and salt until mixture resembles coarse meal. Pat mixture into prepared pan and bake in middle of oven for 25-30 minutes, or until golden brown. Allow to cool for 10 minutes before pouring custard in.
Reduce oven temperature to 300*.
In a medium bowl whisk together eggs and granulated sugar until combined well. Stir in flour, lime juice and zest.
Pour mixture over crust and bake in middle of oven for 20-25 minutes until just the center of the custard is not set. Top custard with 1/3 cup toasted coconut and bake for an additional 5-10 minutes until all of custard is just set.
Cool in pan on rack for 1 hour, then chill in refrigerator for 1 hour before serving.
I have a bit of an issue with baked goods. One might actually be more inclined to call my 'issue" a minor addiction, as my mind seems to focus on one track when I find myself in a room that also harbors some form of baked treat. Like a moth to a flame I am drawn to whatever chocolate-y, vanilla-y, fruity, fluffy, cakey, crumbly goodness my eyes or nose pick out. It takes an immense amount of willpower to resist the temptation of dessert no matter the time of day, and there are certain months of the year when what little willpower I have takes off on vacation and leaves me defenseless to the siren song of sweets.
Those months would be November and December, when it is nearly impossible to take ten steps without encountering a variety of cookie, cake or brownie that somebody is offering up. I brought the temptation upon myself even earlier last year, filling the month of October with varioustypesofpie in preparation for the upcoming holidays. I grew accustomed to dessert every night until finally, in the first week of the new year my practical self, the side of me that recognized that my pants were getting a little *ahem* snug in certain areas, intervened and told my over-indulgent self to lay off the 'goods.
Not one to jump on board with any overly restrictive, treats-prohibiting, quit-cold-turkey diets, I recognized the fact that I simply needed to find some healthier options to satiate my cravings for sweets rather than eliminating them from my life completely. I browsed the archives of Bella Eats' leaner, more fitness-focused days and came across this recipe for banana date bread*, an old favorite and one that I'd nearly forgotten about. In no time my kitchen smelled of baking banana and cinnamon as I pulled a loaf from the oven. Spread with a bit of almond butter and paired with fresh fruit it served as breakfast for Brian and I several mornings in a row.
Inspired by my first healthy baking activity in months, I decided that afternoon to start experimenting with a new type of cookie. Or, rather, a granola bar masquerading as a cookie. That was my hope, anyway, to create a cookie so chock-full of good-for-me ingredients like oat bran, rolled oats, dried fruit and whole grain flour, without the less desirable ingredients such as butter and refined sugar, that I'd be able to eat several of them for breakfast. Or for a snack before my new workout routine. Or right before I go to bed while I'm waiting for the dogs to come in from outside. You get the idea.
What resulted is a soft, chewy cookie that IS full of delicious and hearty ingredients, minus butter, refined sugar and even eggs. The whole grains provide a flavorful backdrop for the dried cherries and dark chocolate that punctuate each bite. I made them three times within two weeks, tweaking the recipe until I was satisfied with the final result. The photographs in this post are actually of the second batch - the final batch saw the addition of a bit more baking soda and the resulting cookies weren't as flat as those pictured below, so don't be surprised if yours look a little different.
In the end, I don't know that there is actually any caloric difference between these cookies and your standard variety. But I can assure you that they are delicious, and any calorie savings I might have seen were made up for when I reached for another cookie. And another. I just can't help myself. I've decided to start running again instead.
Chocolate Cherry Granola Cookies
(dairy free, egg free, naturally sweetened) adapted from Sweet & Natural Bakingmakes 20 cookies
Ingredients
1-3/4 cups spelt flour (if you can't find spelt flour, use white whole wheat flour instead and only 1 tsp of baking soda)
1-1/2 tsp baking soda
1/2 tsp cinnamon
1/4 tsp salt
1/4 cup oat bran
1/2 cup rolled oats
3/4 cup liquid fruit juice concentrate (I use FruitSweet, which I find at Whole Foods)**
6 tbsp canola oil
1-1/2 tsp vanilla
1/2 cup semi-sweet chocolate chips
1/2 cup unsweetened dried cherries
Method
Position oven racks in center and top third of oven. Preheat to 350*. Line 2 large baking sheets with parchment paper.
Sift the flour, baking soda, cinnamon and salt together in a large bowl. Add the oat bran and rolled oats and whisk to combine. Make a well in the center.
Whisk the fruit juice concentrate, canola oil and vanilla together in another bowl. Pour into the well and mix together with a wooden spoon. Stir in the chocolate chips and the dried cherries. Cover and refrigerate until firm enough to scoop, about 1 hour.
Using about 3 tbsp dough per cookie, transfer the dough to the baking sheets and space 2-inches apart. Bake the cookies until the edges are lightly browned and they feel firm in the center, 12-15 minutes. Halfway through baking, switch the position of the baking sheets. Cool the cookies for 2 minutes on the baking sheets, then transfer to a wire rack to cool completely.
* A note about that bread - I substituted a 1/2-cup of fat-free vanilla greek yogurt for the applesauce and it was absolutely divine. Try it!** The third time I made these cookies I only had a 1/2-cup of FruitSweet left, so I substituted a 1/4-cup of pure maple syrup for the remaining sweetener. It was delicious, and I loved the extra flavor added to the cookies. If you can't find liquid fruit juice concentrate, I'd try substituting maple syrup for the full amount of sweetener. Maybe leave out the vanilla though. And then tell me how they turn out!
As I write this post snow is softly falling outside, turning my little city into a winter wonderland. In the five winters that Brian and I have spent in Virginia, we've never seen a snowfall like this. Its breathtakingly beautiful, the 22-inches we've received so far softening the landscape with a blanket of white, turning our street into an unrecognizable scene dotted with pedestrians in bright winter parkas out enjoying the snow.
Holed up inside for the day, I managed to pull myself away from the window for about an hour to satisfy the urge to bake. An urge that is unavoidable when your outside world is blanketed with snow and inside, curled up in your favorite chair, under a quilt, with hot coffee (and perhaps a splash of Bailey's Irish Cream...), you are toasty warm and feeling very domestic. I'll share the cake that I just pulled from the oven in the next day or two, but on this snowy afternoon I feel it appropriate to give you a recipe for some chewy ginger cookies. They feel so very 'snow day', the perfect snack waiting on the counter when you come in from making snowmen and snow angels.
Ginger cookies have been a longtime favorite in our household, but I do believe that this is the first time I've ever made them myself. I've helped my momma on many past Christmas Eves to roll out perfect little balls of ginger snap dough, the delightfully crunchy cookies a staple between meals on Christmas day. But last year Brian and I were introduced to a different variety of ginger cookie, one that was chewy rather than crispy in texture, and laced with chunks of crystallized ginger. Brian declared them his favorite cookie, ever, and I vowed to find a recipe to replicate them prior to the next Christmas. Lucky for me, Bon Appetit read my mind.
We love the soft, chewy interior texture of these cookies, complemented perfectly by the crunchy shell of turbinado sugar that coats the exterior. The bits of crystallized ginger throughout are wonderful surprises.
Triple Ginger Cookies
adapted from bon appetit, december 2009
Ingredients
2-1/2 cups all purpose flour
1/3 cup minced crystallized ginger
2 tsp baking soda
1/4 tsp salt
3/4 cup (1-1/2 sticks) unsalted butter, room temp
1 cup (packed) light brown sugar
1 large egg, room temp
1/4 cup blackstrap molasses
1-1/2 tsp finely grated fresh peeled ginger
1-1/2 tsp ground ginger
1 tsp ground cinnamon
1/2 tsp ground cloves
1/2 cup turbinado sugar (for rolling cookies in)
Method
Position 1 rack in top third of oven, 1 rack in bottom third; preheat to 350*. Line two baking sheets with parchment paper.
Whisk together flour, crystallized ginger, baking soda and 1/4 tsp salt in a medium bowl.
Using an electric mixer, beat butter until creamy and light in a separate bowl for about 2 minutes. Gradually add brown sugar and beat on medium-high speed until creamy, about 3 minutes. Add egg, molasses, fresh ginger, ground ginger, cinnamon and cloves. Beat to blend.
Add flour mixture to wet mixture in two additions, beating on low speed just to blend between additions.
Place 1/2 cup of turbinado sugar in small bowl. Measure 1 tbsp of dough (a 1-tbsp ice cream scoop works really well) and roll into a ball between palms of hands. Roll dough in sugar and place on baking sheet. Repeat with remaining cookie dough, spacing cookies 1-1/2 to 2-inches apart.
Bake cookies until surfaces crack and cookies are firm around edges but still slightly soft in center, about 15 minutes. Cool completely on sheets on rack.
I sit at our dining table in the morning, a heaping spoonful of almond butter resting on top of my oatmeal, a dollop of jam alongside it. The windows are open to let the cool morning breeze whisper past my skin, and through them I hear kids squealing as they make their way to the school bus stop on the corner by our house. I find myself lost in thought, reminiscing about the past and contemplating the future, each almond butter + jam-laced bite taking me further into my own head.
I’ve been eating a lot of PB+J lately. Actually, to be more accurate, AB+HJ - almond butter and homemade jam. I just can’t seem to get enough of it. I’m slathering almond butter and jam on my Kashi waffles and toast, mounding it on top of oatmeal or sandwiching it between two slices of whole wheat bread for a quick and satisfying lunch. I partly blame the incredible amount of jam we have in our refrigerator right now - a few ounces of each flavor we made that wasn’t quite enough to process in a canning jar, plus a delightful fig jam made by some dear friends after a reconnaissance fig-gathering mission to some public trees down the street. But even more than the excess, I blame the fast-approaching end of Summer.
As we transition into Autumn, I find myself in a very nostalgic frame of mind. This time of year seemed to have so much more significance in my youth, always marking the start of a new chapter in my young life. Going back to school, with its new clothes and fancy backpack filled with blank notebooks and freshly-sharpened pencils signified another year of progress. I’d eagerly seek out friends I hadn’t seen in 3 months to discuss our summer vacations, who’s dating who, class schedules and the fact that we were one year closer to graduation, college and “real” life.
In college, the return to another semester was bittersweet. I was studying architecture, and while I was eager to tackle the challenges that a new design studio - with its new city, site and building program - offered, I was also wary of letting go of a care-free summer job in exchange for the stress of all-night charrettes and design reviews in front of a panel of my peers and professors. But still, there was the seeking out of missed friends to discuss summer internships, who’s engaged to who, how we had finagled our schedules to allow for one or two(!!!) days without class and the fact that we were one year closer to graduation and finding our “dream” jobs.
And now, here I am. Post undergraduate and graduate degrees, working in my field for a firm I respect designing projects I enjoy, one year closer to...what? For the first time in my life, I am settled into a place with no “end” in sight. I am happily married, living in a city I adore, with a job I enjoy waking up for. There’s no impending school, or graduation, or job search in my future. Its a comfortable feeling, but is at the same time a little bit unnerving. And when I’m feeling a little bit unnerved I seek additional comfort in food. Of late, that food has been the AB+HJ combination.
It was only a matter of time before my latest obsession made it into a baked good. And then, this recipe showed up in my reader to push me right over the edge. I made the cookies, which have a classic butter cookie texture laced with the flavor of high-quality natural peanut butter, and was initially disappointed with the pre-jam outcome. I was looking for a softer specimen, and was worried that when sandwiched on either side of a dollop of jam this cookie would, well, crumble. So I quickly searched for a new option, found a recipe that boasted a softer outcome and incorporated oats(!!!) and decided to try a thumbprint version. I loved the chewiness that the oats added to the cookie, and the fact that the jam-to-cookie ratio was more equal than the sandwich version. But, after all that worry, the sandwich cookie turned out to be really fantastic as well, with or without the addition of a little blackberry peach jam.
Each of these cookies is really wonderful on their own. I recommend filling and sandwiching only the amount of cookies you and yours can eat in a day, as they will get soft when stored in an airtight container with jam. On their own, in a ziplock bag, the cookies maintain their texture for a full 5 days.
I think that each of these recipes would be wonderful with almond butter in place of the peanut butter. When I made the suggestion to Brian, who is very traditional in his dessert choices and hates to see a good thing tampered with, he vetoed it. That was ok, the tried and true PB+J combo was a success both in taste and nostalgia-induced comfort.
PB+J Sandwich Cookiesrecipe from the new york timesmakes about 18 sandwich cookies
Ingredients:
1/2 pound [2 sticks] unsalted butter, softened, plus more to grease cookie sheets
Cream butter, sugar and peanut butter together with an electric mixer. Add egg, and beat until well blended.
In a separate bowl, combine flour, salt and baking powder. Add the dry ingredients to the wet, adding milk as necessary to make dough just soft enough to handle. Stir in vanilla.
Shape dough into a log about 1-1/2 inches in diameter. [I suggest making two logs...the amount of dough makes one very long log that is difficult to transfer to the fridge]. Wrap dough log[s] in plastic and refrigerate for at least 2 hours or up to 2 days. Can be frozen if wrapped well.
Heat oven to 400*. Line two baking sheets with parchment paper. Remove dough from refrigerator and cut slices between 1/8" and 1/4" thick from log. Try to make the slices as even in thickness as possible. Place on baking sheets and sprinkle with sugar.
Bake until edges are lightly browned and centers are set, about 10 minutes. Cool for about 2 minutes on sheets before using a spatula to transfer cookies to a rack to finish cooling.
Sandwich flat sides of two cookies together with a heaping teaspoonful of jam.
PB+J Thumbprint Cookiesrecipe for cookie from foodnetwork.commakes about 3 dozen thumbprint cookies
Ingredients:
1 stick of unsalted butter, softened
1/2-cup creamy, natural peanut butter
1/2 cup sugar
1/4 cup light brown sugar, lightly packed
1/2 tsp vanilla extract
1 egg
3/4 cup all-purpose flour
1/2 tsp baking soda
1/4 tsp baking powder
1 cup quick oats (I used rolled, and they were fine)
Preheat oven to 350* and line two baking sheets with parchment paper.
Cream the butter and peanut butter together in an electric mixer on high speed. Add the sugar, brown sugar and vanilla and continue to beat until the mixture is fluffy. Add the egg and beat until combined.
Mix the flour, baking soda, baking powder and oats together in a separate bowl and add to the wet mixture. Mix until well combined.
Roll dough into 1-inch diameter balls and place on baking sheets, leaving about 2 inches between each cookie. Using your pinkie finger, make a deep indentation in the top of each dough ball, being careful not to press all the way down to the baking sheet.
Bake in the top half of the oven until cookies are golden, about 10 minutes. Remove from oven and re-shape indentations while cookies are still pliable, if needed. Let cool completely.
Once the cookies are cool, place on countertop and sprinkle with powdered sugar. Spoon a teaspoonful of jam into each cookie.
You may have noticed that I’ve had quite a few baked goods featured here lately. Bella Eats is starting to look more like a baking blog than an all foods blog, which is not my intention even though I do have a not-so-secret desire to be a baker. The truth is, when I am stressed, overwhelmed or even underwhelmed with life in general, or just want an excuse to be lost in my head for an hour or two, I bake. Some people go for a run, others practice yoga, I pull out the flour and sugar and butter and get to work mixing and shaping.
Maybe its because I am training to be an architect, spending my days working on minute details for buildings that won’t break ground for another six months and won’t be complete for another two years. It takes a lot of time, and a lot of patience, to get to the point in a project where you feel the satisfaction of seeing the results of your hard work. The days can be frustrating, the hours long, and at the end of it all you may not even be happy with the final result. But you continue forward, filing away the lessons learned on one project for a similar situation on the next, always striving for the perfect design against the odds of disagreeable clients and undesirable sites.
There are a lot of similarities between baking and architecture - formula, precision, a bit of risk taking, structure - but one very notable difference is timing. I can enter the kitchen, experiment with a new recipe that I’ve been dreaming about and have results in 1-2 hours. And if the final product doesn’t come out exactly as I had imagined, I can try again the next evening. Or immediately even, if the desire to get it right then and there is strong enough. That [nearly] instant gratification is what I love most about baking. The reactions from friends presented with something you’ve made from scratch help as well - who isn’t happy to be surprised with a plateful of baked goods?
There are nights when I get home from the office needing to bake. Not just wanting to, but needing to. Sometimes I’ll pick a recipe that is tried and true, other times I’ll try drastic experiments that go horribly wrong but always teach me something new. Last week I was looking for a recipe somewhere in the middle - a recipe that someone else had tried and recommended, that I could play with and put my own twist on. Luckily I had recently discovered Sweet Amandine and spent most of Sunday reading through her archives, soaking in her lovely writing and photographs. I found these chocolate hazelnut bites, put my own little spin on them and got to work.
There are a lack of preparatory photographs in this post because baking these cookies on that particular night was purely for my mental well-being. I was tired, a little bit frazzled and a lot in need of the dark chocolatey, almondy, slightly salty goodness that these three-bite cookies delivered to my mouth. The process to make them was really quite simple - melt chocolate, amaretto and butter in one pan while whipping together the egg and sugar in another. You combine the two, fold in some finely processed toasted almonds and then chill the batter for 1-2 hours. If you have the patience, shoot for two hours of chilling. I couldn't stand it and pulled them after just one so that I could get to work on the methodical task of rolling each lump of dough between my palms and coating each ball with granular sugar and then powdered. They bake for a quick 10-12 minutes and then you are free to pile them onto a plate, grab a glass of wine and cuddle up to your partner on the couch. There's no better cure for a long day, I promise.
Also, if you are in need of some cheer the next evening as well, they are great crumbled over vanilla ice cream.
Dark Chocolate Almond Bitesadapted from Sweet Amandine who adapted from Chez Pim who adapted from David Lebovitz's Room for Dessert - goodness, this cookie's been around!makes 3-4 dozen 3-bite cookies
Ingredients:
8 oz bittersweet chocolate (I used Ghirardelli 60% Cacao)
3 tbsp butter
3 tbsp amaretto
2 large eggs at room temperature
1/3 cup granulated sugar
1 cup sliced almonds, toasted
1/2 cup white whole wheat flour
1/2 tsp baking powder
3-4 pinches sea salt
*1 cup each of granulated sugar and powdered sugar, in separate bowls, for rolling dough balls in
Method:
Preheat the oven to 350*.
Spread the almonds onto a baking sheet and toast for 8-10 minutes, until fragrant. Do not burn. Remove from oven and allow to cool completely.
Meanwhile, chop the chocolate into small pieces and melt it in a double boiler with butter and amaretto until smooth.
In the bowl of a stand mixer, whip together the eggs and 1/3 cup sugar on high speed until pale, as pictured above (5-8 minutes). Stir in the melted chocolate mixture.
Pour the cooled nuts and flour into a food processor and pulse until finely ground. Add the baking powder and the salt, and pulse a few more times. Stir the ground nut mixture into the chocolate batter.
Chill for 1-2 hours, preferably 2, until batter is firm.
When you are ready to bake the cookies, preheat your oven to 350 again and set up your bowls of granulated sugar and powdered sugar. Roll the chocolate cookie batter into 1-inch balls. Roll each ball first in granulated sugar and then in powdered sugar. Set the cookies in rows, at least 1-inch apart, on two parchment-lined baking sheets.
Bake the cookies for 10-12 minutes, swapping the top and bottom baking sheets about halfway through. The cookies should be slightly firm around the edges, but otherwise soft.
Cool on a rack completely, then store in an airtight container.
Oh! And if you haven't noticed, I've added helpful links to the right side of the page for you to subscribe to Bella Eats, or follow me on Twitter, if you desire.
My momma has been telling me about these cookies for months now. She makes them for my stepfather, Joe, because he is a BIG fan of amaretto. We’re talking about the kind of fan that, when handed a small glass containing the thick amber liquid, will take 20 full minutes to take a sip because each time he brings it to his mouth he is overwhelmed by the intoxicating smell. He’s Italian, so we’re all convinced he’s got a bit of amaretto coursing through his veins.The cookies have been in my “to make” folder ever since their name rolled off of my momma’s tongue. Almond Chocolate Chip Cookie Sandwiches with Amaretto Frosting. Come on...who wouldn’t add them to their list? Sadly, my folder (titled “Andrea Miscellaneous” and added to by Brian whenever he finds my printed recipes or articles torn from various magazines strewn around our house, which is often) is over-stuffed with delectable-sounding treats awaiting attention, and this recipe somehow got shuffled to the bottom. I’m lucky that it made the menu cut for our Florida visit last weekend, otherwise it may have been another few months before I tasted the gems, declared love, and shared them with you. Even if you ignore the frosting (and the only reason you should is if you’re not a fan of very sweet treats...) the cookies themselves are some of the best I’ve had. Delicately flavored with ground oatmeal, almond extract and chopped almonds, they have an extra depth that standard chocolate chip cookies lack. They are slightly crisp around the edges and still chewy in the middle, perfect CCC texture. Watch them closely as they bake, you want to pull them just as they start to very slightly brown at the edges.
I hope you’ll learn from my mistake, keep this recipe at the top of your list, make the cookies as soon as possible and share them with family and friends. Your loved ones will thank you, I promise. And be sure to go through your recipe folders, as I will be this weekend, to see if you have any other recipes tucked away that have been recommended by your momma. Because those recipes shouldn't be shuffled to the bottom.
Almond Chocolate Chip Cookiesrecipe modified from Giada De Laurentiis via foodnetwork.commakes 4 dozen cookies or 2 dozen cookie sandwiches
1/2 cup rolled oats
2-1/4 cups all purpose flour
1 tsp baking powder
1 tsp baking soda
1/2 tsp salt
1 cup unsalted butter, room temperature
1 cup (packed) golden brown sugar
1 cup granulated sugar
2 large eggs, room temperature
3/4 tsp pure almond extract
1 (12 oz) bag semi-sweet chocolate chips
1 cup whole almonds, toasted and chopped
Method:
Preheat oven to 325*. Line baking sheets with parchment paper.
Finely chop oats in a food processor (we used a small chopper), mix in the flour, baking powder, baking soda and salt. Set aside.
Using an electric mixer (we used a stand mixer) beat the butter and sugars in a large bowl until fluffy. Scrape down the sides of the mixing bowl and beat in the eggs and extract.
Add the flour mixture in 3 batches and mix until just blended.
Gently fold in the chocolate chips and almonds.
Drop dough (about one rounded tablespoon each) onto cookie sheet, two inches apart. Do not flatten.
Bake until cookies are golden, about 13 minutes.
Cool the cookies on sheets for 5 minutes and then transfer to wire cooling rack.
Amaretto Frostingrecipe modified from Gale Gand via foodnetwork.commakes enough for 2 dozen sandwich cookies
3 cups confectioners' sugar
1 cup butter
1 tbsp amaretto liqueur
Method:
In a stand mixer fit with whisk attachment, mix sugar and butter. Mix on low speed until well blended and then increase speed to medium and beat for another 3 minutes.
Add amaretto and continue to beat on medium speed for one more minute, adding more amaretto if you wish.


 I’ve been eating a lot of PB+J lately. Actually, to be more accurate, AB+HJ - almond butter and
  As we transition into Autumn, I find myself in a very nostalgic frame of mind. This time of year seemed to have so much more significance in my youth, always marking the start of a new chapter in my young life. Going back to school, with its new clothes and fancy backpack filled with blank notebooks and freshly-sharpened pencils signified another year of progress. I’d eagerly seek out friends I hadn’t seen in 3 months to discuss our summer vacations, who’s dating who, class schedules and the fact that we were one year closer to graduation, college and “real” life.
 In college, the return to another semester was bittersweet. I was studying architecture, and while I was eager to tackle the challenges that a new design studio - with its new city, site and building program - offered, I was also wary of letting go of a care-free summer job in exchange for the stress of all-night charrettes and design reviews in front of a panel of my peers and professors. But still, there was the seeking out of missed friends to discuss summer internships, who’s engaged to who, how we had finagled our schedules to allow for one or two(!!!) days without class and the fact that we were one year closer to graduation and finding our “dream” jobs.
 And now, here I am. Post undergraduate and graduate degrees, working in my field for a firm I respect designing projects I enjoy, one year closer to...what? For the first time in my life, I am settled into a place with no “end” in sight. I am happily married, living in a city I adore, with a job I enjoy waking up for. There’s no impending school, or graduation, or job search in my future. Its a comfortable feeling, but is at the same time a little bit unnerving. And when I’m feeling a little bit unnerved I seek additional comfort in food. Of late, that food has been the AB+HJ combination.
 It was only a matter of time before my latest obsession made it into a baked good. And then,
  Each of these cookies is really wonderful on their own. I recommend filling and sandwiching only the amount of cookies you and yours can eat in a day, as they will get soft when stored in an airtight container with jam. On their own, in a ziplock bag, the cookies maintain their texture for a full 5 days.
I think that each of these recipes would be wonderful with almond butter in place of the peanut butter. When I made the suggestion to Brian, who is very traditional in his dessert choices and hates to see a good thing tampered with, he vetoed it. That was ok, the tried and true PB+J combo was a success both in taste and nostalgia-induced comfort.
PB+J Sandwich Cookies
recipe from
Each of these cookies is really wonderful on their own. I recommend filling and sandwiching only the amount of cookies you and yours can eat in a day, as they will get soft when stored in an airtight container with jam. On their own, in a ziplock bag, the cookies maintain their texture for a full 5 days.
I think that each of these recipes would be wonderful with almond butter in place of the peanut butter. When I made the suggestion to Brian, who is very traditional in his dessert choices and hates to see a good thing tampered with, he vetoed it. That was ok, the tried and true PB+J combo was a success both in taste and nostalgia-induced comfort.
PB+J Sandwich Cookies
recipe from  PB+J Thumbprint Cookies
recipe for cookie from
PB+J Thumbprint Cookies
recipe for cookie from 
 Maybe its because I am training to be an architect, spending my days working on minute details for buildings that won’t break ground for another six months and won’t be complete for another two years. It takes a lot of time, and a lot of patience, to get to the point in a project where you feel the satisfaction of seeing the results of your hard work. The days can be frustrating, the hours long, and at the end of it all you may not even be happy with the final result. But you continue forward, filing away the lessons learned on one project for a similar situation on the next, always striving for the perfect design against the odds of disagreeable clients and undesirable sites.
 There are a lot of similarities between baking and architecture - formula, precision, a bit of risk taking, structure - but one very notable difference is timing. I can enter the kitchen, experiment with a new recipe that I’ve been dreaming about and have results in 1-2 hours. And if the final product doesn’t come out exactly as I had imagined, I can try again the next evening. Or immediately even, if the desire to get it right then and there is strong enough. That [nearly] instant gratification is what I love most about baking. The reactions from friends presented with something you’ve made from scratch help as well - who isn’t happy to be surprised with a plateful of baked goods?
 There are nights when I get home from the office needing to bake. Not just wanting to, but needing to. Sometimes I’ll pick a recipe that is tried and true, other times I’ll try drastic experiments that go horribly wrong but always teach me something new. Last week I was looking for a recipe somewhere in the middle - a recipe that someone else had tried and recommended, that I could play with and put my own twist on. Luckily I had recently discovered
  There are a lack of preparatory photographs in this post because baking these cookies on that particular night was purely for my mental well-being. I was tired, a little bit frazzled and a lot in need of the dark chocolatey, almondy, slightly salty goodness that these three-bite cookies delivered to my mouth. The process to make them was really quite simple - melt chocolate, amaretto and butter in one pan while whipping together the egg and sugar in another. You combine the two, fold in some finely processed toasted almonds and then chill the batter for 1-2 hours. If you have the patience, shoot for two hours of chilling. I couldn't stand it and pulled them after just one so that I could get to work on the methodical task of rolling each lump of dough between my palms and coating each ball with granular sugar and then powdered. They bake for a quick 10-12 minutes and then you are free to pile them onto a plate, grab a glass of wine and cuddle up to your partner on the couch. There's no better cure for a long day, I promise.
Also, if you are in need of some cheer the next evening as well, they are great crumbled over vanilla ice cream.
Dark Chocolate Almond Bites
adapted from
There are a lack of preparatory photographs in this post because baking these cookies on that particular night was purely for my mental well-being. I was tired, a little bit frazzled and a lot in need of the dark chocolatey, almondy, slightly salty goodness that these three-bite cookies delivered to my mouth. The process to make them was really quite simple - melt chocolate, amaretto and butter in one pan while whipping together the egg and sugar in another. You combine the two, fold in some finely processed toasted almonds and then chill the batter for 1-2 hours. If you have the patience, shoot for two hours of chilling. I couldn't stand it and pulled them after just one so that I could get to work on the methodical task of rolling each lump of dough between my palms and coating each ball with granular sugar and then powdered. They bake for a quick 10-12 minutes and then you are free to pile them onto a plate, grab a glass of wine and cuddle up to your partner on the couch. There's no better cure for a long day, I promise.
Also, if you are in need of some cheer the next evening as well, they are great crumbled over vanilla ice cream.
Dark Chocolate Almond Bites
adapted from  Oh! And if you haven't noticed, I've added helpful links to the right side of the page for you to subscribe to Bella Eats, or follow me on

 I hope you’ll learn from my mistake, keep this recipe at the top of your list, make the cookies as soon as possible and share them with family and friends. Your loved ones will thank you, I promise. And be sure to go through your recipe folders, as I will be this weekend, to see if you have any other recipes tucked away that have been recommended by your momma. Because those recipes shouldn't be shuffled to the bottom.
Almond Chocolate Chip Cookies
recipe modified from Giada De Laurentiis via
I hope you’ll learn from my mistake, keep this recipe at the top of your list, make the cookies as soon as possible and share them with family and friends. Your loved ones will thank you, I promise. And be sure to go through your recipe folders, as I will be this weekend, to see if you have any other recipes tucked away that have been recommended by your momma. Because those recipes shouldn't be shuffled to the bottom.
Almond Chocolate Chip Cookies
recipe modified from Giada De Laurentiis via 