Contact Us

Use the form on the right to contact us.

You can edit the text in this area, and change where the contact form on the right submits to, by entering edit mode using the modes on the bottom right. 


123 Street Avenue, City Town, 99999

(123) 555-6789

email@address.com


You can set your address, phone number, email and site description in the settings tab.
Link to read me page with more information.

Blog

Filtering by Tag: bread baker's apprentice

breathless

Andrea

Hi, friends. How are you? Goodness...well, it has been awhile, hasn’t it? We’ve missed a lot these last few months...such as apples. A trip to Boston and Halloween. Pumpkins and cranberries. The second anniversary of Bella Eats. And then there was Thanksgiving, and the first snow, and a trip to Florida and, finally, Christmas and the end of another year. Wow. So many opportunities to share food and photos and life with you all and I missed them, each one. I don’t want to start this first post back after three months gone with an apology, so, I won’t. Instead I’ll just say “Hi!” And, “I’m back!” And finally, “If you’re still here...thank you!”

What I do have to say about these last three months is this...they were full. So very full. The full you feel after an extraordinary meal; one that involves ten-too-many bites, an unbuckling of pants, and a slouching down in one’s chair followed by a long, low groan. So satisfying, but when you look down at your plate there are still ten more bites waiting, and you think to yourself “Can I do it?”. Somehow, you do, and at the end of it all you’re left with no choice but to lie down someplace dark and quiet. 

The thing about those big meals is that they are typically surrounded by a tableful of loved ones, conversing and laughing and drinking and eating right alongside you. They are so jovial and supportive that you don’t even notice the fullness until it is too late, and then they are there to moan and groan with you, and to reminisce about the wonderfulness that was the meal consumed. Been there? I thought so. And that is precisely what the last three months has felt like.

I am typically a very stick-to-the-path kind of girl. I follow directions well, read books and watch shows in sequence, knew what I wanted to be when I grew up at twelve years old. But three months ago I took a detour; strayed from the road I’d been traveling and forged a new trail through uncharted territory. 

I quit my architecture job in order to pursue photography as a career. 

That sentence leaves me giddy; so full of excitement that it is difficult to sit in this chair and continue typing. Not only is it unbelievably amazing to be chasing after a dream I never thought possible, but the unwavering support of family and friends has left me breathless.  There are scary moments, certainly, when I peer ahead and begin to doubt my ability to move forward with sure and confident steps. But then, out of nowhere, I’ll receive an email or phone call or Facebook message or tweet (what a funny world we live in, huh?) and I take another step, and another, and another until I am running so fast that I fear I won’t be able to stop. I am breathless, I tell you.

Finally, with the conclusion of a semester of teaching and 100% of my concentration set on photography, I have time for Bella Eats again. This fact I find nearly as exciting as my decision to change paths; to move towards a big dream shimmering at the horizon.  Bella Eats is part of that dream and, in fact, even the generator of it. Without this site I may not have renewed a passion for photography born long ago and lost in my pursuit of architecture. And I certainly wouldn’t have met all of you, or formed real friendships with some very inspiring and brave individuals. I owe much to this place I’ve carved from the world wide web and the people I’ve connected to through it, and am happy to finally be able to give some of that energy back.

And now, let’s talk about breakfast.

Recently, breakfast has slipped into the role of “Andrea’s favorite meal with friends”. It is usually enjoyed out, at any one of a handful of local joints, with someone I most likely haven’t seen in some time. That seems to be the case with most of my friends these days, who all seem equally as busy as I, and the breakfast hour is one that isn’t typically prescheduled for some other task. It is a mighty fine way to kick off a weekday, leaving you content and happy from the time, food, and news shared. 

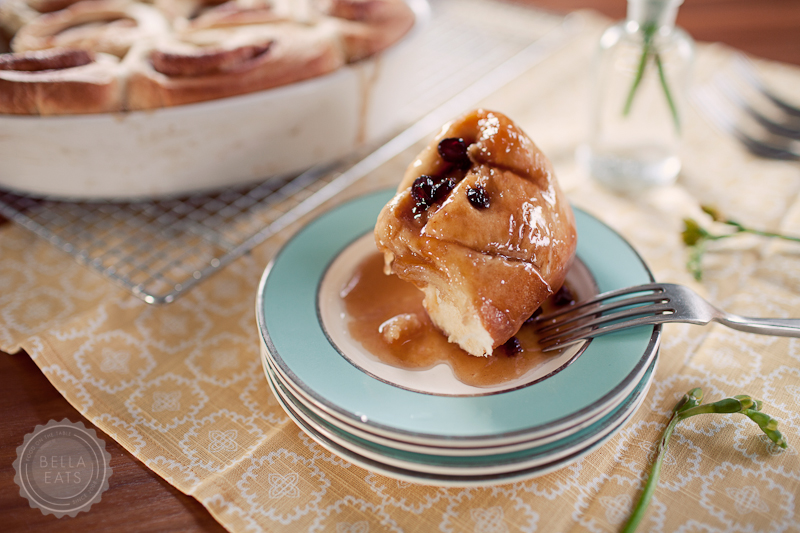
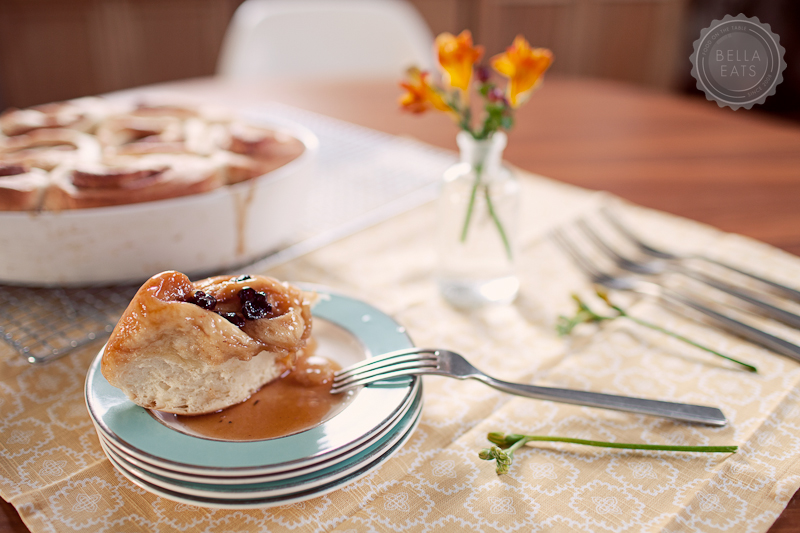
If I could, I would make each and every one of you these sticky buns one morning this week. They take a bit of planning and an early morning wake-up call, but the end result is quite worth the effort. Paired with a cup of coffee and perhaps a few slices of crispy bacon, the soft, pillowed interior makes the perfect vessel for a sticky sauce of caramel and cranberries. We made them twice within a week, once for Thanksgiving guests and again for friends...just because. 

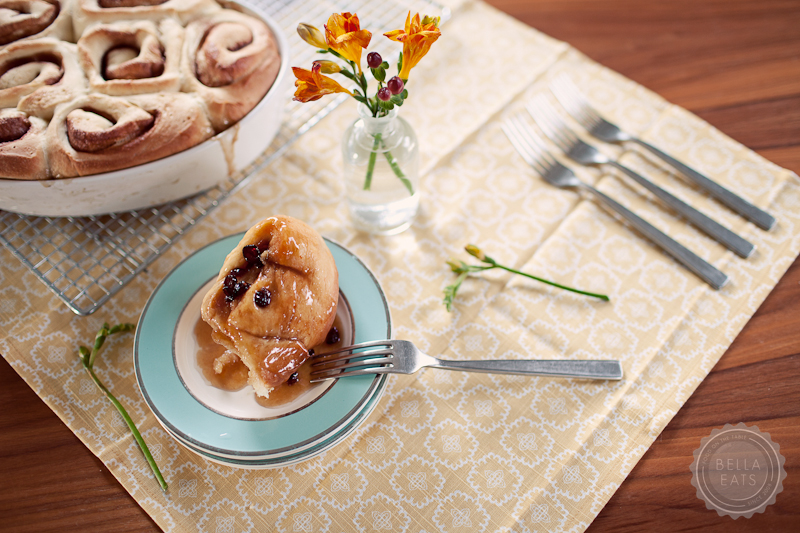
CRANBERRY ORANGE STICKY BUNS

adapted from Peter Reinhart's The Bread Baker's Apprentice
makes 8-12 large sticky buns

Ingredients

  • 6-1/2 tbsp granulated sugar
  • 1 tsp salt
  • 5-1/2 tbsp unsalted butter, at room temperature
  • 1 large egg
  • 1 tsp grated orange zest
  • 3-1/2 to 4 cups unbleached bread flour
  • 2 tsp instant yeast
  • 1-1/8 to 1-1/4 cups whole milk, at room temperature
  • 1/2 cup cinnamon sugar (6-1/2 tbsp granulated sugar plus 1-1/2 tbsp ground cinnamon)
  • Caramel Glaze (see below)
  • 1/4 cup dried cranberries

Method

  1. Cream together the sugar, salt, and butter on medium-high speed in an electric mixer with paddle attachment. Whip in the egg and orange zest until smooth. Add the flour, yeast, and milk. Mix on low speed until the dough forms a ball. Switch to the dough hook and increase the speed to medium, mixing for approximately 10 minutes, or until the dough is silky and supple, tacky but not sticky. You may have to add a little flour or water while mixing to achieve the desired texture. The dough should pass the windowpane test and register 77˚ to 81˚F. Lightly oil a large bowl and transfer the dough to the bowl, rolling it around to coat it with oil. Cover the bowl tightly with plastic wrap.
  2. Ferment the dough at room temperature for approximately 2 hours, or until the dough doubles in size.*
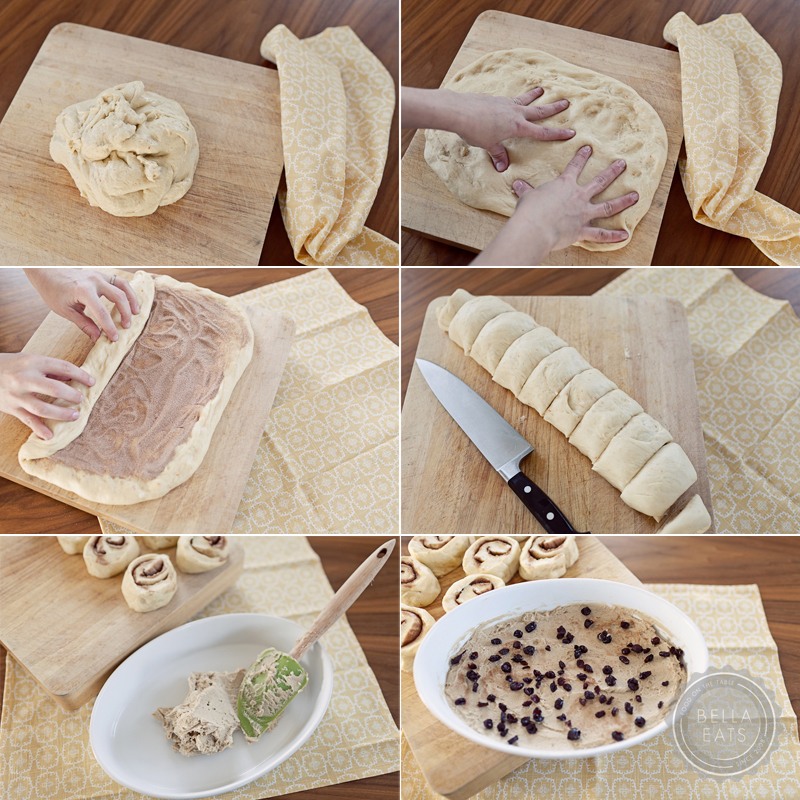
  3. Mist the counter with spray oil and transfer the dough to the counter. Roll the dough with a rolling pin or press and stretch with fingertips, lightly dusting the top of the dough with flour to keep it from sticking. Roll or press into a rectangle about 2/3 inch thick and 14 inches wide by 12 inches long. Don't roll too thin, or the resulting buns will be tough and chewy. Sprinkle the cinnamon sugar over the surface of the dough and roll the dough up into a cigar-shaped log, from the long side. With the seam side down, cut the dough into 8 to 12 even pieces each about 1-3/4 inches thick.
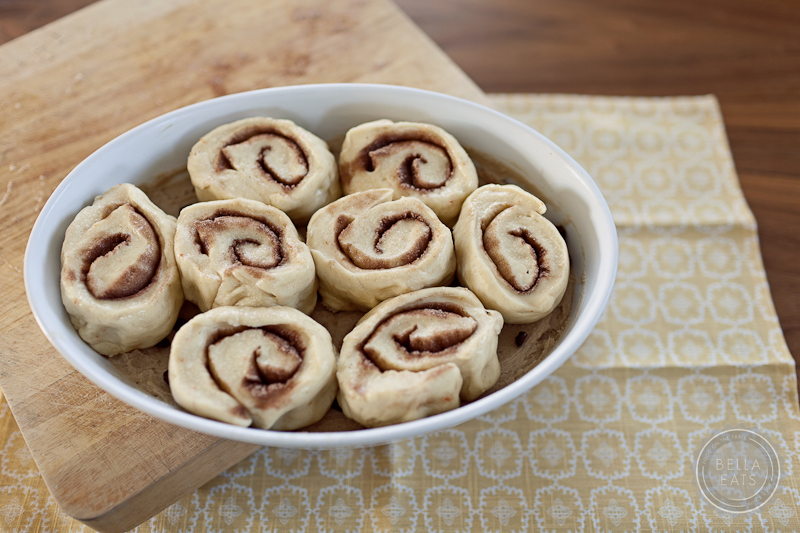
  4. Coat the bottom of 1 or more baking dishes or baking pans with sides at least 1-1/2 inches high with a 1/4 inch layer of the caramel glaze. Sprinkle on the cranberries. Lay the pieces of dough on top of the caramel glaze, spacing them about 1/2 inch apart.** Mist the dough with spray oil and cover loosely with plastic wrap.
  5. Proof at room temperature for 75-90 minutes, or until the pieces have grown into one another and have nearly doubled in size. You may also retard the shaped buns in the refrigerator for 2 days, pulling the pans out of the refrigerator 3 to 4 hours before baking to allow the dough to proof.***
  6. Preheat the oven to 350˚F with the oven rack on the lowest shelf. Place a baking sheet lined with foil on that oven rack to catch potential overflow.
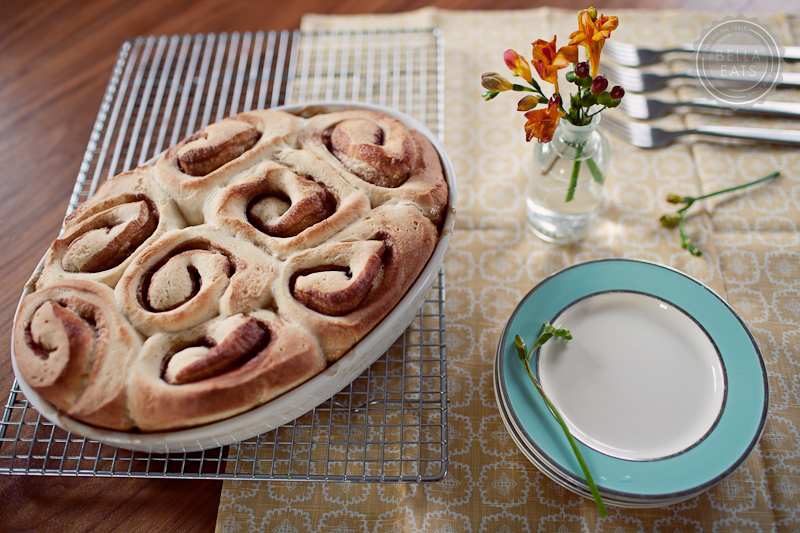
  7. Bake the sticky buns for 30-40 minutes, or until golden brown. Keep in mind that the sticky buns are really upside down, so the heat has to penetrate through the pan and into the glaze to caramelize it. The tops will become the bottoms, so they may appear dark and done in order for the underside to be fully baked.

CARAMEL GLAZE

Ingredients

  • 1/2 cup granulated sugar
  • 1/2 cup firmly packed brown sugar
  • 1/2 tsp salt
  • 1/2 pound unsalted butter, at room temperature
  • 1/2 cup light corn syrup
  • 1 tsp orange extract

Method

  1. Cream together the granulated sugar, brown sugar, salt, and butter for 2 minutes on high speed with the paddle attachment. Add the corn syrup and orange extract. Continue to cream for about 5 minutes until light and fluffy.

You probably will not need all of the glaze for the buns. Refrigerate and save any excess for future use, it will keep for months in a sealed container.

NOTES:

* When the weather is cool I warm the oven to its lowest setting, 170˚, and then turn it off. I place the fermenting dough in the oven to rise and have much better luck than just leaving it on the calendar in our 60˚ house.

** Clearly my baking dish pictured was too small.  But it's pretty, so I dealt with it.

*** The first time I made these I made the dough and fermented it the night before I wanted to bake it. After shaping the rolls and placing them in the pan on the glaze I covered them with plastic wrap and refrigerated them. I set my alarm for 4 hours before I wanted to put them in the oven, took them out of the refrigerator, and went back to bed.  They came out beautifully.

oh so pleased

Andrea

Summer is officially here.  We started her off right with a barbeque at our place last weekend, complete with pulled pork sandwiches, homemade pickles, an assortment of salads, cupcakes, backyard games and conversations with many good friends.  Preparation started early.  The carrots and sugar snaps were jarred with their spicy brines on Monday, to give them plenty of time to soak in the flavors that would take them from fresh-from-the-garden goodness to out-of-this-world “you made pickles?!?” delight.  Friday night the kitchen was a flurry of dough mixing and fermenting, buttercream whipping and iced tea steeping.  Rugs were vacuumed, the floor was mopped and the bar was stocked with all of the favorites for summer cocktails.

kaiser merge 3

On Saturday, the weather was perfect - sunny and a bit too warm out in the open but perfectly comfortable in the shade of our apple trees with a light breeze whispering across bare skin.  The smoker worked all day on a 10-pound pork shoulder, flavoring it and the air with the sweet scent of hickory, which, when mixed with the smell of freshly-mown grass (to make bocce and croquet a bit more manageable) should be bottled and sold with the simple descriptor of “summer”.  Drinks were poured, games were played, and finally, as the sun started to dip behind the trees we all settled down in the grass with plates in our laps and vinegar dripping down to our elbows.

kaiser merge 2

Sadly, I was so caught up in the great company and delicious fare that I failed at what I thought was my biggest goal for the day - to get photographs of people as well as the food.  I have a depressingly small amount of photos from the festivities, a few from before our guests arrived and even fewer during the time that they populated our back yard.  But I’ve realized that, while physical documentation of the event would have been nice, I’m so very glad that the day was relaxing enough to elicit deep and distracting conversations with some very good friends.  And, the lack of photos gave Brian and I an excuse to have a smaller, quieter picnic under our apple trees the next day, complete with leftovers (although sadly, no pork) and the company of our dogs.

kaiser 5

I have several recipes to tell you about from our barbeque menu, but am going to post them separately in short installments.  Since we’re on the subject of yeast breads and Peter Reinhart, I think I’ll start by telling you about the homemade kaiser rolls that sandwiched the vinegar-laden slivers of 10-hour smoked pork from the Big Green Egg.  Now, I knew going in that Brian’s Eastern Carolina-style barbeque would be the star of the show, but I wanted to be sure that it was delivered to the mouths of our guests via a vehicle worthy of the task.

kaiser merge 4

I can't even describe to you how good these rolls were.  I'll try, but I promise, mere words won't do them justice.  When they first came out of the oven I was worried that they were too big, and would require mouths to be overextended in order to get a bite that would be too bread-y.  When the filling of a sandwich promises to be as good as our pork was, the last thing you want is a mouthful of too-chewy bread overpowering the experience.  These rolls were such a pleasant surprise - once in your hands they squished down nicely, allowing for an easy bite.  And once in your mouth the bread seemed to melt away, allowing the pork to maintain its role as star of the show.

If you are thinking about tackling yeast breads, try these.  Please.  Though they are time-consuming, they are simple, and you will be oh so pleased with yourself.  Promise.

I followed Peter Reinhart's recipe precisely, so the following recipe is completely his.  I wish I had more photographs of the process because they would be helpful to explain some of the techniques.  If you are interested in bread baking, I highly recommend picking up The Bread Baker's Apprentice from the library or adding it to your own kitchen collection, it is an excellent resource.

Kaiser Rolls

from The Bread Baker's Apprentice, by Peter Reinhart (Ten Speed Press, 2001), pg. 175

makes 6 large rolls or 9 small

For this recipe, you need to start the night before with a pâte fermentée.

Pâte Fermentée Ingredients:

  • 1-1/8 cups (5 oz) unbleached all-purpose flour (I use King Arthur)
  • 1-1/8 cups (5 oz) unbleached bread flour (I use King Arthur)
  • 3/4 tsp salt
  • 1/2 tsp instant yeast
  • 3/4 cup to 3/4 cup plus 2 tbsp water, room temperature

Pâte Fermentée Method:

This makes enough for 2 batches of kaiser rolls.

  1. Stir together the flours, salt and yeast in a large bowl or bowl of an electric mixer. Add 3/4 cup of water and stir until everything comes together (or mix for 1 minute on low speed with paddle attachment). Adjust flour or water as necessary, so that the dough is not too sticky nor too stiff.
  2. Sprinkle flour on counter. Knead dough on counter for 4 to 6 minutes (or mix on medium speed with dough hook attachment for 4 minutes), until the dough is soft and pliable, tacky but not too sticky.
  3. Pour 1 tbsp vegetable oil into large bowl and coat sides from halfway down. Add dough ball to bowl and roll around to coat. Cover the bowl tightly with plastic wrap and ferment at room temperature for 1 hour, or until the dough swells to 1-1/2 times its original size.
  4. Remove the dough from the bowl, knead it lightly to degas and return it to the bowl, covering the bowl tightly with plastic wrap. Place the bowl in the refrigerator overnight. It will keep for 3 days in the refrigerator or can be frozen in an airtight plastic bag for up to 3 months.

Kaiser Roll Ingredients:

  • 1-1/2 cups (8 oz) pâte fermentée (I weighed it, to be sure I got the correct amount)
  • 2-1/4 cups (10 oz) unbleached bread flour
  • 3/4 tsp plus a pinch salt
  • 1-1/2 tsp barley malt syrup (or 1 tsp diastatic barley malt powder - I used the syrup)
  • 1 tsp instant yeast
  • 1 large egg, slightly beaten
  • 1-1/2 tbsp vegetable oil
  • 10 tbsp to 3/4 cup water, lukewarm
  • poppy or sesame seeds for topping (optional)
  • semolina flour or cornmeal for dusting

Kaiser Roll Method:

  1. Take the pâte fermentée out of the refrigerator 1 hour before making the dough.
  2. Stir together the flour, salt, malt powder if using, and yeast in a large bowl or bowl of a stand mixer. Add the pâte fermentée, egg, oil, malt syrup if using and 10 tbsp water. Stir (or mix on low speed with paddle attachment) for 1 minute, until the ingredients form a ball. Add extra water if necessary.
  3. Lightly dust the counter with flour and transfer the dough to the counter to begin kneading (or mix on medium speed with the dough hook). Knead for about 10 minutes (I kneaded for about 8 minutes with my stand mixer) adding flour if needed, until the dough is soft and supple, tacky but not too sticky. The dough should pass the window pane test*, pictured below on the right. Lightly oil a large bowl and transfer the dough to the bowl, rolling it to coat it with oil. Cover the bowl tightly with plastic wrap. Ferment at room temperature for 2 hours.
  4. Remove the dough from the bowl and divide it into 6 to 9 equal pieces (I made 6, 4-1/2 oz rolls). Clear the counter of all flour and wipe with a damp cloth to increase friction. Form the pieces into balls by placing the dough into your cupped hand. Firmly press the dough into the counter as if trying to push it through the counter, simultaneously rotating your hand in a circular motion, driving the dough with the outer edge of your hand. The dough should pop up into your palm and form a tight round ball.
  5. Mist the rounds lightly with spray oil, cover with plastic wrap and let the dough relax for about 10 minutes.
  6. Line a baking sheet with parchment paper, spray the paper with oil and dust lightly with semolina flour or cornmeal (I was all out, so just used bread flour).
  7. Prepare the individual rolls by cutting them with a kaiser roll cutter, if you have one. I do not, so I used Peter Reinhart’s knotting method instead. Roll out the dough ball into an 8” log (about 3/4” to 1” in diameter). Tie a simple knot, pulling the ends so that you have enough length to wrap them back through the knot again. I know this is a little confusing without a picture, I promise to document better the next time. Basically, after you’ve tied the simple knot, one of the ends will wrap down around the outside of the ring and up through the middle, while the other will wrap down through the middle of the ring to be secured at the outside.
  8. Place the rolls, cut or knot side down, on the parchment paper. Mist lightly with spray oil and loosely cover the pan with plastic wrap.
  9. Proof the rolls for 45 minutes at room temperature. Flip them over so that the cut or knotted side is facing up. Mist again with spray oil, cover with plastic and continue proofing for another 30-45 minutes, or until the rolls are double their original size.
  10. Preheat the oven to 425*F with the oven rack on the middle shelf. Uncover the rolls and prepare them for baking. I brushed mine with a bit of water and sprinkled poppy seeds over the top. My finished rolls weren’t nearly as shiny and golden as Peter’s when they came out of the oven, so I’ll probably brush them with an egg wash next time to get the same finish.
  11. Place the pan in the oven, spray the oven walls with water (or flick water from a basting brush, like I did) and close the door. After 10 minutes, rotate the pan for even baking and lower the oven temperature to 400*F. Continue baking until the rolls are a medium golden brown. The timing here is tricky. My 4-1/2 oz rolls took an additional 15 minutes to bake, but Peter says they will take anywhere from 15-30 for larger rolls and less for smaller rolls. My best advice is to watch them carefully. When they come out of the oven they will make a hollow sound if you thump them on the bottom.
  12. Remove the rolls from the pan and transfer to a cooling rack. Wait at least 30 minutes before serving.

* After the dough has been kneaded for the suggested amount of time, break off a chunk and stretch it out with two hands. You should be able to get the dough stretched thin enough so that it becomes translucent, without it breaking. If it breaks early, it still needs additional time kneading.

kaiser merge 1

Read More

for the ages

Andrea

A long time ago I owned a bread machine.  With that machine I made my husband (then boyfriend) batches of everything bagels on a bi-weekly basis.  It was so easy to dump all of the ingredients in, leave the machine unattended for 3-1/2 hours, then boil and bake the bagel dough until golden brown.  Well, three years ago we bought a house.  A very small house with a kitchen that lacks any kind of storage space, especially space for a clunky bread machine.  So, three years ago Brian stopped getting homemade bagels for breakfast and instead made do with bagels from the local shop, sliced then frozen then thawed when desired.  And, for three years he's been asking me to start making homemade bagels again. bagels 1 I agreed to get rid of the bread machine not only because we had zero space for it, but also because I thought it would be a way to force myself to learn how to bake yeast breads from scratch.  It seemed like a great idea since I already loved to bake cookies and muffins and quick breads - Brian even bought me a beautiful book to help in my endeavors. Unfortunately, the arrival of that book in our house coincided with my first semester of graduate school, which means that nary a loaf nor bagel was baked as I studied the affect of wind on structures and built teeny, tiny models of buildings at all hours of the night.  Although I've been out of school for a full year now, I've just recently begun tackling yeast breads.  And two weeks ago, much to Brian's delight, I tackled bagels. bagels merge 1 It really wasn't a difficult task, making bagels from scratch, especially with Peter Reinhart's The Bread Baker's Apprentice as my tutor.  Yes it was handy to have the bread machine take care of all of the mixing and kneading and resting and kneading again, without my having to keep an eye on a clock.  However, with a little forethought and a a stand mixer (I'm sure you could make these with a handheld mixer and a lot of elbow grease, but I'm not that brave) the bagels can be started Saturday evening and baked up just in time for Sunday morning breakfast.  And they are delicious - so much better than the bread machine bagels of our past.  The overnight fermentation process adds a great flavor that you just can't match in 3-1/2 hours. bagels 4 Now, I'm not from New York or Philadelphia or any other city whose residents claim that they have the *best* bagel.  I didn't grow up eating bagels every week so don't have the kind of nostalgia associated with them that so many other people have.  I don't claim to have had the best bagel of my life when I was growing up in such-and-such city, and certainly haven't spent my life trying to find one that compares.  So, while I can't personally claim that this bagel will match the bagel of your past, I do trust Peter Reinhart when he claims that this is a bagel for the ages. bagels 2 This recipe produces a bagel with a chewy exterior, soft interior and endless possibilities for toppings.  I froze ours in gallon-size bags once they had cooled, and simply microwaved them for 30 seconds before slicing and toasting when we were ready to eat them.  The flavor and texture were still perfect. Before typing out the [rather lengthy] recipe, I did a quick search to see if I could find a link online.  Luckily, Smitten Kitchen came through. For Peter Reinhart's bagel recipe, from The Bread Baker's Apprentice, click here. bagels 3
Read More