Contact Us

Use the form on the right to contact us.

You can edit the text in this area, and change where the contact form on the right submits to, by entering edit mode using the modes on the bottom right. 


123 Street Avenue, City Town, 99999

(123) 555-6789

email@address.com


You can set your address, phone number, email and site description in the settings tab.
Link to read me page with more information.

Blog

Filtering by Category: sweets

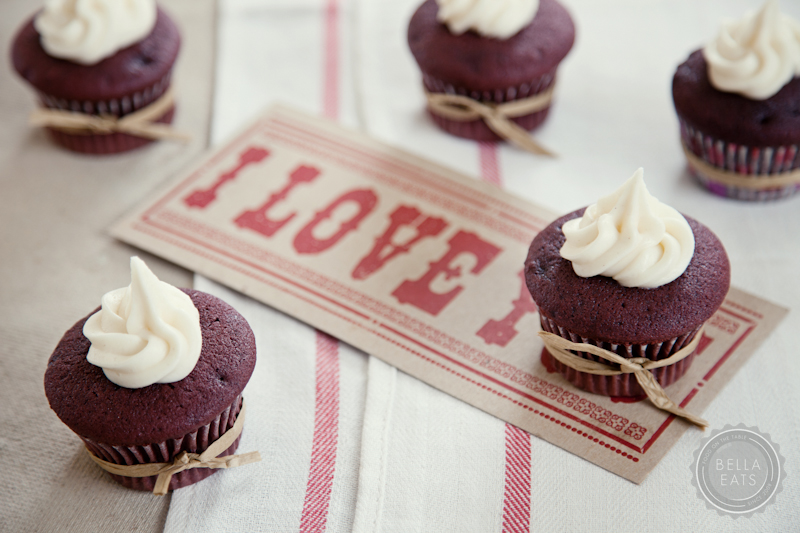
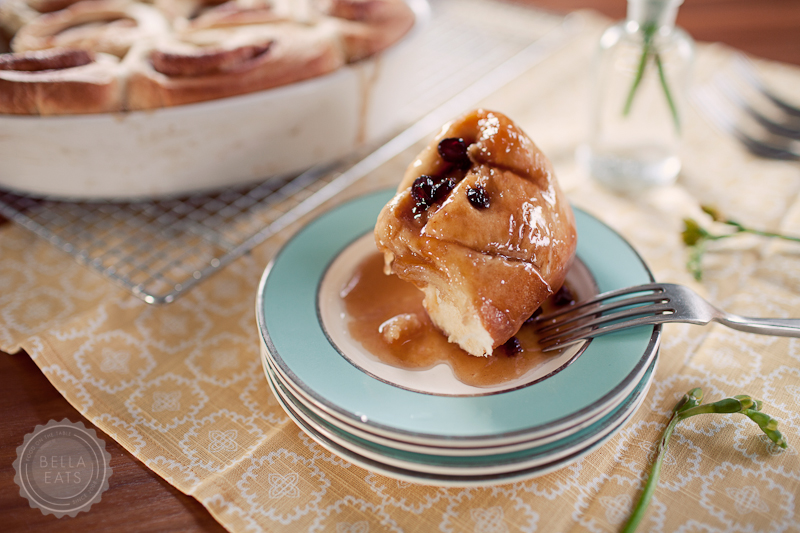
double chocolate cake, raspberry filling, vanilla meringue buttercream (oh my!)

Andrea

chocolate cake vanilla buttercream-3.jpg

March 5, 2012. That is the original date on this post, the date that I thought I would be sharing this cake with you. Three days after my honey's birthday, one hundred and four days ago. Bella Eats has not gone this long without a real post since the great silence of 2010, when I took a few months off in the midst of starting my company, teaching architecture to hopeful college students, and redesigning this site. I hoped then that such a long break would never happen again, but I suppose that one can never predict life's ebbs and flows. I won't bore you with what I've been up to. If you're interested, I invite you to visit my other passions, Andrea Hubbell Photography and Beyond the Flavor, for peeks into my latest projects.

Rather than start off with apologies I'd like to have a little celebration. That's what cakes are for, right?! This particular cake was baked to celebrate Brian's 30th birthday. Thirty! 30. The big 3-0. We both reached that milestone in March with mixed emotions, though most of them good. I've never thought of myself as one who is aware of age. But perhaps that was because I was the one still in my 3rd decade while most of my friends were beginning their 4th. Maybe it is my change in career (there are a lot of young, talented photographers that I've surrounded myself with lately) or the launch of Beyond the Flavor (where we find ourselves often interviewing young, talented chefs/farmers/bakers) but I've found myself on several occasions lately thinking 'Gosh, I'm old!'. I know that it's silly, and that those of you reading this who are dancing your way through your fourth, fifth, sixth, and seventh decades are rolling your eyes at this very moment. But, it’s true.

And I’ve realized, each time that I think ‘Gosh, I’m old!’, that it really isn’t a bad feeling. With ‘old’ comes comfort, and experience, and tradition. For example, I love that I can look back over the last few years and see four variations of this chocolate cake. Three years ago, when Bella Eats was in its infancy, I made a double chocolate cake with raspberry filling to celebrate my love’s twenty-seventh birthday. It was my very first layer cake...ever. And the next year, a double chocolate cake with praline topping to celebrate his twenty-eighth. And the following year, a double chocolate cake with mocha cream for his twenty-ninth (although, somehow, this version never made it to the blog). I have, just now, read those first two cake posts, and am completely delighted with how much has changed since then. 

In 2009 I had just lost my first job out of graduate school. I’d completed my master’s in architecture the previous spring unsure of what I wanted to be when I grew up. Employment in architecture was the clear path, but I wasn’t feeling compelled to follow it. Secretly, I hoped that I wouldn’t receive a job offer after school, and that I would be forced to think outside of the box to find my true calling. Instead, a position at a landscape architecture firm landed in my lap, and I took the opportunity to explore something similar, but different, from what I’d been trained to do. 2009 brought the loss of that job, and a position back in an architecture firm. Also, I was baking in my cramped, red countertop kitchen.

In 2010 I was still working for that same architecture firm, although the writing was on the wall that I might not be for long. It was a tough year for architects; a year when the economy forced many of us to find alternate paths. I was beginning to find mine when I wrote Brian’s birthday cake post in March, having recently photographed a few projects for the firm and a few family portraits for friends.  Soon after, I would receive an offer to teach architecture at the University of Virginia. And, I was still baking in my cramped, red countertop kitchen.

Although there isn’t a proper post for Brian’s 29th birthday cake, I can remember with some clarity what was happening in 2011 and feel I should document it here. I’d recently quit my architecture job, declined a second semester of teaching at UVA, and launched into my photography company as a full-time career. It was scary, and unpredictable, and I had no idea what I was doing. Brian found a new job that same month, sending himself off in a new direction entirely. We were hopeful, and excited, and ready for what the world had to offer. But still, I was baking in my cramped, red countertop kitchen.

And here we are in 2012. Life has more certainty to it. My career path is clear, Brian’s career path is clear, we are both loving our jobs. After a decade together (yes, we started dating when we were 20!) and six years of marriage we’ve finally planned a honeymoon to Spain.  Looking back on B’s 28th birthday post, my favorite lines are these: We've started a ‘thirty before thirty’ list, although I don’t think either of us has finalized the catalog of things we’re set to accomplish. A lot can happen in two years’ time, and I’ve come to terms with the reality that is a sliding scale of goals, an evolving list of priorities. The point is to think about it, to make an effort towards trying new things, towards bettering and challenging ourselves in the smallest or biggest of ways. We definitely didn’t complete the items on the list, and probably never completed the list itself, but I like to think that we still approach life in the same way. And yes, I baked his thirtieth birthday cake in our cramped, red countertop kitchen.

Much has changed these last three years. My job. My career path. My writing and my photography. Even our kitchen, since we just spent the last month remodeling it (!!!!!!!). But the one constant, that one element in each of these posts aside from the double chocolate cake, is Brian. He who makes growing old comfortable, enjoyable, and welcome. May we have many more birthdays to celebrate, with some variation of this double chocolate cake. xoxo.

chocolate cake vanilla buttercream-1.jpg
chocolate cake vanilla buttercream-4.jpg

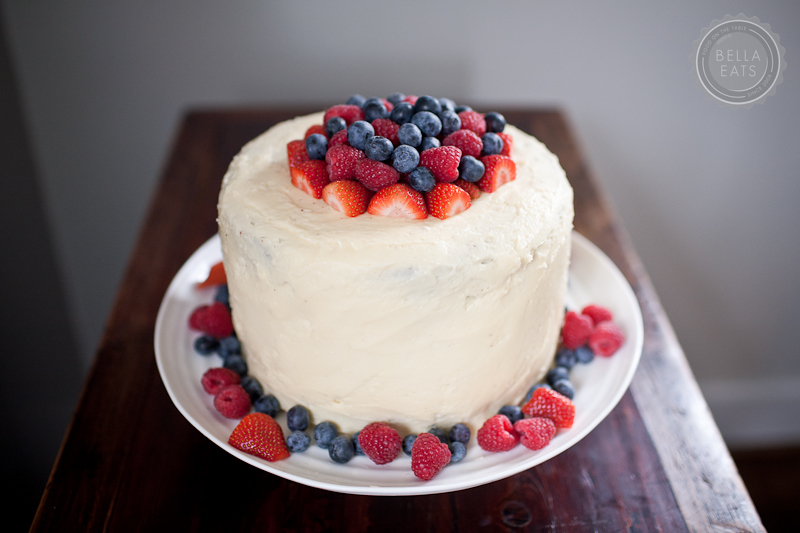
Double Chocolate Cake with Raspberry Filling and Vanilla Meringue Buttercream

Makes 12-14 servings. Cake recipe from Epicurious, Vanilla Meringue Buttercream recipe adapted from Martha Stewart

Ingredients

for cake layers:

  • 3 ounces fine-quality semisweet chocolate such as Callebaut
  • 1 1/2 cups hot brewed coffee
  • 3 cups sugar
  • 2 1/2 cups all-purpose flour
  • 1 1/2 cups unsweetened cocoa powder (not Dutch process)
  • 2 teaspoons baking soda
  • 3/4 teaspoon baking powder
  • 1 1/4 teaspoons salt
  • 3 large eggs
  • 3/4 cup vegetable oil
  • 1 1/2 cups well-shaken buttermilk (for dairy free variation: mix 1 1/2 cups soymilk with 1 tablespoon cider vinegar and set aside to curdle)
  • 3/4 teaspoon vanilla

for raspberry filling:

  • 2 10-oz bags frozen raspberries, thawed
  • 1/2 cup sugar
  • 2 tbsp cornstarch

for vanilla meringue buttercream:

  • 5 large egg whites
  • 1 cup plus 2 tbsp sugar
  • pinch of salt
  • 1 lb (4 sticks) unsalted butter, at room temperature
  • 2 tsp vanilla extract

    Method

    make cake layers:

    1. Preheat oven to 300* F and grease two 10″ cake pans, or three 8″ or 9″. Line bottoms with rounds of wax paper and grease paper.
    2. Finely chop chocolate and in a bowl combine with hot coffee. Let mixture stand, stirring occasionally, until chocolate is melted and mixture is smooth.
    3. Into a large bowl sift together sugar, flour, cocoa powder, baking soda, baking powder, and salt. In another large bowl with an electric mixer beat eggs until thickened slightly and lemon colored (about 3 minutes with a standing mixer or 5 minutes with a hand-held mixer). Slowly add oil, buttermilk, vanilla, and melted chocolate mixture to eggs, beating until combined well. Add sugar mixture and beat on medium speed until just combined well.
    4. Divide batter between pans (pans should only be half full – if you use 8″ pans you will have some batter leftover) and bake in middle of oven until a tester inserted in center comes out clean, 1 hour to 1 hour and 10 minutes for 10″ pans, 50 minutes for 8″-9″ pans.
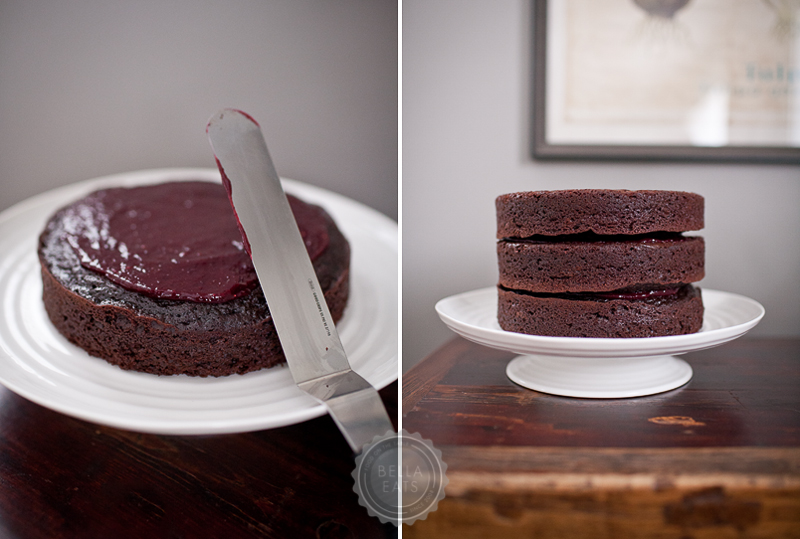
    5. Cool layers completely in pans on racks. Run a thin knife around edges of pans and invert layers onto racks. Carefully remove wax paper and cool layers completely. Cake layers may be made 1 day ahead and kept, wrapped well in plastic wrap, at room temperature.

    make raspberry filling:

    1. Puree the raspberries in a food processor or blender. Press the puree through a fine-mesh strainer with the back of a spoon, removing the seeds. Heat the puree in a small pot with the sugar and cornstarch until mixture boils, stirring constantly. As it boils, it should quickly thicken. Let cool.

    make frosting:

    1. To make the frosting, combine the egg whites, sugar and salt in a heatproof bowl set over a pot of simmering water.  Heat, whisking frequently, until the mixture reaches 160° F and the sugar has dissolved.
    2. Transfer the mixture to the bowl of a stand mixer fitted with the whisk attachment.  Beat on medium-high speed until stiff peaks form and the mixture has cooled to room temperature, about 8 minutes.
    3. Reduce the speed to medium and add the butter, 2 tablespoons at a time, adding more once each addition has been incorporated.  If the frosting looks soupy or curdled, continue to beat on medium-high speed until thick and smooth again, about 3-5 minutes more (don’t worry, it will come together!)  Stir in the vanilla extract and mix just until incorporated.
    4. Keep buttercream at room temperature if using the same day, or transfer to an airtight container and refrigerate up to 3 days or freeze up to 1 month. Before using, bring to room temperature and beat with paddle attachment on low speed until smooth again, about 5 minutes.
    chocolate cake vanilla buttercream-2.jpg

    red velvet cupcakes with cinnamon cream cheese frosting

    Andrea

    We're not big on Valentine's Day plans in our house, typically choosing to stay home for a dinner cooked together paired with a nice bottle of wine. And really, how is that different from most nights around here? But this year Brian has something special up his sleeve, and despite my persistent quest for answers, he hasn't slipped me the slightest hint about what he's up to. It's impressive, really, because we're usually the couple that exchanges gifts as soon as we've purchased them, never able to hold out for the birthday, anniversary, or holiday they are truly meant for. I've got to say, I'm pretty excited. The anticipation is killing me! :)

    When you're a recipe blogger you really can't avoid Valentine's Day, despite our typical lack of celebration at home. The red food coloring and sprinkles and heart-shaped cookie cutters are part of the job, and I really am okay with it. Any excuse to bake is fine by me. This year for my Valentine's baking (a week early, so that I could share with you here) I decided to go with a more natural palette - a toned-down burgundy cake and cream frosting, adorned with a simple craft ribbon. Which, I think, makes these red velvet cupcakes the perfect "all-grown-up" Valentine's Day dessert. 

    Now I wouldn't call myself a red velvet cake aficionado, as I've never really understood the appeal of it before now. It's just red cake...right?!? Not really. I love the subtle chocolate flavor and soft crumb of these cakes, made light and moist with buttermilk. And the cinnamon cream cheese frosting is so completely delicious that it's a wonder any made it to the domed tops. Seriously, I could have eaten the entire bowl on its own. Don't skip this frosting in favor of a fluffy white version, the cupcakes just wouldn't be the same.

    Happy Valentine's Day, all! I hope you spend the day, and each one after that, with those you love.

    PS: There's nothing wrong with sprinkles, and if you're looking for some (along with the story of my breaking a little boy's heart), I suggest my Valentine's Day post from last year. :)

    Red Velvet Cupcakes with Cinnamon Cream Cheese Frosting

    from Hummingbird Bakery Cookbook via Joy The Baker

    makes 12 cupcakes. double the recipe to make two 9-inch layer cakes.

    Cupcake Ingredients

    • 4 Tablespoons unsalted butter, at room temperature
    • 3/4 cup sugar
    • 1 egg
    • 3 Tablespoons unsweetened cocoa powder
    • 2-1/2 Tablespoons red food coloring (I used a gel food coloring...about 1 tsp mixed with enough water to make 2-1/2 tablespoons...which is why my cupcakes are more burgundy than red)
    • 1/2 teaspoon vanilla extract
    • 1/2 cup buttermilk
    • 1 cup plus 2 Tablespoons all-purpose flour
    • 1/2 teaspoon salt
    • 1/2 teaspoon baking soda
    • 1-1/2 teaspoons distilled white vinegar

    Method

    1. Preheat oven to 350*. Line standard muffin pan with paper liners.
    2. In the bowl of a stand mixer with paddle attachment, cream the butter and sugar together until light and fluffy. Add the egg, and beat until well-incorporated, scraping down the bowl as needed.
    3. In a separate bowl, mix together the cocoa, food coloring, and vanilla extract to form a paste. (I used 1 tsp of gel food coloring with water added to equal 2-1/2 tbsp, which is why I think my cupcake color isn't as vibrant as Joy's.) Add to the batter and mix thoroughly, until completely combined. Be sure to scrape the sides and bottom of the bowl to be sure that all of the batter is equally colored.
    4. Turn the mixer to low and slowly add half of the butter milk. Mix to combine. Add half of the flour and mix to combine. Repeat with the last of the buttermilk and the last of the flour. Scrape the bowl, turn mixture to high, and beat until smooth.
    5. Turn the mixer back to low and add the baking soda, salt and vinegar. Turn mixer up to high and beat for 1-2 minutes until smooth.
    6. Spoon the batter into paper-lined cupcake pan and bake at 350* for 20-25 minutes, until a toothpick inserted in the center of a cupcake comes out clean. If you have doubled the recipe and are baking 2 pans at once, be sure to rotate the pans halfway through baking.
    7. Cool on rack in pan for 10 minutes, then remove from pan and allow to cool completely before frosting.

    Frosting Ingredients

    I go light on frosting, so this made the perfect amount for a double-batch of cupcakes. If you're making a layer cake, you'll probably want to double it.

    • 2-1/3 cups powdered sugar, sifted
    • 3 Tablespoons butter, room temperature
    • 4 ounces cream cheese, cold (I used room temperature)
    • scant 1/4 teaspoon ground cinnamon

    Method

    1. Cream the butter in the bowl of a stand mixer with paddle attachment.  Add the powdered sugar and cinnamon and mix at medium-slow speed until well combined. 
    2. Add the cream cheese all at once and beat at medium-high for 5 minutes, or until the frosting is light and fluffy. Do not over-beat as the frosting can become runny quickly.

    lemon-drenched lemon cakes

    Andrea

    Today I made and re-photographed this Lemon Drenched Lemon Cake for a project I am working on with Retail Relay. Also, for a dinner party Brian and I are going to tonight. Except this time, I am topping it with Blackberry Compote. MmmHmm...

    Happy Weekend, Everyone!

    lemon cake-2.jpg
    lemon cake-1.jpg
    lemon cake-3.jpg

    This recipe makes 2 cakes.  After reading some comments from Joy's readers I would not recommend trying to bake this cake in any pan other than loaf pans.  Also, I used ALL of the syrup.  I just kept brushing layer upon layer of syrup over the tops of the cakes, allowing each application to soak in before adding another.  And, when there was just a bit left in the bowl, I poured it onto the serving plate and plopped the cakes right on top of it, allowing the bottoms to soak it up and get nice and lemon-y.  If you're not a lemon fanatic like me, you might want to only use 1/2 the syrup.

    Lemon Drenched Lemon Cakes

    Recipe adapted from Dorie Greenspan via Joy the Baker.  Be sure to check out the lovely pictures of this cake on Joy's site, since I was a bit of a slacker and didn't get many...

    Cake:

    • 2-2/3 cups all-purpose flour
    • 2-1/2 tsp baking powder
    • pinch of salt
    • 2-1/3 cups sugar
    • 1-1/2 tsp vanilla
    • 6 large eggs, preferably at room temperature
    • 2/3 cup heavy cream
    • zest of 2 lemons, finely grated
    • 1 stick, plus 7 tbsp unsalted butter (15 tbsp total), melted and cooled

    Syrup:

    • 1/3 cup water
    • 1/4 cup sugar
    • juice of two lemons

    Method:

    1. Center a rack in the oven and preheat the oven to 350 degrees F. Butter two 9x5-inch loaf pans, dust the insides with flour and tap out the excess. Even if the pans are nonstick, it’s a good idea to butter and flour them.
    2. Sift together the flour, baking powder and salt.
    3. Put the sugar and the lemon zest in a large bowl, working with your fingers, rub them together until the sugar is moist and thoroughly imbued with the fragrance of lemon.
    4. Add the eggs and whisk them into the sugar, beating until they are thoroughly incorporated. Whisk in the extract, then whisk in the cream. Continuing with the whisk, or switching to a large rubber spatula, gently stir in the dry ingredients in 3 or 4 additions; the batter will be smooth and thick. Finish by folding in the melted butter in 2 or 3 additions. Pour the batter into the pans, smoothing with a rubber spatula.
    5. Bake for 55 to 60 minutes, or until a knife inserted into the center of the cakes comes out clean. As soon as the cake goes into the oven, make the syrup. After about 30 minutes in the oven, check the cakes for color- if they are browning too quickly, cover them lightly with foil tents.
    6. Stir the water and sugar together in a medium saucepan over medium heat until the sugar melts, then bring to a boil. Remove the pan from heat and stir in the lemon juice. Pour the syrup into a heatproof bowl and let cool.
    7. When the cakes test done, transfer them to a wire rack to cool for 5 minutes before unmolding them and turning them right side up on the rack. Place the rack over a baking sheet lined with wax paper and, using a thin skewer, cake tester or thin-bladed sharp knife, poke holes all over the cakes. Brush the cakes all over with the syrup, working slowly so that the cakes sop it up. Leave the cakes on the rack to cool to room temperature.

    Blackberry Compote

    Ingredients:

    • 3 cups fresh or frozen blackberries
    • 1/2 cup water
    • 1/2 cup sugar
    • 1 cinnamon stick

    Method:

  • Place all ingredients in a medium saucepan over medium heat. Bring to a strong simmer for 20 minutes, stirring occasionally, until compote has thickened and reduced. Allow to cool, and serve over slices of cake.
  • breathless

    Andrea

    Hi, friends. How are you? Goodness...well, it has been awhile, hasn’t it? We’ve missed a lot these last few months...such as apples. A trip to Boston and Halloween. Pumpkins and cranberries. The second anniversary of Bella Eats. And then there was Thanksgiving, and the first snow, and a trip to Florida and, finally, Christmas and the end of another year. Wow. So many opportunities to share food and photos and life with you all and I missed them, each one. I don’t want to start this first post back after three months gone with an apology, so, I won’t. Instead I’ll just say “Hi!” And, “I’m back!” And finally, “If you’re still here...thank you!”

    What I do have to say about these last three months is this...they were full. So very full. The full you feel after an extraordinary meal; one that involves ten-too-many bites, an unbuckling of pants, and a slouching down in one’s chair followed by a long, low groan. So satisfying, but when you look down at your plate there are still ten more bites waiting, and you think to yourself “Can I do it?”. Somehow, you do, and at the end of it all you’re left with no choice but to lie down someplace dark and quiet. 

    The thing about those big meals is that they are typically surrounded by a tableful of loved ones, conversing and laughing and drinking and eating right alongside you. They are so jovial and supportive that you don’t even notice the fullness until it is too late, and then they are there to moan and groan with you, and to reminisce about the wonderfulness that was the meal consumed. Been there? I thought so. And that is precisely what the last three months has felt like.

    I am typically a very stick-to-the-path kind of girl. I follow directions well, read books and watch shows in sequence, knew what I wanted to be when I grew up at twelve years old. But three months ago I took a detour; strayed from the road I’d been traveling and forged a new trail through uncharted territory. 

    I quit my architecture job in order to pursue photography as a career. 

    That sentence leaves me giddy; so full of excitement that it is difficult to sit in this chair and continue typing. Not only is it unbelievably amazing to be chasing after a dream I never thought possible, but the unwavering support of family and friends has left me breathless.  There are scary moments, certainly, when I peer ahead and begin to doubt my ability to move forward with sure and confident steps. But then, out of nowhere, I’ll receive an email or phone call or Facebook message or tweet (what a funny world we live in, huh?) and I take another step, and another, and another until I am running so fast that I fear I won’t be able to stop. I am breathless, I tell you.

    Finally, with the conclusion of a semester of teaching and 100% of my concentration set on photography, I have time for Bella Eats again. This fact I find nearly as exciting as my decision to change paths; to move towards a big dream shimmering at the horizon.  Bella Eats is part of that dream and, in fact, even the generator of it. Without this site I may not have renewed a passion for photography born long ago and lost in my pursuit of architecture. And I certainly wouldn’t have met all of you, or formed real friendships with some very inspiring and brave individuals. I owe much to this place I’ve carved from the world wide web and the people I’ve connected to through it, and am happy to finally be able to give some of that energy back.

    And now, let’s talk about breakfast.

    Recently, breakfast has slipped into the role of “Andrea’s favorite meal with friends”. It is usually enjoyed out, at any one of a handful of local joints, with someone I most likely haven’t seen in some time. That seems to be the case with most of my friends these days, who all seem equally as busy as I, and the breakfast hour is one that isn’t typically prescheduled for some other task. It is a mighty fine way to kick off a weekday, leaving you content and happy from the time, food, and news shared. 

    If I could, I would make each and every one of you these sticky buns one morning this week. They take a bit of planning and an early morning wake-up call, but the end result is quite worth the effort. Paired with a cup of coffee and perhaps a few slices of crispy bacon, the soft, pillowed interior makes the perfect vessel for a sticky sauce of caramel and cranberries. We made them twice within a week, once for Thanksgiving guests and again for friends...just because. 

    CRANBERRY ORANGE STICKY BUNS

    adapted from Peter Reinhart's The Bread Baker's Apprentice
    makes 8-12 large sticky buns

    Ingredients

    • 6-1/2 tbsp granulated sugar
    • 1 tsp salt
    • 5-1/2 tbsp unsalted butter, at room temperature
    • 1 large egg
    • 1 tsp grated orange zest
    • 3-1/2 to 4 cups unbleached bread flour
    • 2 tsp instant yeast
    • 1-1/8 to 1-1/4 cups whole milk, at room temperature
    • 1/2 cup cinnamon sugar (6-1/2 tbsp granulated sugar plus 1-1/2 tbsp ground cinnamon)
    • Caramel Glaze (see below)
    • 1/4 cup dried cranberries

    Method

    1. Cream together the sugar, salt, and butter on medium-high speed in an electric mixer with paddle attachment. Whip in the egg and orange zest until smooth. Add the flour, yeast, and milk. Mix on low speed until the dough forms a ball. Switch to the dough hook and increase the speed to medium, mixing for approximately 10 minutes, or until the dough is silky and supple, tacky but not sticky. You may have to add a little flour or water while mixing to achieve the desired texture. The dough should pass the windowpane test and register 77˚ to 81˚F. Lightly oil a large bowl and transfer the dough to the bowl, rolling it around to coat it with oil. Cover the bowl tightly with plastic wrap.
    2. Ferment the dough at room temperature for approximately 2 hours, or until the dough doubles in size.*
    3. Mist the counter with spray oil and transfer the dough to the counter. Roll the dough with a rolling pin or press and stretch with fingertips, lightly dusting the top of the dough with flour to keep it from sticking. Roll or press into a rectangle about 2/3 inch thick and 14 inches wide by 12 inches long. Don't roll too thin, or the resulting buns will be tough and chewy. Sprinkle the cinnamon sugar over the surface of the dough and roll the dough up into a cigar-shaped log, from the long side. With the seam side down, cut the dough into 8 to 12 even pieces each about 1-3/4 inches thick.
    4. Coat the bottom of 1 or more baking dishes or baking pans with sides at least 1-1/2 inches high with a 1/4 inch layer of the caramel glaze. Sprinkle on the cranberries. Lay the pieces of dough on top of the caramel glaze, spacing them about 1/2 inch apart.** Mist the dough with spray oil and cover loosely with plastic wrap.
    5. Proof at room temperature for 75-90 minutes, or until the pieces have grown into one another and have nearly doubled in size. You may also retard the shaped buns in the refrigerator for 2 days, pulling the pans out of the refrigerator 3 to 4 hours before baking to allow the dough to proof.***
    6. Preheat the oven to 350˚F with the oven rack on the lowest shelf. Place a baking sheet lined with foil on that oven rack to catch potential overflow.
    7. Bake the sticky buns for 30-40 minutes, or until golden brown. Keep in mind that the sticky buns are really upside down, so the heat has to penetrate through the pan and into the glaze to caramelize it. The tops will become the bottoms, so they may appear dark and done in order for the underside to be fully baked.

    CARAMEL GLAZE

    Ingredients

    • 1/2 cup granulated sugar
    • 1/2 cup firmly packed brown sugar
    • 1/2 tsp salt
    • 1/2 pound unsalted butter, at room temperature
    • 1/2 cup light corn syrup
    • 1 tsp orange extract

    Method

    1. Cream together the granulated sugar, brown sugar, salt, and butter for 2 minutes on high speed with the paddle attachment. Add the corn syrup and orange extract. Continue to cream for about 5 minutes until light and fluffy.

    You probably will not need all of the glaze for the buns. Refrigerate and save any excess for future use, it will keep for months in a sealed container.

    NOTES:

    * When the weather is cool I warm the oven to its lowest setting, 170˚, and then turn it off. I place the fermenting dough in the oven to rise and have much better luck than just leaving it on the calendar in our 60˚ house.

    ** Clearly my baking dish pictured was too small.  But it's pretty, so I dealt with it.

    *** The first time I made these I made the dough and fermented it the night before I wanted to bake it. After shaping the rolls and placing them in the pan on the glaze I covered them with plastic wrap and refrigerated them. I set my alarm for 4 hours before I wanted to put them in the oven, took them out of the refrigerator, and went back to bed.  They came out beautifully.