Contact Us

Use the form on the right to contact us.

You can edit the text in this area, and change where the contact form on the right submits to, by entering edit mode using the modes on the bottom right. 


123 Street Avenue, City Town, 99999

(123) 555-6789

email@address.com


You can set your address, phone number, email and site description in the settings tab.
Link to read me page with more information.

Blog

Filtering by Category: baking

sweet potato biscuits

Andrea

I have had this post queued up and ready to go for the last two weeks. Two. Weeks. The problem is, two weeks these days feels more like two hours. Time is flying faster than Harry Potter chasing the golden snitch. (Can you tell that my Thanksgiving plans include a trip to The Wizarding World of Harry Potter? That's pretty much all I can think about in between shooting and editing and shooting some more.) These biscuits were meant to welcome November and the sweet potato madness that comes with it but, instead, they're being offered up as a potential Thanksgiving morning breakfast. That works too, right? I think it is a brilliant idea.

Imagine Thanksgiving morning: the too-early wake-up call, the hours of cooking laid out in front of you, the stress of making sure the turkey is cooked just right. Now, picture the container of freshly (as in the night before) baked biscuits waiting for you as you start the coffee. The thin slices of salt-cured ham in the refrigerator. The pairing of that salty ham with those barely-sweet biscuits, which are easy to hold in one hand as you pull out celery and carrots and onions for chopping. Not bad, right? Make it come true, friends. Take a bit of time Wednesday night to whip up these beauties so they'll be ready to fuel you Thursday morning. You'll be oh-so-glad you did.

Sweet Potato Biscuits

from gourmet

makes 8 mid-size biscuits

Ingredients

  • 1 lb sweet potatoes (1 large or 2 small)
  • 2 tbsp milk
  • 1-1/2 cups all-purpose flour
  • 2 tbsp sugar
  • 1 tbsp baking powder
  • 1/2 tsp salt
  • 1 stick cold unsalted butter, cut into small pieces

Method

  1. Preheat your oven to 425℉ with the rack in the middle.
  2. Prick the sweet potatoes in several places with a fork, then bake on a baking sheet until very tender, 1 to 1-1/4 hours.  Cool slightly, then halve lengthwise and discard skin. Purée sweet potato in a food processor.  Transfer 1 cup purée to a bowl (reserve any remainder for another use) and stir in milk.  Chill until cold, about 30 minutes.
  3. Preheat oven to 425℉ again.  Grease a large baking sheet or line with parchment paper.
  4. Whisk together flour, sugar, baking powder, and salt in a large bowl.  Blend in butter with your fingertips or a pastry blender until mixture resembles coarse meal.  Add sweet potato mixture and stir just until a dough forms.
  5. Drop dough in 10 equal mounds onto greased baking sheet, spacing them 1-1/2 inches apart.
  6. Bake until lightly browned and cooked through, 18 to 22 minutes.  Transfer biscuits to a rack to cool.

torta di mele | apple tart

Andrea

My goodness...I should not have underestimated the powers of a beautiful salad! Thank you all for your sweet comments and enthusiasm. I won't lie, I fully expected to receive a whopping 2 comments on yesterday's post, so I appreciate all 10 of you proving me wrong. :)

As promised, here is an apple tart to kick off your weekend. It is your reward for yesterday's salad love, friends. This here tart is one of those pesky editorial assignments that I was telling you about, the completely fun and delicious and right-up-my-ally projects that cause me to eat more sweets/sushi/potato chips/wedding cake than maybe I should. This particular recipe was made and photographed for C-Ville Weekly and published in last week's issue. I'm just a little behind in getting it up here on Bella Eats. But, for all of you Charlottesville folks, Relay Foods has all of the ingredients ready to add to your cart in one click should you choose to make this apple tart this Fall. And you really should, as it is simple and lovely and delicious...three qualities I strive for in most food coming out of my kitchen.

Your tart will most likely look just a little bit different than mine because, well, I messed with the recipe a little bit. And wrongly, I might add. Your apples probably won't sit so high on the base, and the base itself won't be quite as dense. Even though I added a tad too much flour we still loved this treat.  I can't wait to make it again, sticking to the recipe below.

The pattern cut into the apples is, other than pretty, very helpful to slicing the tart in any way you might wish.

Torta di Mele (Apple Tart)

serves 8

from Meredith Barnes, C-Ville Weekly October 4-10, 2011

Ingredients

  • 1 egg
  • 3/4 cup sugar
  • pinch of salt
  • zest from 1 lemon
  • 1-1/2 sticks (3/4 cup) unsalted butter, melted
  • 2 cups all purpose flour
  • 1 tbsp active dry yeast
  • 1 tsp vanilla extract
  • 6 tbsp milk
  • 4 tart apples, peeled, cored, and halved
  • 2 tbsp apricot preserves
  • 2 tbsp water
Method:
  1. Preheat the oven to 375°.  Butter and flour a 9" or 10" cake pan, tapping to remove excess flour.
  2. Place the egg, sugar, salt, and lemon zest in the large bowl of a food processor.  Pulse until mixture is starting to combine and then add the melted butter, continuing to pulse until smooth.
  3. Combine the flour and yeast, and add to the mixture in the processor. Pulse until evenly distributed, add the milk and vanilla, and then process until a soft batter forms.  
  4. Pour the batter into the prepared pan and spread across the pan until it is level.
  5. Deeply score the 8 apple halves in a grid pattern.  Place one half in the center of the cake pan and arrange the remaining halves in a circular pattern. Bake for 10 minutes, the reduce the oven temperature to 350° and bake for 35-40 minutes more, until a toothpick inserted into the center comes out clean.
  6. Meanwhile, combine the 2 tbsp apricot preserves with the 2 tbsp water in a small saucepan and stir over low heat until melted.  When the tart comes out of the oven, brush it with the preserves and bake for an additional 3 minutes.  Serve warm.

apple dapple cake, and some food photography tips

Andrea

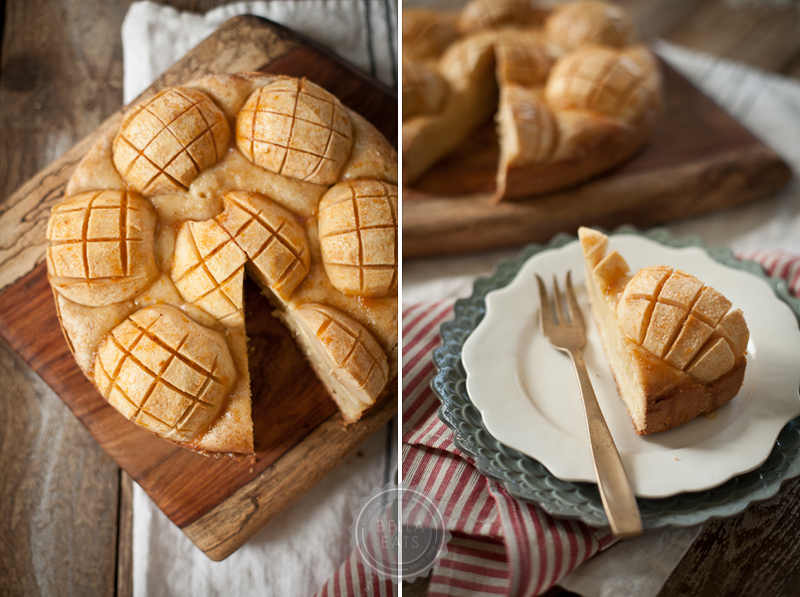
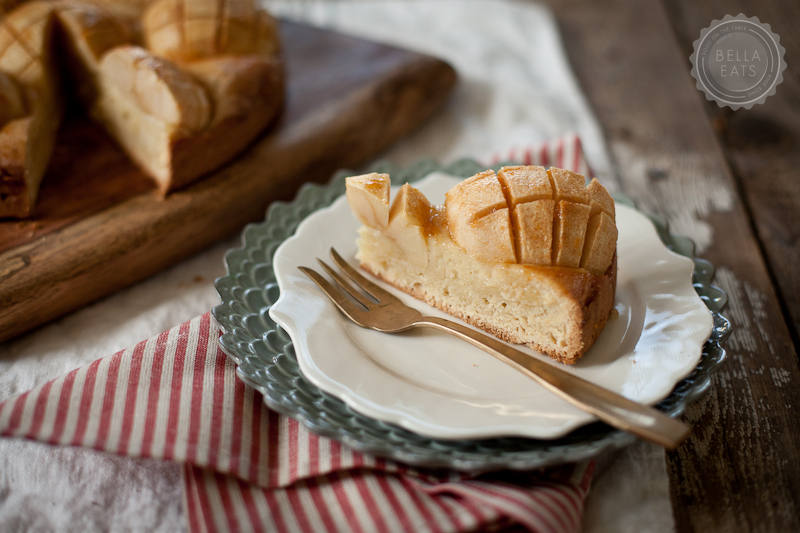
I mentioned last week that I'd be giving a little chat about food photography underneath the Relay Foods tent at the Heritage Harvest Festival last Saturday. Since so many of my readers are not local and would not have had the opportunity to stop by, I thought I'd post a summary of that presentation here on Bella Eats. And, for those of you who just want the recipe for the apple dapple cakes pictured throughout, it's at the end. :)

I get questions quite often about my photography and how I capture the images that I present here. The most important piece of advice that I ever give inquiring minds is this: PRACTICE. If you reach waaayyy back in the Bella Eats archives you'll see that my photography has changed immensely in the nearly 3 years since I've been sharing recipes from my kitchen. In fact, I give this little weblog 100% credit for renewing my passion for photography after architecture stole it away for 10 years. When I began Bella Eats I relied mostly on my little Canon Powershot point-n-shoot camera, and quickly switched over to my DSLR once the focus of the site moved from a daily food diary to a more focused recipe + photography portfolio. With that change, the amount of time I spent capturing images for each recipe increased. With each post my eye strengthened and developed until I'd created a style all my own, certainly influenced by but never outright imitating other food photographers that I admire. The reason that my photography looks and feels as it does today is because I keep picking up my camera, keep following the blogs and magazines and artists that inspire me, keep challenging myself in new ways with each project I tackle. And I promise you, 3 years from now my photography will be different than it is today because of the life I will live during that time. Everything experienced in life is an influence on one's art. So...PRACTICE. It is the ONLY way to become the photographer you wish to be. Everything else is just details.

And now, on to those details. This is by no means a comprehensive guide or the 'right/only' way to photograph food. I mostly hope to give some insight into how I work, and the decisions I make while capturing images for Bella Eats. I don't go into the technical aspects of working your camera, but simply challenge you to look at your photography from another point of view. If you have any specific questions, please feel free to ask them in the comments section!

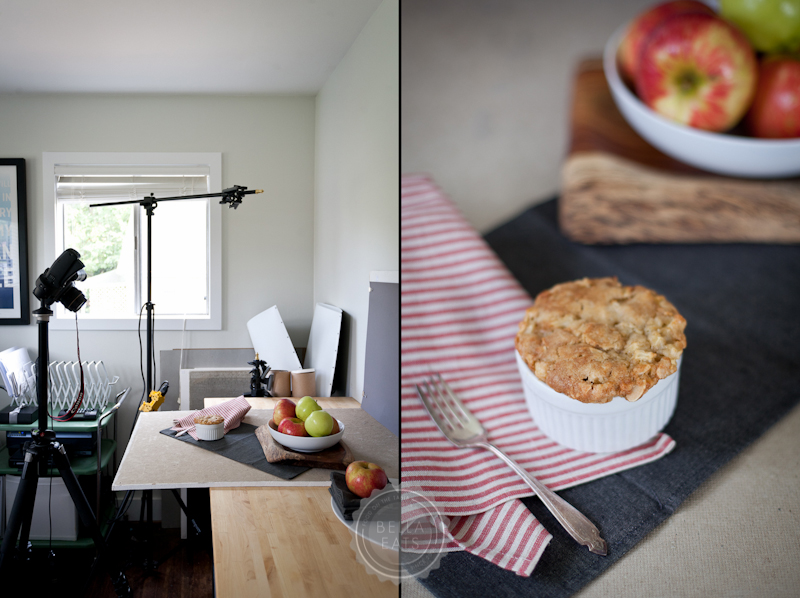
I first want to show you that I don't have a big fancy studio with a beautiful gourmet kitchen directly adjacent to it. Boy, do I wish I did! Someday... Right now Brian and I share a 10'x10' home office space, one side dedicated to our desks and computers and the other dedicated to my work table, some prop storage, and camera equipment. The end of that table is where most of my photography happens, unless I'm feeling like a different sort of lighting or need a bit more space, and then I'll move out to our dining room. (I'll show you the difference in light quality between those spaces a little later.) It is very helpful to have this dedicated space for photos, so that our dining room isn't constantly taken over with my equipment as it was for the first 2 years of writing Bella Eats. If you can manage to clear off a 2'x3' space to keep set up, I highly recommend it.

LIGHT

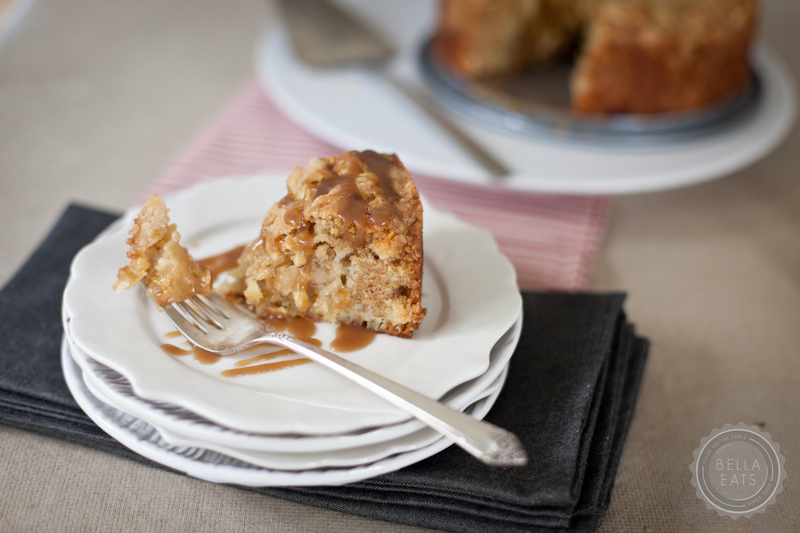
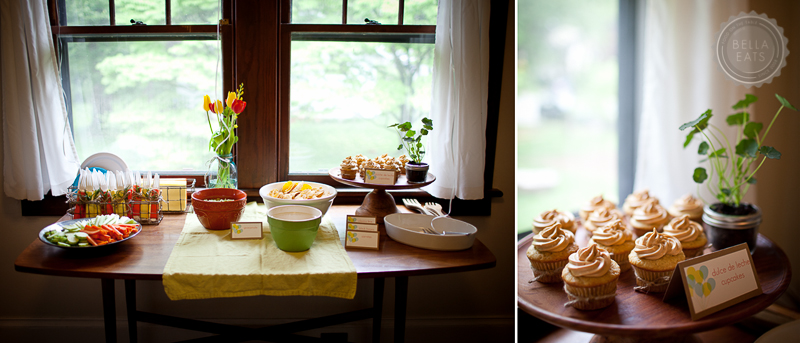
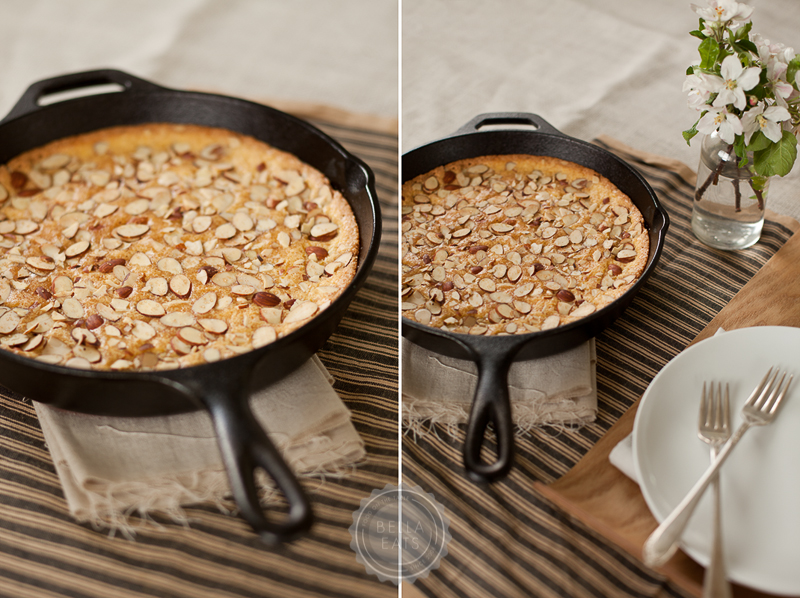
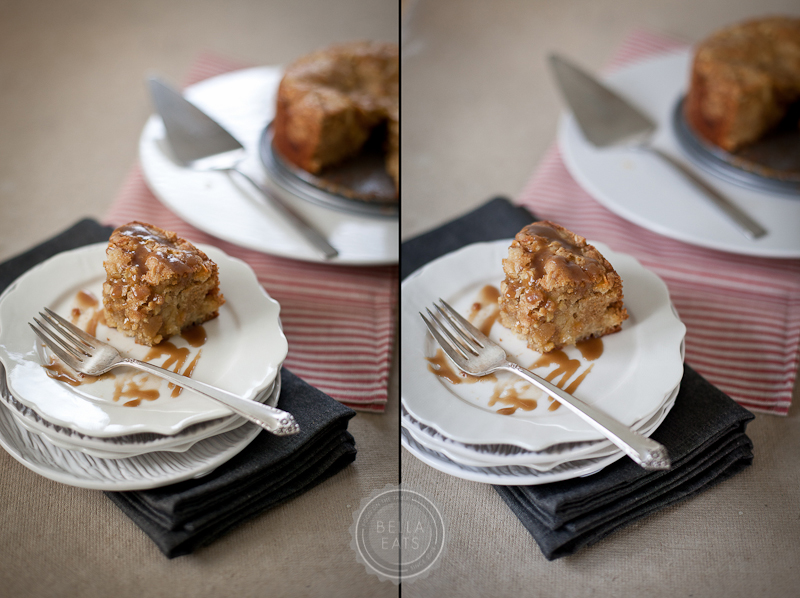
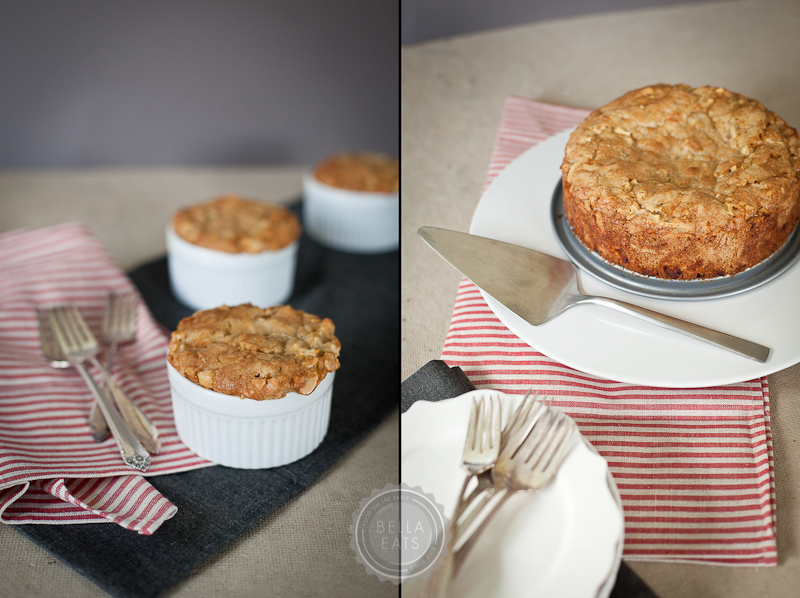
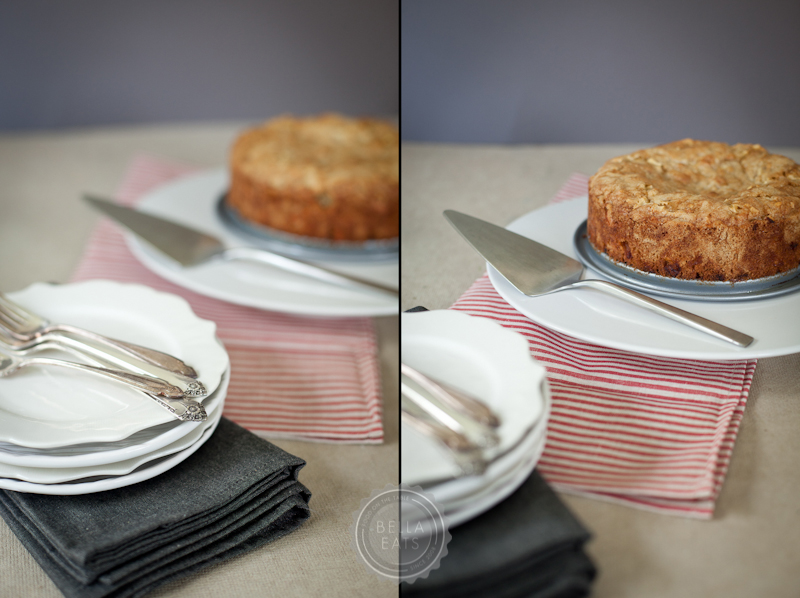
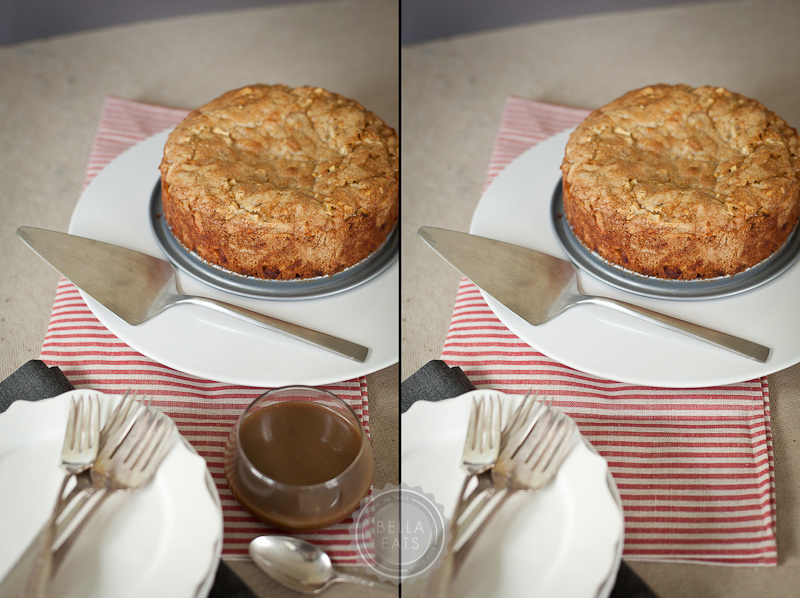
All recipes on Bella Eats are photographed using natural light. I did dabble with artificial lighting momentarily, and occasionally break out my Lowel Egos if I will be shooting on location in a restaurant, but 95% of the time the images captured are lit using indirect or diffused sunlight. So, the first thing that I do when I am planning to photograph a recipe is I think about the quality of light that I am looking for in my images. The pair of shots below demonstrates the difference in lighting in my dining room (left) versus my studio (right). Both images are perfectly fine, but there are subtle differences that I'd like to point out:

1. Temperature. My dining room windows face west and north, and these images were captured in the late afternoon, so the color cast in that space was much warmer than the cast in my office/studio, which faces east and north. 

2. Direction of light. In the image on the left, the windows are to the left and in front of the camera, which highlights the cake stand nicely but casts more shadow on the right side of the cut piece. In the image on the right, the windows are to the left and behind the camera, which provides nice, even lighting on the cut piece but leaves the depth of the image more flat. The difference is especially apparent if you look at the folded end of the gray towel.

Again, neither of these images represents the 'right' way to light a subject, just two different perspectives. And there are many, many more options!

CLEAN + STAGE

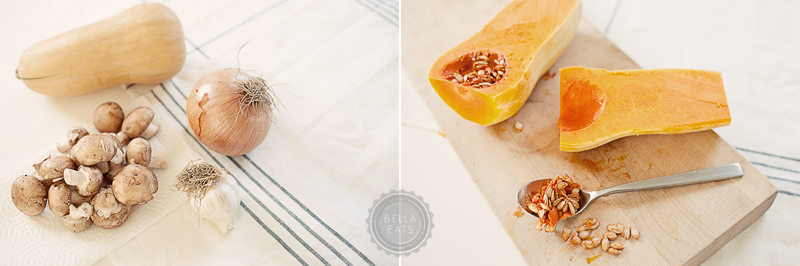
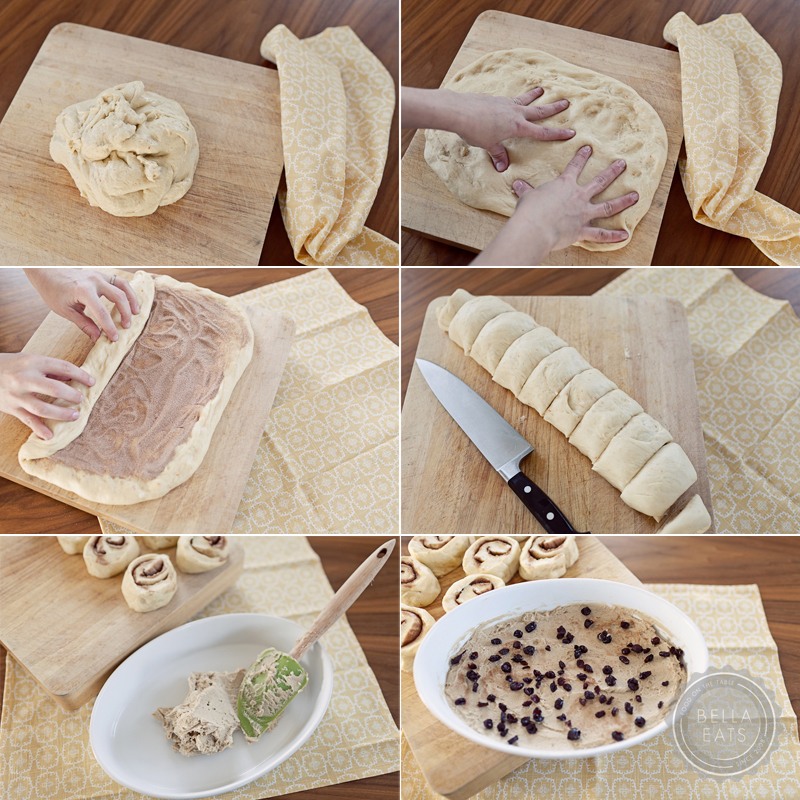
This is pretty self explanatory. Do as much set-up as you can before you step foot in the kitchen. Analyze the recipe, pick your backdrops, linens, dishes, and extra props. Set up the camera and stage the first shot while thinking about how you plan to capture the others. For something like these mini cakes, this step isn't as big of a deal. But if you have a cast iron pan of fajitas coming off the stovetop and you want to photograph the steam rising from those sizzling veggies, you better have your studio space ready to go!

RECIPE ANALYSIS

Just because a recipe for cake says that it should be baked in an 8-inch round cake pan, doesn't mean it has to be! Read through the recipe thoroughly and think about how you'd like to present the food. Individual cakes are fun to photograph, but a whole cake provides a slew of cutting/serving options. Will the food be photographed in the dish that it is prepared in? Or can you ignore the cooking dish because the food will be removed and plated? Do you want to capture multiple stages of the cooking process and, if yes, which of those stages should be documented and where? 
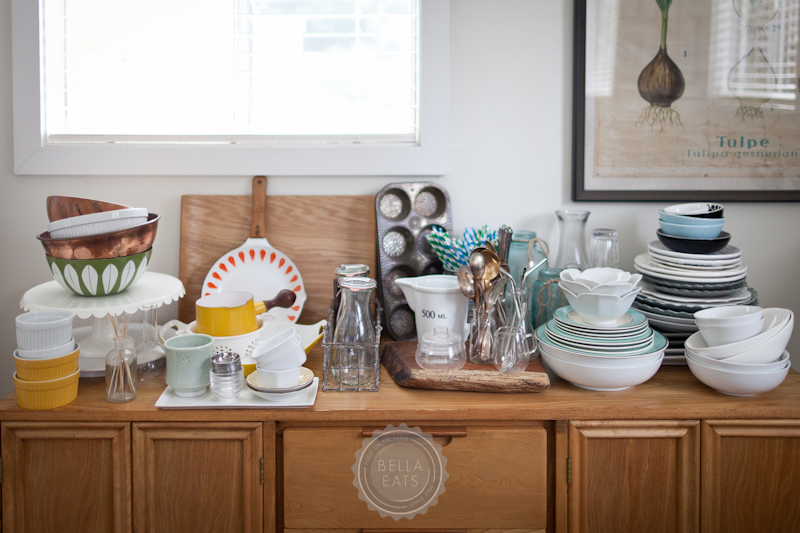
PROPS

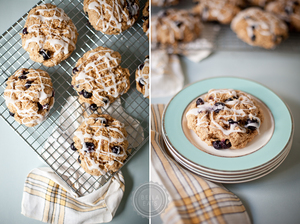
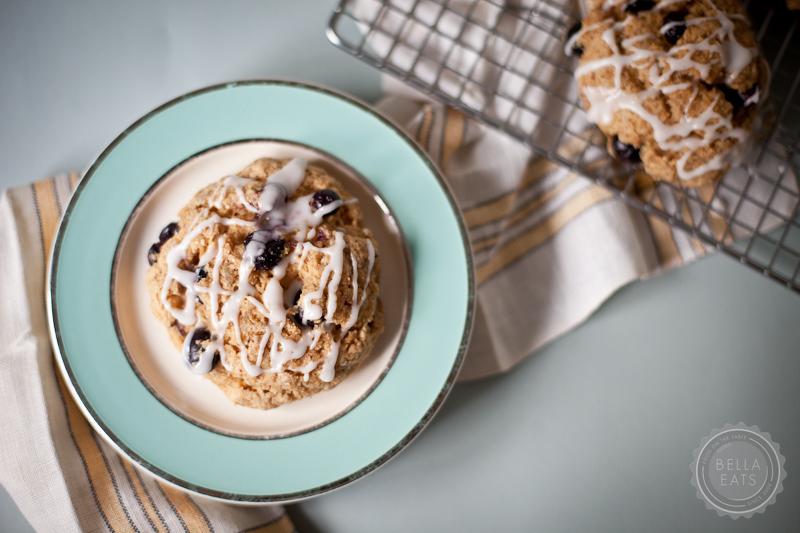
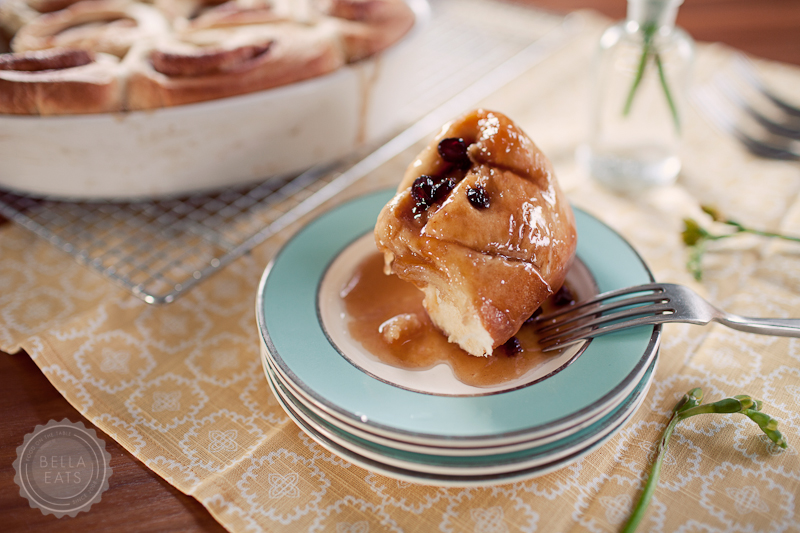
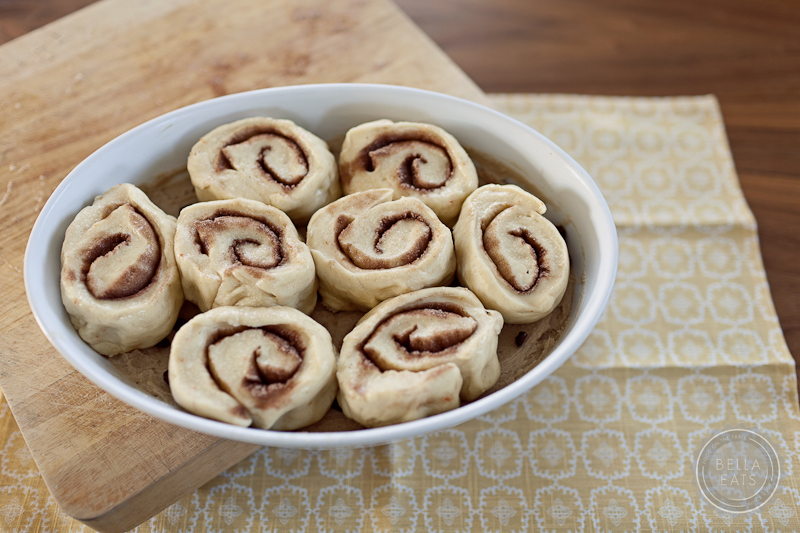
Analyzing the recipe will give clues as to what vessels should be used to present the food. Most often you can't go wrong with a white dish, but sometimes a colorful serving piece can really help to set off the colors in a recipe, such as these strawberry tarts on the teal plates shown below.

BACKDROPS

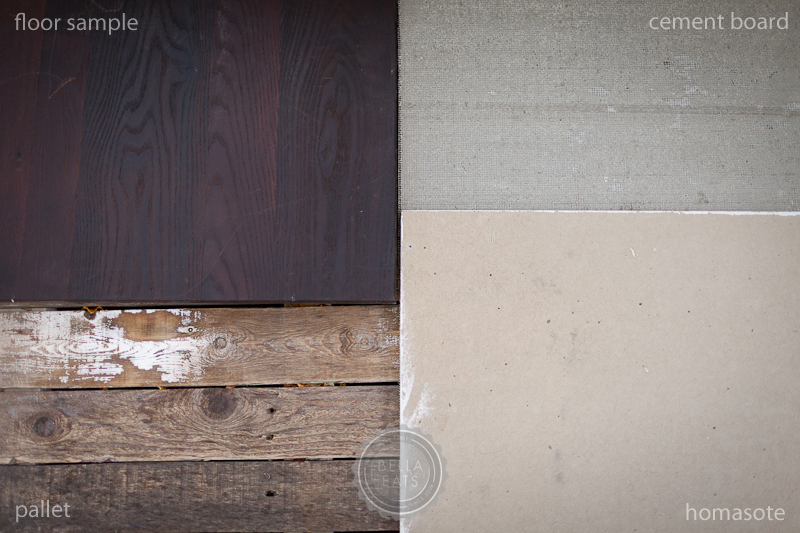
Once I've analyzed the recipe and chosen the dishes I'll use, I pick the backdrop for the photographs. The backdrop has a huge influence on the overall feel of the images, taking it from rustic to refined with a switch from the pallet to the ebony floor sample. As you can see, Lowe's and Home Depot can be a great place to pick up photo backdrops.
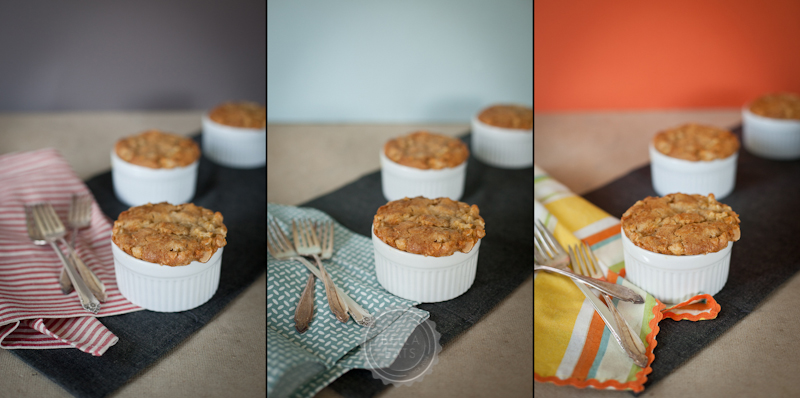
TEXTURES + COLOR

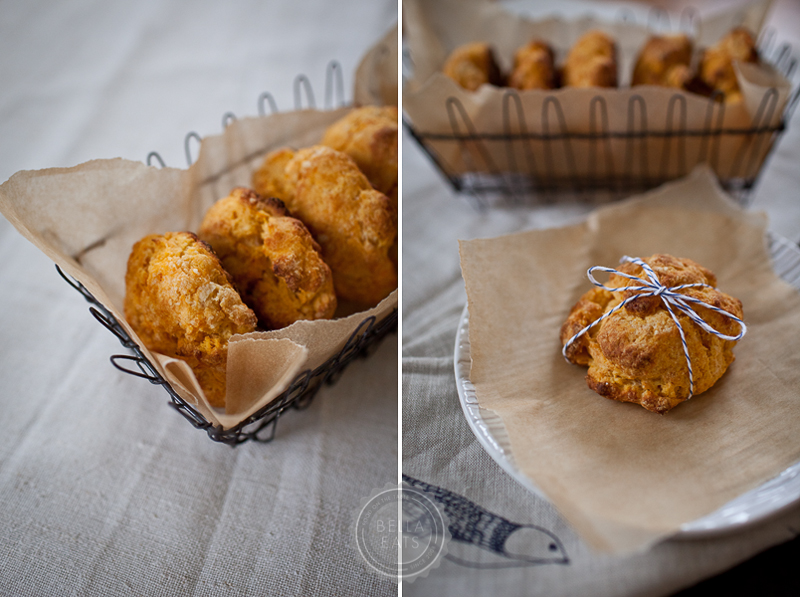
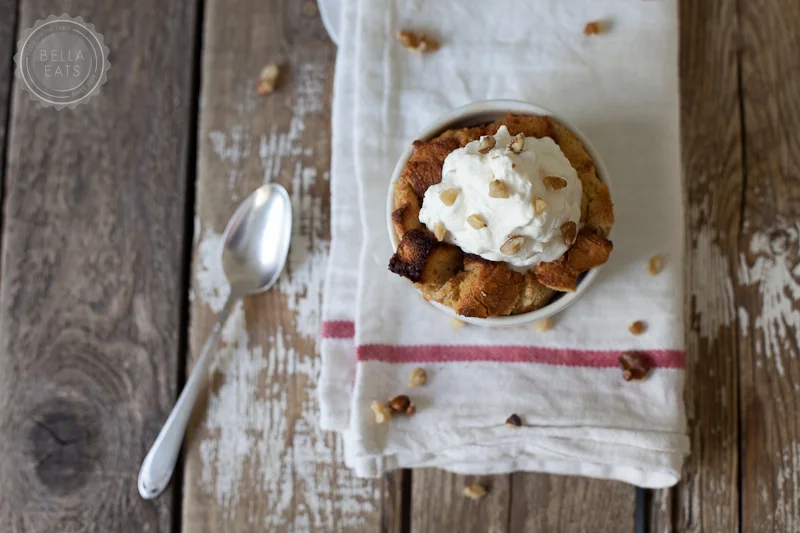
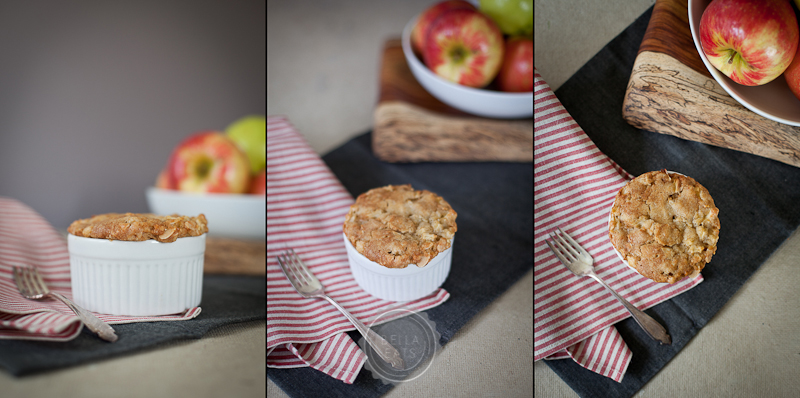
Once I've chosen the dishes and the backdrop, I move on to the styling of the images. Again, colors + textures can have a huge influence on the overall feel of the scene. Below I've shown examples of those little apple cakes styled in three simple ways, from neutral to pastel to festive. This recipe was pretty much a blank slate, given its neutral tone and white ramekin. But, imagine this beet risotto in that orange scene...blech!

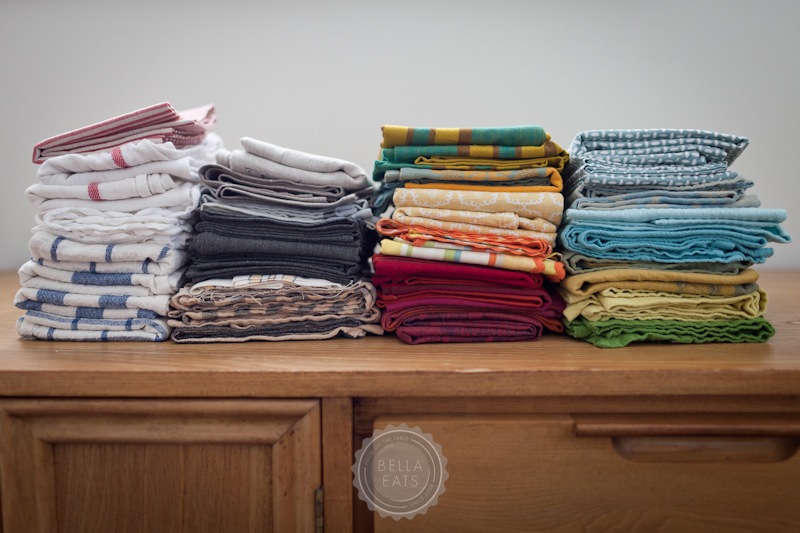
I have a slew of colored and patterned papers and linens that I sort through all the time. The key is to have a good variety so you never get bored. Sometimes, though, I will realize that I've really had a thing for the pallet paired with natural linen and antique silverware (who doesn't?) and have to force myself to think outside of the neutral box, which is typically my preference. Again, challenge yourself! Find a fun linen or paper and work to style your entire scene around it.

VIEWPOINT

There are three viewpoints typically used in food photography: front, angled, top. I use them all, typically in each post. If you find yourself always shooting from one direction be sure to switch things up and challenge yourself to a new point of view. 
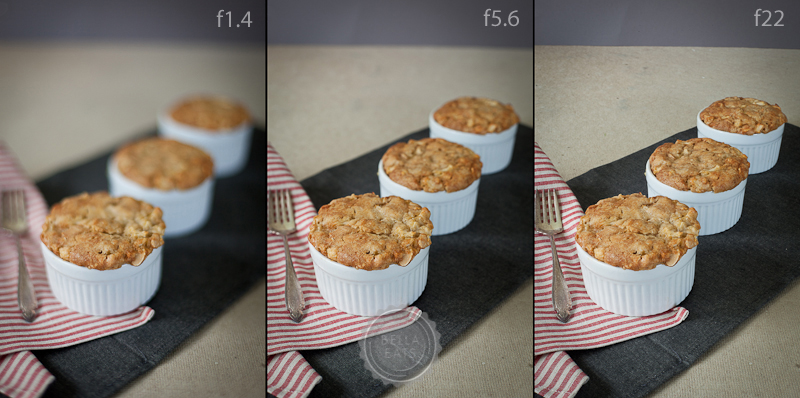
DEPTH OF FIELD

The depth of field in an image refers to the depth of the image that is in focus, and is controlled by the camera's aperture. This is a subtle nudge to explore the settings on your camera beyond 'auto'. Again, none of these is the 'right' aperture to set your camera to, but is simply a demonstration of how the story you tell with your art can be influenced by the depth of field.

FOCAL POINT

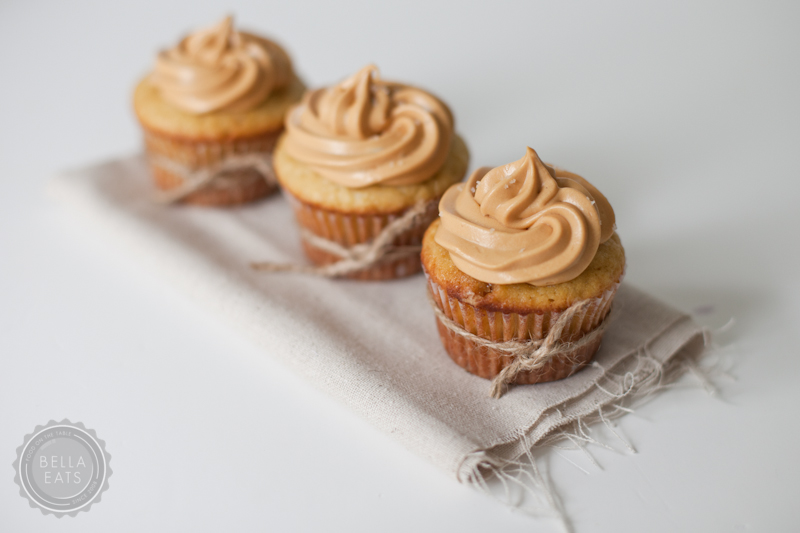
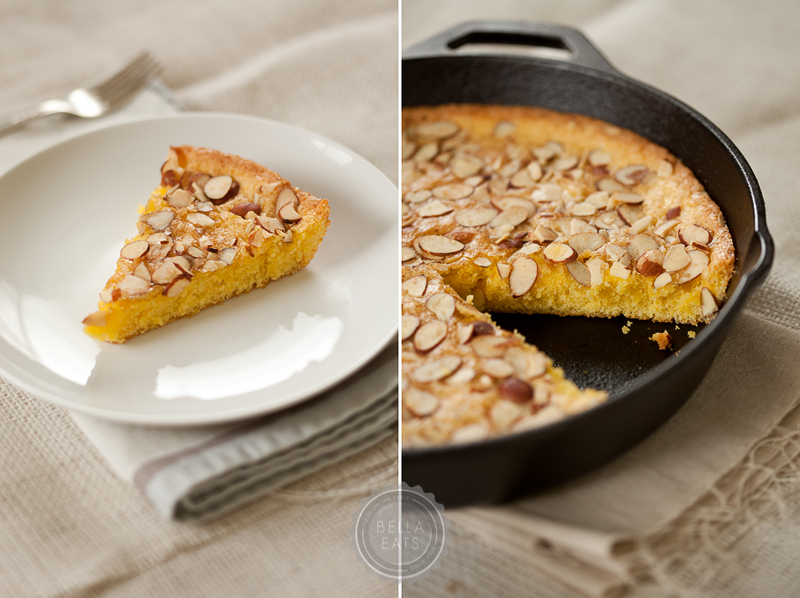
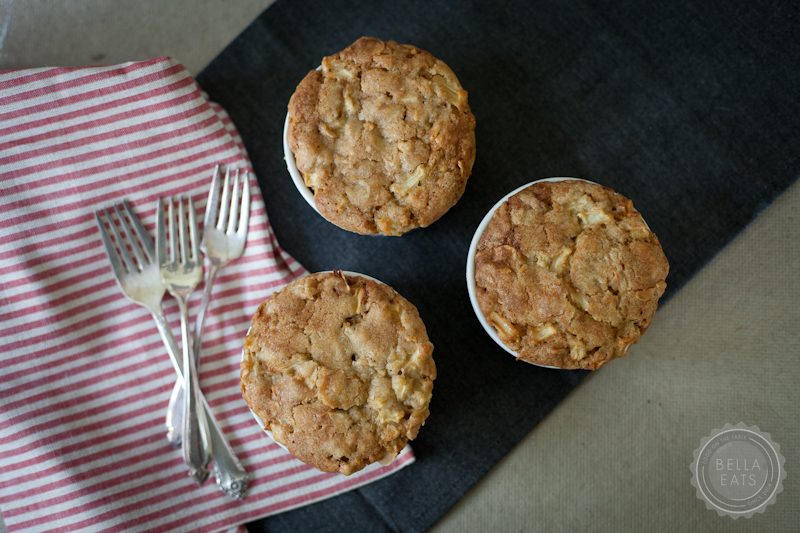
Similar to the depth of field, the point of focus in the image can alter the story told. Below I've focused on the first, the middle, and then the last cake. In the image below that I've focused first on the forks and then on the cake. Quite literally, the focal point will draw attention to the point of the image that you wish to be the focus, and it doesn't always fall right in the middle of the frame.

CROP

Does the whole dish need to be present in the frame for you to convey its qualities?

CLUTTER

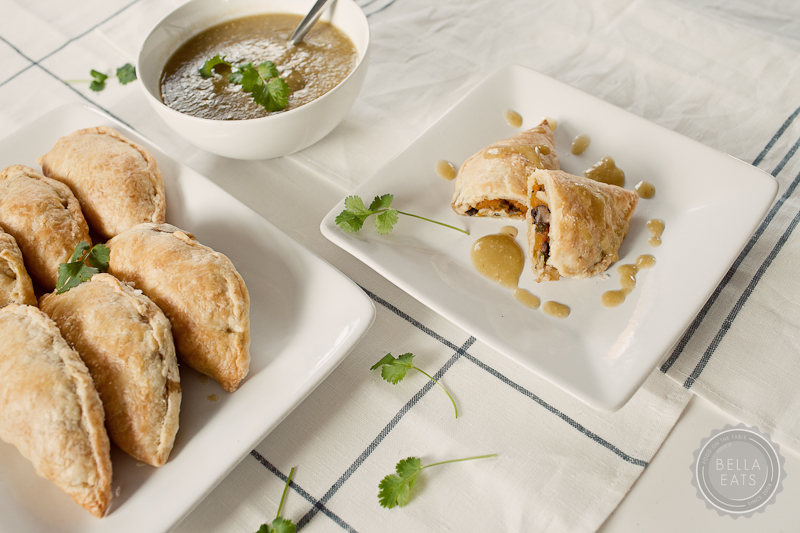
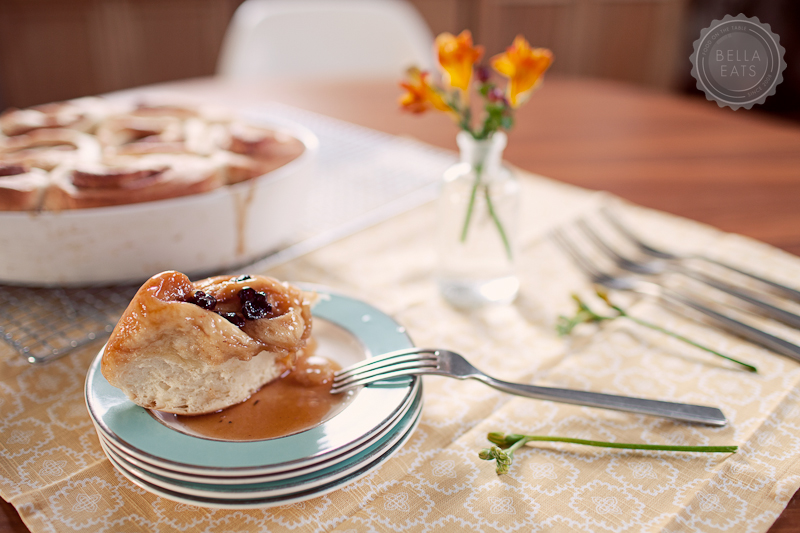
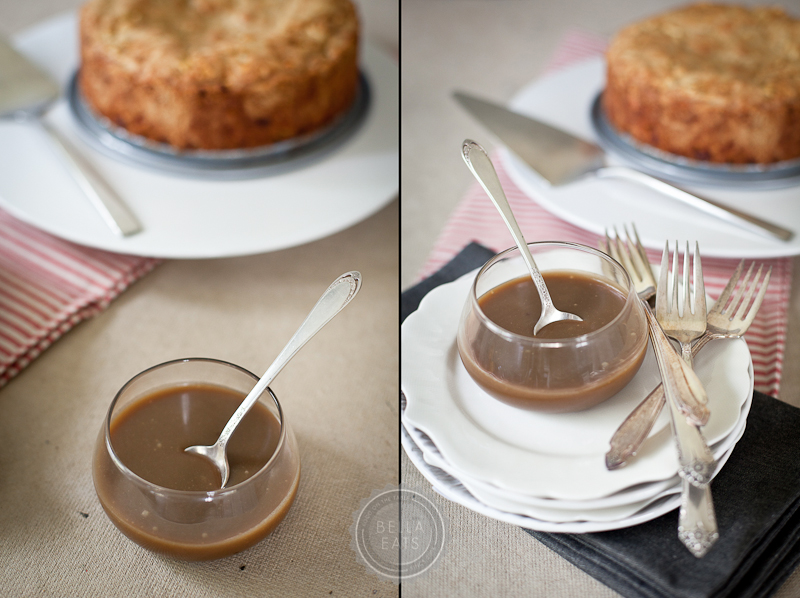
I often find that less is more. In the case of the two images below, I really wanted to show the sauce I made to accompany the cake. However, the image on the left felt a bit too cluttered, and I was much happier with the shot once I removed the little bowl.

Instead, I found two different ways to set up and style additional images with the sauce as the focus. I would probably pair one of these with the image on the right, above, in a blog post.

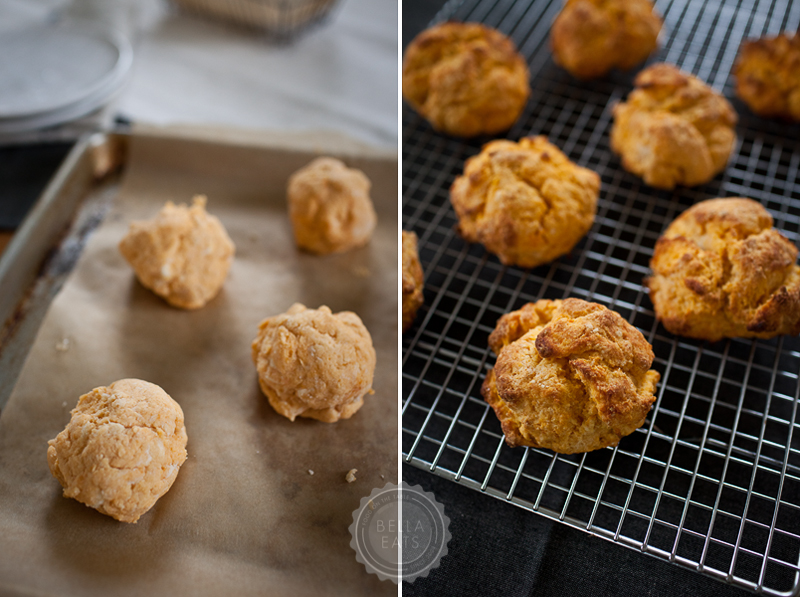
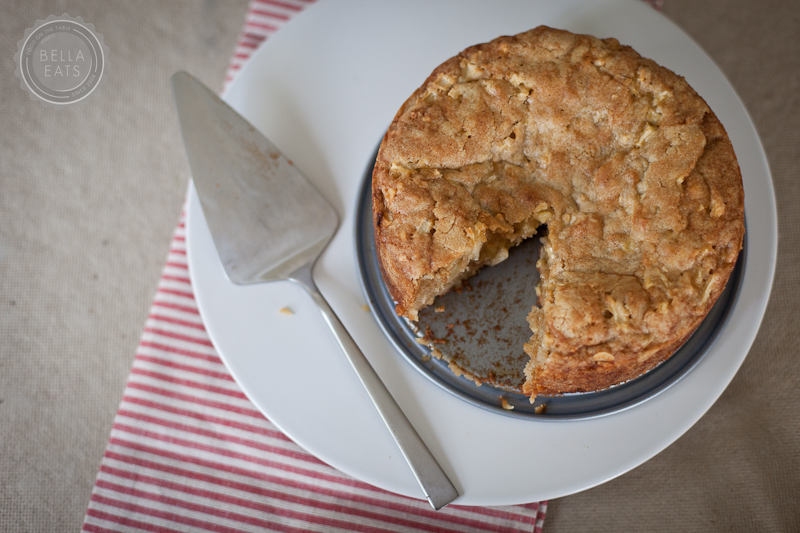
SHOW MORE OF THE STORY

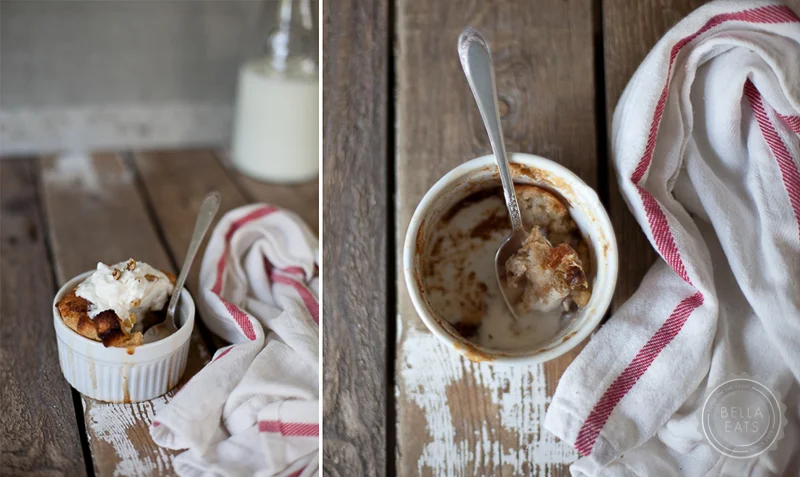
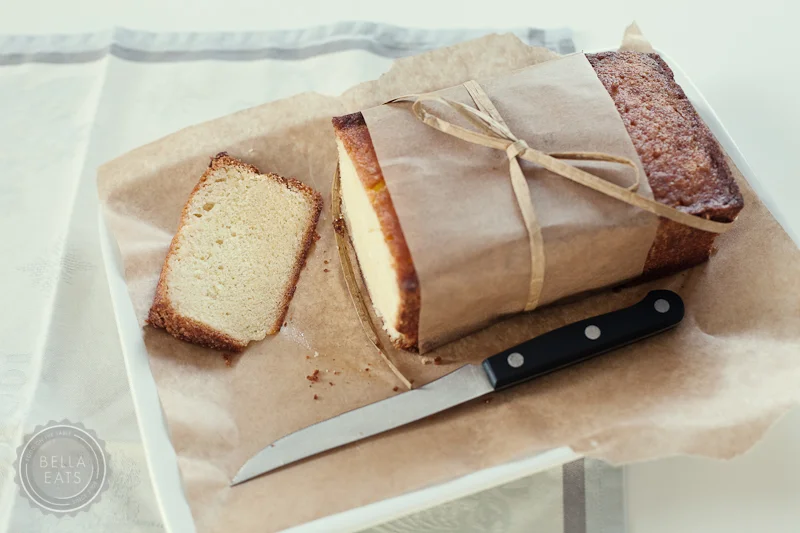
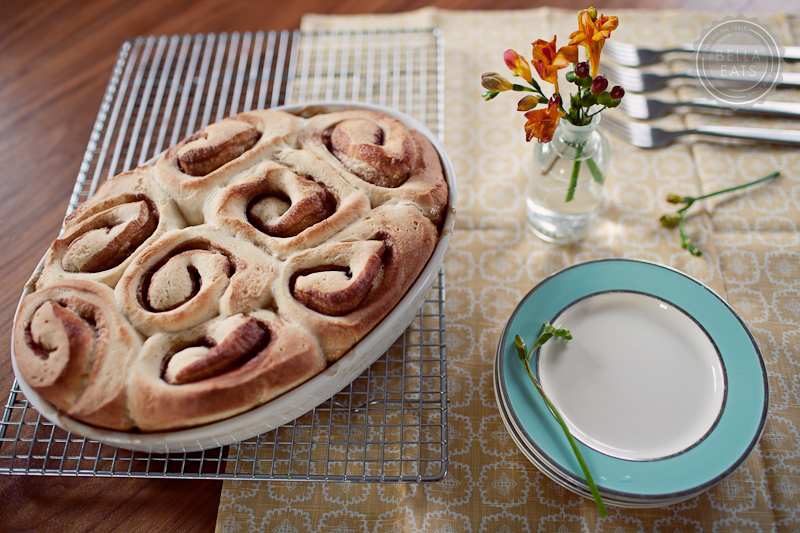
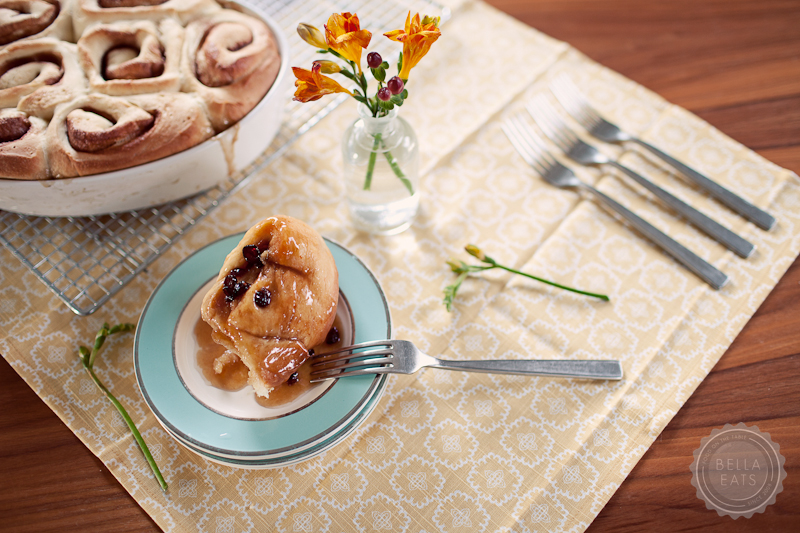
Don't lose sight of the fact that food is meant to be eaten, and showing only the final, pristine cake is not the whole story. Slice it, dish it, eat some of it, and photograph each of those stages. Some of my favorite images show a half-eaten piece of cake or an empty plate, typically found at the end of a post.

POST-PROCESSING

It is my goal to do as little post-processing as possible, always. My love for photography falls in the styling and capturing of images, not in sitting behind my computer tweaking settings until the image looks nothing like what I caught in-camera. I adore Adobe Lightroom 3, and do most of my editing there. It is a powerful editing program and fantastic for organizing my images, of which I take a lot. For an average Bella Eats post I'll take between 60-100 images, and typically whittle them down to 10 that actually go in the post. Lightroom is great for that process. I rarely take images into Photoshop, and when I do it is usually only to remove a stain from a backdrop paper I've used one too many times, or to collage multiple images together (I am still not happy with doing this in Lightroom, for some reason). I even add my watermark as I export images at web-resolution from Lightroom.

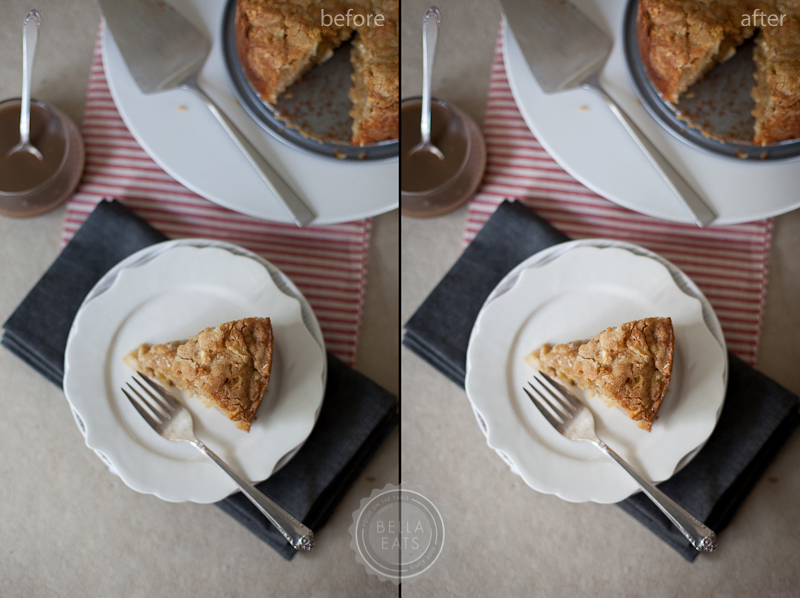
The image on the left is straight from the camera, and on the right after a little brightening, a little warming, and a little clarity.....and that's about it.

Same for the images below, except I also removed that little paint spot from the homosote, also in Lightroom. I can be picky.

And...that's it! My process for capturing photographs of food. Again, if there are any specific questions, please ask in the comments section below! I'll go ahead and answer one right now, because I know I'll get it:

Q: What camera equipment do you use for food photography?

A: Canon 5D MkII, Canon 50mm f1.4, Canon 100mm f2.8, Canon 35mm f1.4L

On to cake. Seriously, this recipe is one of our new favorites. I seem to say that a lot, but I really, really mean it with this one. So simple, so delicious, easy to travel with (I lugged the full cake and the mini cakes to the festival for my demonstration last night, and they fared perfectly). It has a consistency similar to coffee cake - soft and spongey and laced with fruit and nuts. Meaning...it is great for breakfast. And you know I LOVE a cake that I can eat for breakfast. :)

Apple-Dapple Cake

from Mollie Cox Bryan's Mrs. Rowe's Little Book of Southern Pies (the original recipe is for pie)

makes (8) 4-inch cakes, or (2) 8-inch cakes

Ingredients

  • 3 eggs
  • 2 cups sugar
  • 1-1/2 cups light vegetable oil
  • 1 tsp vanilla extract
  • 3 cups all-purpose flour
  • 1 tsp baking soda
  • 1 tsp ground cinnamon
  • 1 tsp salt
  • 3 cups diced apples
  • 1 cup chopped raw or toasted nuts (I used sliced almonds)

Method

  1. Preheat oven to 350°F. Butter (8) 4-inch ramekins or (2) 8-inch cake pans.
  2. Beat the eggs, sugar, oil, and vanilla in a large bowl until thoroughly combined. Add the flour, baking soda, cinnamon, and salt and mix thoroughly. Stir in the apples and nuts until evenly distributed, then spoon the mixture into the prepared baking dishes.
  3. Bake for 40-50 minutes, until a toothpick inserted in the center comes out almost clean, then transfer cakes to wire racks to cool. (The small cakes took about 40 minutes, the larger the full 50 minutes.)

We enjoyed ours served with this rum caramel sauce.

blueberry scones with lime glaze

Andrea

I hold a firm belief that berries + citrus are one of the best combinations ever. Right up there with caramel + sea salt, peanut butter + banana, tomatoes + pasta. It's a shame that their seasons are opposite each other, with citrus at its height mid-winter and berries abundant mid-summer. That won't stop me, though. Be it berry jam, cobbler, tart, or muffin...it will involve lemons, limes, or oranges.

Also, I am a big fan of scones. If they are the right scones, that is. No dry, crumbly, lumps that turn to paste in the mouth for me. I like them softer; closer to the product of a marriage between scone and muffin. Easy to grab and eat in the car on the way to work, without the spray of crumbs across the lap when you arrive. 

These particular scones, made moist with buttermilk and bright bursts of blueberry, still hold a hearty texture thanks to the white whole wheat flour. I like to think that makes them a healthy breakfast treat, even if all that whole grain goodness does is cancel out the sugary glaze drizzled over top (shhh...just let me have that...please?). If you'd like an even fluffier texture, substitute all-purpose flour for the white whole wheat. And be careful not to overmix your dough, keeping in mind the same principles applied in biscuit-making...work fast and keep your ingredients cold. 

Happy Monday, friends! Have a lovely week.

Although they are best day-of, these scones can be stored in an airtight container for up to three days.

Blueberry Scones with Lime Glaze

makes 8 scones

Scone Ingredients

  • 3/4 cup buttermilk
  • 1 large egg
  • 1/2 tsp vanilla extract
  • 3 cups white whole wheat flour, or all-purpose flour for a fluffier texture
  • 4 tsp baking powder
  • 1/4 tsp salt
  • 1 tbsp lime zest
  • 8 tbsp cold, unsalted butter, cut into 8 pieces
  • 1/2 cup sugar (I used turbinado), plus extra for sprinkling
  • 1 cup fresh blueberries

Glaze Ingredients

  • 1 cup confectioner's sugar
  • 2-3 tsp lime juice

Method

  1. Preheat oven to 375*.  Spray a baking sheet with oil or cover with parchment paper.
  2. Mix buttermilk with egg and extract in a large bowl.
  3. Add flour, baking powder, lime zest and salt to a large food processor. Pulse until blended.  Add butter and pulse until mixture resembles course bread crumbs.  Add sugar and pulse again until blended.
  4. Add flour mixture to egg mixture and stir with a wooden spoon until a soft dough forms. Do not overmix. Add blueberries and carefully fold them into dough.
  5. Turn out dough on a floured board and give 5-6 careful kneads, just until well mixed and cohesive, trying not to crush too many of the berries.  Divide dough into 8 equal pieces and roll into balls before flattening into disks about 4 inches wide.
  6. Bake on prepared baking sheet for 20-25 minutes until medium brown.  Let cool on sheet for 5 minutes before moving to wire rack to cool completely.
  7. To make the glaze, mix the confectioner's sugar with 2 tsp of lime juice. Use a spoon to blend together into a paste, adding more lime juice a bit at a time until the glaze is spreadable.

dulce de leche cupcakes

Andrea

There's something in the water around here. It seems as if Brian and I are surrounded by friends having babies! We have officially become the only couple amongst our close Charlottesville friends who does not have a tiny addition to the family. And, it kind of freaks me out. Just a bit. We're not ready for all of that yet, but it sure does get the gears in your head turning when you're tickling those tiny toes or witnessing first giggles. Those turning gears, they're something that I was never all that sure I would experience and now that I am...wow. Mind-boggling. Brian has asked me more than once who I am and what I've done with his wife, for this whole biological clock thing was never something that either one of us gave a whole lot of merit. Well it exists, I assure you.

The arrival of these tiny humans brings along something that I can wrap my mind around...baby parties. The kind where both men and women are invited, and the focus is on good food and fun [yard] games and great friends giving advice to the new parents-to-be. I love an excuse to plan a party, and the arrival of a new being sure seems like a wonderful reason to celebrate! 

A couple of Saturdays ago I helped to plan a baby party for our good friends Tommy and Kristin. Their little girl arrives in just over a month, and we couldn't be more excited and happy for them! This party was a fiesta of sorts, decorated with bright balloons and citrus-y hues. We had carnitas tacos, and veggie tacos, and cilantro lime slaw, guacamole, black beans, and dulce de leche cupcakes. I fully intended to photograph the carnitas to share with you but, well, when you're co-hosting the party it is tough to remember to pick up your camera. I did manage to capture some images of the cupcakes, so they will have to do. I promise, you won't be disappointed.

These cupcakes come from Joy, who never ceases to amaze me with the cleverness of her recipes. If I think of something, chances are Joy's already done it. And every single recipe I've ever tried of hers has been a winner, so I typically don't question her methods. This was no exception. Seriously, who could go wrong with cream cheese and dulce de leche whipped into a buttercream frosting? It is one of the best things you'll ever taste, I promise.

Dulce de Leche Cupcakes

from joy the baker

makes 24 cupcakes

For the Cupcakes:

  • 3 cups all-purpose flour
  • 1/4 cup cornstarch
  • 1 1/2 teaspoons baking powder
  • 1 1/2 teaspoons baking soda
  • 1 teaspoon salt
  • 3/4 cup (1 1/2 sticks) unsalted butter, softened
  • 1 cup brown sugar
  • 1/2 cup granulated sugar
  • 1 teaspoon pure vanilla extract
  • 3 large eggs
  • 1 1/2 cup buttermilk

For the Frosting:

  • 8 ounces cream cheese, softened
  • 1/2 cup (1 stick) unsalted butter, softened
  • 3/4 cup dulce de leche (I used canned, Nestle brand, dulce de leche. Not the best, and next time I'll find a better brand, but it still worked well in the frosting.)
  • 1/4 teaspoon salt
  • 2 to 3 cups powdered sugar

To make the cupcakes:

  1. Place racks in the center and upper third of the oven and preheat to 350 degrees F.  Line two cupcake pans with paper or foil liners.  Set aside.
  2. In a medium bowl, whisk together flour, cornstarch, baking powder, baking soda and salt.  Set aside.
  3. In the bowl of an electric stand mixer fitted with a paddle attachment, add butter and sugars.  Beat on medium speed until fluffy and pale brown, about 3 minutes.   Stop the mixer, scrape down the sides of the bowl and add one egg.  Beat on medium for one minute.  Add the remaining eggs, one at a time, beating for one minute between each addition.  Stop the bowl and scrape down the sides as necessary. Beat in vanilla extract.
  4. Add half of the flour mixture to the egg and butter mixture.  Beat on low speed and slowly drizzle in the buttermilk.  Beat until just incorporated.  Stop the mixer, scrape down the bowl and add the rest of the dry ingredients.  Beat on low speed until just incorporated.  Remove the bowl from the stand mixer and finish incorporating with a spatula.  Try not to over mix.
  5. Divide the batter between the prepared cupcake pans, filling each liner about 2/3 full.  Bake for 18 to 20 minutes or until a toothpick inserted in the center of one of the cakes comes out clean.  Let rest in the cupcake pans before removing to a wire rack to cool completely.  Cupcakes should be completely cooled before frosting.

To make the frosting:

  1. Place cream cheese in the bowl of an electric stand mixer.  Beat on medium speed for about 30 seconds, until very soft and pliable.  Stop the mixer, scrape down the sides of the bowl and add the butter and dulce de leche.  Beat on medium speed until well incorporated.  Stop the mixer and add the salt and powdered sugar.  Beat on medium speed for about 3 minutes, until fluffy and lighter in color.  
  2. Use a large frosting tip to swirl the frosting onto the tops of the cupcakes.
  3. Garnish with fleur de sel, or coarse sea salt.

For more pictures of Tommy + Kristin's baby party, visit the AHPhoto blog!

bread pudding with amaretto cream

Andrea

bread pudding-8.jpg

Charlottesville is beautiful this time of year...lush new grass, lacy clouds of dogwood blossoms, confetti-hued azalea bushes. But my heart, it lies in another city at the end of April. Far, far south of here, where the air is heavy with music and the scent of chicory. Five years ago this Thursday, Brian and I were married against a cracked brick wall in a classic New Orleans courtyard on the most beautiful day of our lives thus far.  With 35 of our closest friends and family we paraded through the French Quarter, led by a jazz quartet we'd met on Royal Street during our very first visit to the Big Easy. I walked down the aisle to "It's a Wonderful World", we said our vows with our two best friends by our sides, we danced with those we love most, we ate incredible food for hours. What a day...and so hard to believe it was five years ago now.

Yes, this time of year has me longing for New Orleans. We were married in the midst of crawfish season, and luckily for us, we have a local market that brings crawfish into Charlottesville at exactly this time of year, just for our anniversary. Well, maybe not just for us, but the timing sure does work out well. On Friday, Brian brought home with him 1 dozen oysters, 4 pounds of crawfish, and 6 blue crabs. A flash decision was made and I found myself scrambling to make a bread pudding, the perfect ending to the NOLA Seafood Boil suddenly placed on our Friday night agenda. That dinner with dear friends was the next best thing to being in our favorite city, and another evening I won't soon forget.

Bread pudding is a classic New Orleans dessert. It is one that, when we first visited the city, I was entirely unconvinced of. I've come to my senses in the last few years, and might have recently declared bread pudding one of my favorite sweets. I won't deny that. This particular recipe was a new one for me, pulled from Chef Paul Prudhomme's classic cookbook, which hasn't led us astray yet. Chef Paul is a bit of a culinary god in our house...the man did invent the blackening method after all. I expected him to pull through for me again here, and we were not disappointed. This is a traditional bread pudding, made with stale bread and sweet custard and pecans and raisins, topped with Chef Prudhomme's fabulous Chantilly Cream. Because I wasn't expecting to make bread pudding (or any baked good at all, actually) last Friday afternoon, I found myself lacking in some ingredients. But even with a bit of tweaking it was a big hit, and I think the changes made might be permanent.

bread pudding-2.jpg
bread pudding-4.jpg
bread pudding-3.jpg
bread pudding-7.jpg
bread pudding-5.jpg

Bread pudding is best while still warm, but also makes for a really, really good cold breakfast. Trust me...it will sing with your coffee.

Bread Pudding with Amaretto Cream

from Chef Paul Prudhomme's Louisiana Kitchen, with minor modification

serves 8

Ingredients

  • 3 large eggs
  • 1-1/4 cups sugar
  • 1-1/2 tsp vanilla extract (I substituted almond)
  • 1-1/4 tsp ground nutmeg
  • 1-1/4 tsp ground cinnamon
  • 1/4 cup unsalted butter, melted
  • 2 cups milk
  • 1/2 cup raisins (I used golden raisins)
  • 1/2 cup coarsely chopped pecans, dry roasted (I've also used walnuts, and think that almonds would be quite good, too)
  • 5 cups very stale French or Italian bread cubes, with crusts on
  • Amaretto Cream (recipe below)

Method

  1. In a large bowl, beat the eggs on high speed until extremely frothy and bubbles are the size of pinheads, about 3 minutes (or with a metal whisk for about 6 minutes). Add the sugar, vanilla, nutmeg, cinnamon, and butter and beat on high until well blended. Beat in the milk.
  2. Butter (8) small ramekins, (1) 9x5 loaf pan, or (1) 9" square glass dish. (Truly, any of these works.) Place a layer of bread cubes in the greased pan(s). Sprinkle with the golden raisins and nuts and layer bread cubes over top to fill pan. 
  3. Pour the egg mixture over top of the bread cubes and toss (or gently press the cubes down into the liquid so that all are coated, but not covered). Let sit for about 45 minutes, pushing the bread down into the liquid occasionally. Preheat oven to 350°. 
  4. Place the pan(s) in the preheated oven and immediately drop the temperature down to 300°. Bake for 40 minutes, until top is just starting to golden. (If you use small ramekins, bake for just 25-30 minutes). Increase the oven temperature to 425° and bake until pudding is well browned and puffy, about 15 to 20 minutes more.
  5. Serve with Amaretto Cream.

Amaretto Cream

modified from Chef Prudhomme's Chantilly Cream (which is really, really delicious...I just didn't have the right liqueur.)

Ingredients

  • 2/3 cup heavy cream
  • 1 tbsp amaretto
  • 1/4 cup sugar
  • 1 tbsp dairy sour cream

Method

  1. Refrigerate a medium-size bowl and beaters until very cold. Combine the cream and Amaretto in the bowl and beat with a handheld mixer on medium speed for 1 minute. Add the sugar and sour cream and beat on medium just until soft peaks form, about 3 minutes. Do not overbeat!
  2. Try not to eat the entire bowl. But if you do, I understand completely.
bread pudding-6.jpg

swedish visiting cake

Andrea

swedish cake-1.jpg

Spring. My backyard has gone from yellow to pink to white (or, daffodils to plum and apple blossoms).  Each afternoon over 60° has me longing to get outside, in the sunshine, with a glass of white wine in my hand. Preferably, with my husband or a girlfriend by my side and my dogs at my feet. This season brings with it a jovial state of mind. And with that comes the desire to be amongst friends, sharing in the pleasantness of open windows and the greenish light of sunbeams passing through new growth.

I believe it is imperative for every person to have a quick and simple cake in their repertoire. One that, when invited over for a last-minute afternoon visit, or next-day weekend brunch, is easy to whip up using ingredients always on hand. I have a few, but I think that this Swedish Visiting Cake is my very favorite. Not too sweet, but with a substantial, moist crumb, it can pass for either dessert or a morning coffee cake. I adore the crunch of almonds atop the dense base, and the way the edge and bottom of the cake crisp to create a shell that keeps it all together. You know, just in case you choose to pick up an entire slice between your thumb and forefinger. No need to dirty a dish if you're sitting outside and your other hand is occupied with a glass...

swedish cake-2.jpg
swedish cake-3.jpg
swedish cake-4.jpg
swedish cake-5.jpg

I found this recipe last year on Melanger, and it is not surprising that after making it once it has remained at the top of my list. Julia's taste in baked goods is steady; never too rich, most often simple and leaning towards rustic, always comforting. If you haven't yet, you should visit her lovely site.

Swedish Visiting Cake

from Baking: From My Home To Yours by Dorie Greenspan, via Melanger

serves 8

I realized this time, after I'd already prepared the pan and staged the table for photographs, that I was out of vanilla extract. So, I used a full teaspoon of almond extract instead. The cake is delicious both ways.

Ingredients

  • 1/2 cup (1 stick) unsalted butter, melted and cooled, plus more to grease pan
  • 1 cup sugar, plus extra for sprinkling
  • zest from 1 lemon
  • 2 eggs
  • 1/4 tsp salt
  • 1 tsp vanilla
  • 1/2 tsp almond extract
  • 1 cup all-purpose flour
  • 1/4 cup sliced almonds

Method

  1. Place a rack in the center of your oven and preheat oven to 350°. Butter a seasoned 9-inch cast iron pan. (If you don't have a cast iron pan, a 9-inch cake pan works as well). 
  2. Pour sugar into a medium bowl and add lemon zest. Use your fingers to rub the zest into the sugar, until the sugar is moist and fragrant.
  3. Add the eggs, one at a time, whisking to combine.
  4. Add the salt and extracts and whisk to combine.
  5. Stir in the flour using a rubber spatula.
  6. Fold in the melted butter.
  7. Pour batter into your prepared pan and smooth top with rubber spatula. Sprinkle almonds over the top of the batter and finish with a sprinkle of sugar.
  8. Bake for 25-30 minutes until the edges are golden brown and starting to pull away from the edge of the pan.
swedish cake-6.jpg

red velvet cupcakes with cinnamon cream cheese frosting

Andrea

We're not big on Valentine's Day plans in our house, typically choosing to stay home for a dinner cooked together paired with a nice bottle of wine. And really, how is that different from most nights around here? But this year Brian has something special up his sleeve, and despite my persistent quest for answers, he hasn't slipped me the slightest hint about what he's up to. It's impressive, really, because we're usually the couple that exchanges gifts as soon as we've purchased them, never able to hold out for the birthday, anniversary, or holiday they are truly meant for. I've got to say, I'm pretty excited. The anticipation is killing me! :)

When you're a recipe blogger you really can't avoid Valentine's Day, despite our typical lack of celebration at home. The red food coloring and sprinkles and heart-shaped cookie cutters are part of the job, and I really am okay with it. Any excuse to bake is fine by me. This year for my Valentine's baking (a week early, so that I could share with you here) I decided to go with a more natural palette - a toned-down burgundy cake and cream frosting, adorned with a simple craft ribbon. Which, I think, makes these red velvet cupcakes the perfect "all-grown-up" Valentine's Day dessert. 

Now I wouldn't call myself a red velvet cake aficionado, as I've never really understood the appeal of it before now. It's just red cake...right?!? Not really. I love the subtle chocolate flavor and soft crumb of these cakes, made light and moist with buttermilk. And the cinnamon cream cheese frosting is so completely delicious that it's a wonder any made it to the domed tops. Seriously, I could have eaten the entire bowl on its own. Don't skip this frosting in favor of a fluffy white version, the cupcakes just wouldn't be the same.

Happy Valentine's Day, all! I hope you spend the day, and each one after that, with those you love.

PS: There's nothing wrong with sprinkles, and if you're looking for some (along with the story of my breaking a little boy's heart), I suggest my Valentine's Day post from last year. :)

Red Velvet Cupcakes with Cinnamon Cream Cheese Frosting

from Hummingbird Bakery Cookbook via Joy The Baker

makes 12 cupcakes. double the recipe to make two 9-inch layer cakes.

Cupcake Ingredients

  • 4 Tablespoons unsalted butter, at room temperature
  • 3/4 cup sugar
  • 1 egg
  • 3 Tablespoons unsweetened cocoa powder
  • 2-1/2 Tablespoons red food coloring (I used a gel food coloring...about 1 tsp mixed with enough water to make 2-1/2 tablespoons...which is why my cupcakes are more burgundy than red)
  • 1/2 teaspoon vanilla extract
  • 1/2 cup buttermilk
  • 1 cup plus 2 Tablespoons all-purpose flour
  • 1/2 teaspoon salt
  • 1/2 teaspoon baking soda
  • 1-1/2 teaspoons distilled white vinegar

Method

  1. Preheat oven to 350*. Line standard muffin pan with paper liners.
  2. In the bowl of a stand mixer with paddle attachment, cream the butter and sugar together until light and fluffy. Add the egg, and beat until well-incorporated, scraping down the bowl as needed.
  3. In a separate bowl, mix together the cocoa, food coloring, and vanilla extract to form a paste. (I used 1 tsp of gel food coloring with water added to equal 2-1/2 tbsp, which is why I think my cupcake color isn't as vibrant as Joy's.) Add to the batter and mix thoroughly, until completely combined. Be sure to scrape the sides and bottom of the bowl to be sure that all of the batter is equally colored.
  4. Turn the mixer to low and slowly add half of the butter milk. Mix to combine. Add half of the flour and mix to combine. Repeat with the last of the buttermilk and the last of the flour. Scrape the bowl, turn mixture to high, and beat until smooth.
  5. Turn the mixer back to low and add the baking soda, salt and vinegar. Turn mixer up to high and beat for 1-2 minutes until smooth.
  6. Spoon the batter into paper-lined cupcake pan and bake at 350* for 20-25 minutes, until a toothpick inserted in the center of a cupcake comes out clean. If you have doubled the recipe and are baking 2 pans at once, be sure to rotate the pans halfway through baking.
  7. Cool on rack in pan for 10 minutes, then remove from pan and allow to cool completely before frosting.

Frosting Ingredients

I go light on frosting, so this made the perfect amount for a double-batch of cupcakes. If you're making a layer cake, you'll probably want to double it.

  • 2-1/3 cups powdered sugar, sifted
  • 3 Tablespoons butter, room temperature
  • 4 ounces cream cheese, cold (I used room temperature)
  • scant 1/4 teaspoon ground cinnamon

Method

  1. Cream the butter in the bowl of a stand mixer with paddle attachment.  Add the powdered sugar and cinnamon and mix at medium-slow speed until well combined. 
  2. Add the cream cheese all at once and beat at medium-high for 5 minutes, or until the frosting is light and fluffy. Do not over-beat as the frosting can become runny quickly.

banana date bread

Andrea

banana date bread-6.jpg

I'll admit...I've shared this recipe before. It was a long, long, time ago, way back in the first few months of Bella Eats' existence. I claimed then that this was the best quick bread I'd made...ever. And now, 2 years and many loaves later, I'm sticking to that statement. This recipe is at the tippy top of my list of favorites, loved so much that the old photographs just didn't do it justice. And so, when the baking urge hit me mid-afternoon last week (as it does most afternoons these days) I decided to capture new images of this old friend.

I love the melded scents of banana and cinnamon punctuated by sweet dates, which take on an almost caramel flavor. Diced apple keeps the bread wonderfully moist while adding its own, very subtle, sweetness. Made without oil, with whole wheat flour, and sweetened naturally, it is not absurd to have several slices of the loaf in one sitting without feeling guilty. Add a smear of almond butter to a thick slab and you have quite the hearty and filling breakfast or afternoon snack, while a quick zap in the microwave and a thin sliver of butter make for a lovely not-too-sweet dessert.

Happy Friday, Friends!

banana date bread-1.jpg
banana date bread-3.jpg
banana date bread-4.jpg

If you've been around since the beginning and already added this recipe to your repertoire, you might notice that I've made a small change in the ingredients. Instead of the 1/2 cup of applesauce previously present, I've substituted non-fat Greek yogurt. I've found that the overall texture is improved and the bread has a better, more shapely, rise. 

This loaf freezes quite well for up to 3 months if wrapped tightly in plastic wrap and again in foil. 

Banana Date Bread

makes 1 loaf

Ingredients:

  • 2 very ripe bananas, mashed
  • 1/2 cup fat free, vanilla, Greek yogurt
  • 1/2 cup turbinado sugar
  • 1 egg
  • 1/2 cup peeled, chopped, tart apple
  • 6 medjool dates, chopped
  • 1-1/4 cup white whole wheat flour
  • 1 tsp baking soda
  • 1/2 tsp salt
  • 2 tsp ground cinnamon
  • 1/4 tsp nutmeg

Method:

  1. Preheat oven to 350*F. Grease a 9x5 loaf pan.
  2. In a large bowl, combine the bananas, yogurt, sugar, egg, apple, and dates. 
  3. In a medium bowl, combine the flour, baking soda, salt, cinnamon, and nutmeg.
  4. Add the dry ingredients to the wet and stir until just combined. Pour batter into prepared pan.  
  5. Bake for 45-55 minutes, until a toothpick inserted into center of bread comes clean. Cool in pan on rack for 10 minutes. Remove loaf from pan and cool on rack completely before slicing.
banana date bread-5.jpg

lemon-drenched lemon cakes

Andrea

Today I made and re-photographed this Lemon Drenched Lemon Cake for a project I am working on with Retail Relay. Also, for a dinner party Brian and I are going to tonight. Except this time, I am topping it with Blackberry Compote. MmmHmm...

Happy Weekend, Everyone!

lemon cake-2.jpg
lemon cake-1.jpg
lemon cake-3.jpg

This recipe makes 2 cakes.  After reading some comments from Joy's readers I would not recommend trying to bake this cake in any pan other than loaf pans.  Also, I used ALL of the syrup.  I just kept brushing layer upon layer of syrup over the tops of the cakes, allowing each application to soak in before adding another.  And, when there was just a bit left in the bowl, I poured it onto the serving plate and plopped the cakes right on top of it, allowing the bottoms to soak it up and get nice and lemon-y.  If you're not a lemon fanatic like me, you might want to only use 1/2 the syrup.

Lemon Drenched Lemon Cakes

Recipe adapted from Dorie Greenspan via Joy the Baker.  Be sure to check out the lovely pictures of this cake on Joy's site, since I was a bit of a slacker and didn't get many...

Cake:

  • 2-2/3 cups all-purpose flour
  • 2-1/2 tsp baking powder
  • pinch of salt
  • 2-1/3 cups sugar
  • 1-1/2 tsp vanilla
  • 6 large eggs, preferably at room temperature
  • 2/3 cup heavy cream
  • zest of 2 lemons, finely grated
  • 1 stick, plus 7 tbsp unsalted butter (15 tbsp total), melted and cooled

Syrup:

  • 1/3 cup water
  • 1/4 cup sugar
  • juice of two lemons

Method:

  1. Center a rack in the oven and preheat the oven to 350 degrees F. Butter two 9x5-inch loaf pans, dust the insides with flour and tap out the excess. Even if the pans are nonstick, it’s a good idea to butter and flour them.
  2. Sift together the flour, baking powder and salt.
  3. Put the sugar and the lemon zest in a large bowl, working with your fingers, rub them together until the sugar is moist and thoroughly imbued with the fragrance of lemon.
  4. Add the eggs and whisk them into the sugar, beating until they are thoroughly incorporated. Whisk in the extract, then whisk in the cream. Continuing with the whisk, or switching to a large rubber spatula, gently stir in the dry ingredients in 3 or 4 additions; the batter will be smooth and thick. Finish by folding in the melted butter in 2 or 3 additions. Pour the batter into the pans, smoothing with a rubber spatula.
  5. Bake for 55 to 60 minutes, or until a knife inserted into the center of the cakes comes out clean. As soon as the cake goes into the oven, make the syrup. After about 30 minutes in the oven, check the cakes for color- if they are browning too quickly, cover them lightly with foil tents.
  6. Stir the water and sugar together in a medium saucepan over medium heat until the sugar melts, then bring to a boil. Remove the pan from heat and stir in the lemon juice. Pour the syrup into a heatproof bowl and let cool.
  7. When the cakes test done, transfer them to a wire rack to cool for 5 minutes before unmolding them and turning them right side up on the rack. Place the rack over a baking sheet lined with wax paper and, using a thin skewer, cake tester or thin-bladed sharp knife, poke holes all over the cakes. Brush the cakes all over with the syrup, working slowly so that the cakes sop it up. Leave the cakes on the rack to cool to room temperature.

Blackberry Compote

Ingredients:

  • 3 cups fresh or frozen blackberries
  • 1/2 cup water
  • 1/2 cup sugar
  • 1 cinnamon stick

Method:

  • Place all ingredients in a medium saucepan over medium heat. Bring to a strong simmer for 20 minutes, stirring occasionally, until compote has thickened and reduced. Allow to cool, and serve over slices of cake.
  • butternut squash + mushroom empanadas

    Andrea

    It may seem odd to be posting a recipe for empanadas in the dead of Winter. To me empanadas are a Summer food, or maybe Fall; plucked up from a street vendor or taco stand, wrapped in waxed paper, eaten as you walk an outdoor festival or Charlottesville’s downtown pedestrian mall. They are perfect on-the-go, warm weather, sandals and short sleeves food; self-contained pockets of goodness you can eat as you walk. Outside. In the sunshine. So why, then, am I sharing these with you in the gray and bitter cold of January?

    Well, for one, I am long overdue in posting this recipe on Bella Eats. Had I uploaded the images of empanadas just after making them, at the beginning of October, when butternut squash was just starting its weekly appearance on our menu, there would still be Fall festivals and backyard BBQs to attend. I wavered with whether or not to even publish this one, thinking that I’d lost its window of opportunity along with that of a handful of apple dishes I’d prepared, until I received an email from a friend on Saturday. She and her husband were on their way to Bali. Bali! In January! How lovely.

    Shortly after reading that email I watched Eat, Pray, Love (which, it turns out, is not nearly as good as the book) and stared longingly at the beaches and bike riding and sundresses of Indonesia, the warmth of it all seeping from the screen. That is what I crave this time of year, the ability to escape to someplace warm and tropical, if even for just one meal. If you’re at all similar to me then a dish like these empanadas, which are made up of Winter-ish ingredients but convey the spirit of warmer times, will be just what you’re looking for this January.

    Unless, of course, your resolutions for the new year include limiting luxuries like butter in your diet. To that I say, “everything in moderation” and “invite some friends over”! These rich, savory, chock-full-of-butter pockets certainly are not something to have on hand for multiple days at a time, and so are really the perfect thing to make and experiment with when you have plans to eat with a group of people. Just as empanadas are an excellent walking food, they also work well at a mostly-standing, “lose the Winter blahs with tequila in one hand” party. I have a feeling that we will all be looking to add one of those gatherings to our calendars towards the end of this gray and dreary month, so keeping this recipe close will be handy. Trust me.

    Butternut squash roasted with mushrooms and wrapped in a delicate, butter-full pastry has all the makings for a hearty Fall-Winter meal. The fresh tomatillo sauce, however, does throw me off. In a space where I try to share mostly seasonal recipes, anything that calls for tomatillos in the heart of January seems a bit hypocritical, does it not? Luckily, there are some good options for jarred tomatillo salsa out there, any of which would be an excellent (and much less time-intensive) addition to the empanadas. I would, however, keep this sauce in mind next Summer when tomatillos are available, and think about making and putting some away for the Fall and Winter months ahead.

    Butternut Squash + Mushroom Empanadas with Tomatillo Sauce
    from Gourmet, October 2002
    makes 8 empanadas

    Filling

    • 1 cup diced (1/4 inch) butternut squash
    • 1/2 cup finely chopped white onion
    • 6 small garlic cloves, minced
    • 2 tbsp olive oil
    • 2 (2 to 3 inch) fresh jalepeño chiles, seeded and ribs discarded, finely chopped
    • 1 pound fresh exotic mushrooms, trimmed and coarsely chopped (I just used cremini mushrooms, because I had them)

    Sauce

    • 1 dried pasilla de Oaxaca chile (I used a canned chipotle chile in adobo sauce, also, because I had it) chopped finely
    • 3 garlic cloves, left unpeeled
    • 1 pound fresh tomatillos, husks discarded and tomatillos rinsed and quartered
    • 1/4 cup finely chopped white onion
    • 1/4 cup water
    • 1/2 tsp salt

    Empanada Dough (from Gourmet, October 2004 - makes enough for 12 empañadas)

    • 2-1/4 cups unbleached all-purpose flour
    • 1-1/2 tsp salt
    • 1 stick (1/2 cup) cold unsalted butter, cut into 1/2 inch cubes
    • 1 large egg
    • 1/3 cup ice water
    • 1 tbsp distilled white vinegar

    Egg Wash

    • 1 large egg beaten with 1 tbsp water

    Method

    1. First, make empanada dough. Sift flour and salt together in a large bowl. Blend in butter with your fingertips or with a pastry blender until mixture resembles course meal with some (roughly pea-size) butter lumps.
    2. Beat together egg, water, and vinegar in a small bowl with a fork. Add to flour mixture, stirring with fork until just incorporated (the mixture should look shaggy).
    3. Turn out mixture onto a lightly floured surface and gather together, then knead gently with heel of your hand once or twice, just enough to bring dough together. Form dough into a flat rectangle and chill, wrapped in plastic wrap, at least one hour.
    4. Next, make filling. Preheat oven to 400˚. Combine together the squash, onion, garlic, jalepeño, and mushrooms. Toss with olive oil and a good sprinkling of salt and pepper, and spread in an even layer on a baking sheet. (The Gourmet recipe differs here, boiling and sauteing the vegetables. I love the flavor that is brought forth with roasting, so chose to cook the filling using this method instead.) Roast for 25-35 minutes, until the squash is tender and the mushrooms have released their liquid, stirring every 10 minutes or so. Remove from oven and cool in pan on rack.
    5. Meanwhile, make the sauce. Heat dry, non-stick pan over moderately high heat until hot, then toast unpeeled garlic until lightly blackened, 2 to 3 minutes on each side. Cool garlic and peel.
    6. Simmer tomatillos, onion, garlic, chile, water, and salt in a large saucepan, covered, until tomatillos are very tender, about 20 minutes, and cool slightly. Puree sauce in a blender (or with an immersion blender) until smooth (use caution as liquid is VERY hot). Return sauce to pan and season with salt. 
    7. Finally, assemble the empanadas! Keep the oven heated to 400˚. Divide dough into 12 equal pieces and form each into a disk (you will only need 8 of these pieces, the rest can be stored in the freezer for up to 1 month). On a floured surface, roll out one disk into a 6 to 7 inch round. Spoon about 1/3 cup of filling onto center and brush edge of pastry with egg wash. Fold dough in half to form a half-moon, enclosing filling, and press edges together to seal. Crimp edge decoratively and move empañada to a large baking sheet. Make 6 more empañadas using the same method.
    8. Lightly brush empanadas with remaining egg wash and sprinkle tops with coarse sea salt. Bake on middle rack of oven until golden, 25-30 minutes. 
    9. While empanadas are baking, reheat sauce. Cut each empanada in half when slightly cooled, and drizzle about 3 tablespoons of sauce around them. The sauce will keep for about a week in an airtight container in the refrigerator, and is wonderful as a salsa or drizzled over burritos, fish, or chicken. 

    breathless

    Andrea

    Hi, friends. How are you? Goodness...well, it has been awhile, hasn’t it? We’ve missed a lot these last few months...such as apples. A trip to Boston and Halloween. Pumpkins and cranberries. The second anniversary of Bella Eats. And then there was Thanksgiving, and the first snow, and a trip to Florida and, finally, Christmas and the end of another year. Wow. So many opportunities to share food and photos and life with you all and I missed them, each one. I don’t want to start this first post back after three months gone with an apology, so, I won’t. Instead I’ll just say “Hi!” And, “I’m back!” And finally, “If you’re still here...thank you!”

    What I do have to say about these last three months is this...they were full. So very full. The full you feel after an extraordinary meal; one that involves ten-too-many bites, an unbuckling of pants, and a slouching down in one’s chair followed by a long, low groan. So satisfying, but when you look down at your plate there are still ten more bites waiting, and you think to yourself “Can I do it?”. Somehow, you do, and at the end of it all you’re left with no choice but to lie down someplace dark and quiet. 

    The thing about those big meals is that they are typically surrounded by a tableful of loved ones, conversing and laughing and drinking and eating right alongside you. They are so jovial and supportive that you don’t even notice the fullness until it is too late, and then they are there to moan and groan with you, and to reminisce about the wonderfulness that was the meal consumed. Been there? I thought so. And that is precisely what the last three months has felt like.

    I am typically a very stick-to-the-path kind of girl. I follow directions well, read books and watch shows in sequence, knew what I wanted to be when I grew up at twelve years old. But three months ago I took a detour; strayed from the road I’d been traveling and forged a new trail through uncharted territory. 

    I quit my architecture job in order to pursue photography as a career. 

    That sentence leaves me giddy; so full of excitement that it is difficult to sit in this chair and continue typing. Not only is it unbelievably amazing to be chasing after a dream I never thought possible, but the unwavering support of family and friends has left me breathless.  There are scary moments, certainly, when I peer ahead and begin to doubt my ability to move forward with sure and confident steps. But then, out of nowhere, I’ll receive an email or phone call or Facebook message or tweet (what a funny world we live in, huh?) and I take another step, and another, and another until I am running so fast that I fear I won’t be able to stop. I am breathless, I tell you.

    Finally, with the conclusion of a semester of teaching and 100% of my concentration set on photography, I have time for Bella Eats again. This fact I find nearly as exciting as my decision to change paths; to move towards a big dream shimmering at the horizon.  Bella Eats is part of that dream and, in fact, even the generator of it. Without this site I may not have renewed a passion for photography born long ago and lost in my pursuit of architecture. And I certainly wouldn’t have met all of you, or formed real friendships with some very inspiring and brave individuals. I owe much to this place I’ve carved from the world wide web and the people I’ve connected to through it, and am happy to finally be able to give some of that energy back.

    And now, let’s talk about breakfast.

    Recently, breakfast has slipped into the role of “Andrea’s favorite meal with friends”. It is usually enjoyed out, at any one of a handful of local joints, with someone I most likely haven’t seen in some time. That seems to be the case with most of my friends these days, who all seem equally as busy as I, and the breakfast hour is one that isn’t typically prescheduled for some other task. It is a mighty fine way to kick off a weekday, leaving you content and happy from the time, food, and news shared. 

    If I could, I would make each and every one of you these sticky buns one morning this week. They take a bit of planning and an early morning wake-up call, but the end result is quite worth the effort. Paired with a cup of coffee and perhaps a few slices of crispy bacon, the soft, pillowed interior makes the perfect vessel for a sticky sauce of caramel and cranberries. We made them twice within a week, once for Thanksgiving guests and again for friends...just because. 

    CRANBERRY ORANGE STICKY BUNS

    adapted from Peter Reinhart's The Bread Baker's Apprentice
    makes 8-12 large sticky buns

    Ingredients

    • 6-1/2 tbsp granulated sugar
    • 1 tsp salt
    • 5-1/2 tbsp unsalted butter, at room temperature
    • 1 large egg
    • 1 tsp grated orange zest
    • 3-1/2 to 4 cups unbleached bread flour
    • 2 tsp instant yeast
    • 1-1/8 to 1-1/4 cups whole milk, at room temperature
    • 1/2 cup cinnamon sugar (6-1/2 tbsp granulated sugar plus 1-1/2 tbsp ground cinnamon)
    • Caramel Glaze (see below)
    • 1/4 cup dried cranberries

    Method

    1. Cream together the sugar, salt, and butter on medium-high speed in an electric mixer with paddle attachment. Whip in the egg and orange zest until smooth. Add the flour, yeast, and milk. Mix on low speed until the dough forms a ball. Switch to the dough hook and increase the speed to medium, mixing for approximately 10 minutes, or until the dough is silky and supple, tacky but not sticky. You may have to add a little flour or water while mixing to achieve the desired texture. The dough should pass the windowpane test and register 77˚ to 81˚F. Lightly oil a large bowl and transfer the dough to the bowl, rolling it around to coat it with oil. Cover the bowl tightly with plastic wrap.
    2. Ferment the dough at room temperature for approximately 2 hours, or until the dough doubles in size.*
    3. Mist the counter with spray oil and transfer the dough to the counter. Roll the dough with a rolling pin or press and stretch with fingertips, lightly dusting the top of the dough with flour to keep it from sticking. Roll or press into a rectangle about 2/3 inch thick and 14 inches wide by 12 inches long. Don't roll too thin, or the resulting buns will be tough and chewy. Sprinkle the cinnamon sugar over the surface of the dough and roll the dough up into a cigar-shaped log, from the long side. With the seam side down, cut the dough into 8 to 12 even pieces each about 1-3/4 inches thick.
    4. Coat the bottom of 1 or more baking dishes or baking pans with sides at least 1-1/2 inches high with a 1/4 inch layer of the caramel glaze. Sprinkle on the cranberries. Lay the pieces of dough on top of the caramel glaze, spacing them about 1/2 inch apart.** Mist the dough with spray oil and cover loosely with plastic wrap.
    5. Proof at room temperature for 75-90 minutes, or until the pieces have grown into one another and have nearly doubled in size. You may also retard the shaped buns in the refrigerator for 2 days, pulling the pans out of the refrigerator 3 to 4 hours before baking to allow the dough to proof.***
    6. Preheat the oven to 350˚F with the oven rack on the lowest shelf. Place a baking sheet lined with foil on that oven rack to catch potential overflow.
    7. Bake the sticky buns for 30-40 minutes, or until golden brown. Keep in mind that the sticky buns are really upside down, so the heat has to penetrate through the pan and into the glaze to caramelize it. The tops will become the bottoms, so they may appear dark and done in order for the underside to be fully baked.

    CARAMEL GLAZE

    Ingredients

    • 1/2 cup granulated sugar
    • 1/2 cup firmly packed brown sugar
    • 1/2 tsp salt
    • 1/2 pound unsalted butter, at room temperature
    • 1/2 cup light corn syrup
    • 1 tsp orange extract

    Method

    1. Cream together the granulated sugar, brown sugar, salt, and butter for 2 minutes on high speed with the paddle attachment. Add the corn syrup and orange extract. Continue to cream for about 5 minutes until light and fluffy.

    You probably will not need all of the glaze for the buns. Refrigerate and save any excess for future use, it will keep for months in a sealed container.

    NOTES:

    * When the weather is cool I warm the oven to its lowest setting, 170˚, and then turn it off. I place the fermenting dough in the oven to rise and have much better luck than just leaving it on the calendar in our 60˚ house.

    ** Clearly my baking dish pictured was too small.  But it's pretty, so I dealt with it.

    *** The first time I made these I made the dough and fermented it the night before I wanted to bake it. After shaping the rolls and placing them in the pan on the glaze I covered them with plastic wrap and refrigerated them. I set my alarm for 4 hours before I wanted to put them in the oven, took them out of the refrigerator, and went back to bed.  They came out beautifully.

    at summer's end

    Andrea

    Hello. My name is Andrea. I write this food blog, Bella Eats. You may remember me, or due to my long absence you may not. I’m sorry about that, truly I am. I miss this space! Life has been busy. So so so busy. I started teaching architectural design at the University of Virginia. Teaching. At a University. !!! And before that teaching officially began there was training for teaching. And in the middle of all of that I photographed the wedding of a dear friend I’ve known since the fifth grade. Fifth grade! She was such a beautiful bride, and if you’re interested in seeing some of those images please check out the AHPhoto blog.

    Oh, and I started a photography business. Because I love taking pictures of people. And buildings. And food. So if you know anybody who needs somebody to take pictures of people, or buildings, or food...feel free to send them my way. I’d appreciate it so so much. And thank you, all of you, who have commented and tweeted and emailed your support. You’re the best, truly.

    And yes, I am still working for an architecture firm here in Charlottesville. So...yeah. Busy.

    It feels as though summer has completely passed by Bella Eats. Since June I’ve posted about cherries, blackberries, and blueberries. There have been no luscious heirloom tomatoes, no juice-laden peaches, no golden ears of corn. I even have a new trick for releasing kernels from their cob without making a complete mess of the kitchen counter and floor, and I haven’t had the opportunity to share it with you. That is sad my friends, because this trick is a good one. It will change the way you view corn entirely. Soon, I hope.

    Way back in the middle of July our dear friend Kristin celebrated her birthday. She celebrated with us, and with this lime tart topped with blackberries from our garden. Blackberry season is just about over, a sign that summer is drawing to a quick close. Our bush has shed it’s bounty completely, leaving only the tiny shriveled berries that didn’t ever come to full ripeness. Our freezer is packed full of quart-size bags of the frozen fruit, our pantry shelf stocked with various forms of blackberry jam. This tart was one of the last recipes made this summer using berries fresh from the garden, and looking at these pictures already has me feeling nostalgic.

    What is it about food that stirs memories stronger than those evoked by any other sense? While blackberries don't take me back to any point of my childhood, they do plop me down solidly in our backyard here in Charlottesville. For the past 4 years we've spent countless July and August evenings standing in our garden, bowls in hand, fingers stained purple, arms eaten by mosquitos, quietly and contently plucking berries one-by-one from a bush WE planted. I know that forever, no matter where we are, when I pop a freshly picked blackberry into my mouth I will be transported back to this place. I love that.

    If you’re lucky you can still find pints of deep purple blackberries at your local farmers’ market, and if you do, I recommend you make this dessert before summer's end. The crust is quite perfect, nearly the consistency and flavor of a shortbread cookie. It doesn't flake and melt in your mouth like many pastry shells, but instead offers a firm vessel on which to carry a scoop of zippy lime curd. And scoop you will, because this tart never really sets up to a solid, sliceable state. Which is fine by me. The delightful combination of sweet shortbread, tart curd, and fresh blackberries had us all going back for seconds, despite our use of a spoon rather than a fork.

    For the record, I am so unhappy with the spacing that this new Wordpress theme defaults too, but I just haven't had the time/energy to dig into the CSS code to fix it. And, we're working on a redesign of Bella Eats to be launched right around the two year (two years!) anniversary of this site at the end of October.  So, please bear with me and the awkward/awful spacing of the text in my recipes... Thank you.

    Lime Tart with Blackberries

    from bon appetit, June 2010 Ingredients for the lime curd:
    • 3 large eggs
    • 3 large egg yolks
    • 1 cup sugar
    • 3/4 cup fresh lime juice
    • 6 tbsp (3/4 stick) unsalted butter, cut into 6 pieces
    for the topping:
    • (3) 6-ounce containers fresh blackberries
    • 1 tbsp blackberry jam
    for the crust:
    • 1/2 cup (1 stick) unsalted butter, room temperature
    • 1/4 cup sugar
    • 1 large egg yolk
    • 1 1/4 cups all purpose flour
    • 1 large pinch of salt
    Method for the lime curd:
    1. Set a fine metal strainer over a medium bowl and set aside. Whisk the eggs, egg yolks, and sugar in another medium metal bowl to blend.  Whisk in lime juice.
    2. Set bowl over large saucepan of gently simmering water (do not allow bottom of bowl to touch water). Whisk constantly until curd thickens and an instant-read thermometer inserted into curd registers 178ºF to 180ºF, about 6 minutes.  Immediately pour curd through prepared strainer set over bowl.
    3. Add butter to warm strained curd; let stand 1 minute, then whisk until blended and smooth.  Press plastic wrap directly onto surface of curd, covering completely.  Refrigerate until cold, about 4 hours.*
    *Lime curd can be made up to 2 days ahead.  Keep chilled. for the crust:
    1. Using an electric mixer, beat the butter and sugar in a medium bowl until well blended, 1 to 2 minutes. Add egg yolk; beat to blend. Add flour and salt and mix on low speed until mixture resembles large peas. Using hands, knead in bowl just until dough comes together.
    2. Transfer dough to a 9-inch diameter tart pan with removable bottom. Break dough into pieces, then press dough evenly up sides and onto bottom of pan. Cover and chill 1 hour.**
    3. Preheat oven to 350ºF. Uncover crust and bake until golden brown, about 35 minutes. Cool completely in pan on rack.
    **Dough can be made 1 day ahead. Keep chilled. assembly:
    1. Remove sides from tart pan and place crust on plate. Spread lime curd evenly in baked crust. Arrange blackberries in concentric circles on top of tart.
    2. Place am in small microwave-safe bowl. Heat in microwave until jam is melted, about 15 seconds. Whisk to loosen and blend, adding water by teaspoonfuls if thick. Brush jam over berries.*** (I only brushed jam over the outer ring, because I liked how they looked without the glaze.)
    ***Tart can be made up to 8 hours ahead. Chill uncovered.
    Read More

    celebrate with citrus cupcakes

    Andrea

    Last weekend we gathered with friends to celebrate the forthcoming birth of a new family. The party [yes, party. this was not a baby shower. and yes, boys were invited.] was co-hosted by myself and two lovely ladies, all of us brought together by our shared bond to Joe and Erin, the parents-to-be. The event was in the works for two months.  Dozens of emails were passed between the three hostesses as we planned. The only request from Erin was that there be no diaper decorations and no silly shower games. No problem.

    We decided to throw a simple summer party and to decorate using colors inspired by the nursery; shades of blue, yellow, and green.  There was fruit-laden sangria and homemade lemonade, pulled-pork sandwiches and corn straight from Erin's family's farm. The weather was kind, overcast and cool with only the slightest spattering of rain. We sat outside sharing stories and laughter as candlelight flickered across happy faces long into the night.

    Also, we ate cupcakes.

    [To see more images of the evening, visit the AHPhoto blog.]

    I love an opportunity to make cupcakes, and an outdoor summer party seemed to be the perfect occasion. A quick email to Erin verified that she had no preference for cake flavor, which was lucky because I had already decided that chocolate wasn't an option. It just didn't fit in with the party decor, which is a perfectly valid excuse I assure you.

    And so I was left thinking about vanilla and lemon. It is no secret that I am a fanatic for citrus-flavored sweets, with four lemon cakescitrus sconeskey lime butter cookies, and coconut lime bars all listed on the Bella Eats recipe page. I should probably apologize for giving you yet another citrus dessert...but I won't. You just can't go wrong with citrus, and that requires no apology.

    The cake itself is actually a modification of an old favorite, borrowed from the Lemon Mousse Cake I made for my own birthday a few months ago. It is a chiffon cake, made light and spongy by the egg whites folded into the batter just before baking. The addition of lemon and orange zest brightens the flavor, but it is the swirl atop the golden domes that truly stands out. The meringue buttercream seemed to be a hit, although it is the most unusual frosting I have ever tasted. A finger swiped across the side of the mixing bowl produces a dollop of ultra-creamy spread that melts as soon as it hits the tongue. At first the taste buds are overwhelmed with the flavor of butter, which then melts away to become a bright pop of lemon, that then fades to the slow warmth of Grand Marnier. It is a three-step process using each third of the tongue - front, middle, back - in succession, with each flavor forming its own distinct statement. And it isn't too sweet, so you could easily eat several cupcakes without causing your teeth to ache.

    Not that I would know that...

    The frosting shapes beautifully, and despite my fears did not melt in the warm and humid evening air. A summer winner, for sure.

    Sunshine Citrus Cupcakes

    cake modified from the greyston bakery cookbook, pg. 46,  frosting from gourmet makes 18 standard cupcakes Cake Ingredients:
    • 5 eggs, separated
    • 1/4 cup (1/2 stick) unsalted butter, melted and cooled
    • 1/2 cup milk
    • 1-1/2 tsp vanilla extract
    • 1-1/2 cups unbleached all-purpose flour
    • 1-1/4 cups sugar
    • 2-1/2 tsp baking powder
    • 1/4 tsp salt
    • 1 tbsp lemon zest
    • 1 tbsp orange zest
    • 1/2 fresh lemon, seeds discarded
    Frosting Ingredients:
    • 4 large egg whites
    • 1 cup sugar
    • 2 sticks unsalted butter, cut into tablespoons and softened slightly
    • 1/3 cup orange liqueur such as Grand Marnier
    • 2 tablespoons fresh lemon juice
    Cake Method:
    1. Position a rack in the center of the oven and preheat oven to 350º. Line 1 standard muffin tin with 12 liners, and another with 6 liners.
    2. In a small bowl, combine the egg yolks, butter, milk and vanilla.  Set aside.
    3. In a large bowl, whisk together the flour, 1 cup of sugar, baking powder and salt to blend.  Add the lemon and orange zest and blend with your fingers to separate clumps. Add the egg yolk mixture and stir until well combined.  Set aside.
    4. In a clean dry bowl, using clean dry beaters, beat the egg whites on medium-high speed until they hold soft peaks.  Lower the mixer speed to medium and gradually add the remaining 1/4 cup sugar, beating the whites until they hold stiff peaks.  Stir about one-third of the egg whites into the batter to lighten.  Gently fold the remaining whites into the batter, in two batches, to blend thoroughly.
    5. Transfer the batter to the prepared pans, filling each muffin cup 3/4 of the way full.  Bake for 15 to 20 minutes, or until a wooden skewer inserted near the center of a cupcake comes out clean.
    6. Set the pans on a wire rack for 10 minutes to cool.  Remove the cupcakes from the pans and allow them to cool completely on wire racks.
    Frosting Method:
    1. Heat whites and sugar in a metal bowl set over a saucepan of simmering water, whisking constantly, until sugar is dissolved and a thermometer registers 160°F. Remove bowl from heat and beat mixture in standing electric mixer on medium-high speed until thick, glossy peaks form. If mixture is still warm, continue beating until cool. (this takes about 10 minutes)
    2. With mixer running, add butter, 1 tablespoon at a time, beating well after each addition. Add liqueur and lemon juice, beating on high speed until smooth and fluffy, about 10 minutes. If buttercream begins to separate, beat on high speed until smooth.
    Assemble:
    1. Use a pastry bag to pipe frosting over cupcakes once they are completely cool. Keep refrigerated until ready to consume.
    Congratulations Joe and Erin, we are so excited to meet your baby boy!
    Read More

    blueberry hill cupcakes, and a happy 4th to you!

    Andrea

    The 4th of July is upon us already!  I'm not sure why 2010 is in such a hurry to rush on by, but I do wish that she would slow down just a bit.  I had big plans for this week, some favorite salads and cocktails and desserts to share with you before the holiday weekend ahead of us.  But, well, time flew.

    I did manage to share one dessert with you, and here is a second.  The first was somewhat healthy, this one is not. Both are delicious, and either would make a nice addition to your picnic, bar-be-que, or party.  How to choose...

    I am keeping things short and sweet today, because I have family in town!  That means wandering shops on Charlottesville's Downtown Mall, stopping for gelato, lunch on a patio, pampering with my Momma, vinho verde on the back deck, sausages on the grill.  And that's just today!  Oh, the weekend we'll have.

    I hope that yours is just as lovely.  What are your plans?  (I really do want to know!)

    Perhaps you could make these cupcakes?  Lemony and chock-full of bright bursts of blueberry, they absolutely scream summer.  You'll love them, I'm sure.

    Blueberry Hill Cupcakes with Blueberry Glaze

    cupcakes from bon appetit, glaze from bella eats I've heard good things about the frosting that accompanies this recipe on bon appetit, but wanted something lighter and with a bit of color.  I bet a lemon buttercream or a lemon glaze would also be really delicious. Also, my "glaze" originally started out as a full-blown buttercream frosting.  I frosted one cupcake, but found the very sweet topping to be very overpowering.  The cake itself is so delicious that you really want to let it shine. Cupcake Ingredients
    • 3 1/4 cups all purpose flour
    • 1 1/4 cups sugar
    • 1 tablespoon baking powder
    • 1/2 teaspoon coarse kosher salt
    • 1/4 teaspoon baking soda
    • 6 tablespoons (3/4 stick) unsalted butter, melted
    • 1/4 cup canola oil
    • 2 large eggs
    • 1 cup buttermilk or low-fat yogurt
    • 1 cup whole milk
    • 1 teaspoon vanilla extract
    • 1 teaspoon grated lemon zest
    • 1 1/4 cups fresh blueberries, frozen for 4 hours
    Glaze Ingredients
    • 2-3 tablespoons blueberry puree (about 1/2 cup blueberries, pureed and strained if desired...I did not strain)
    • 4 tbsp butter (1/2 stick), room temperature
    • 1-1/2 cups powdered sugar
    Method
    1. Preheat oven to 350* F.  Line two 12-cup muffin pans with paper liners.  Sift flour and next 4 ingredients into a large bowl.  Whisk the melted butter and oil in a separate, medium bowl.  Add eggs; whisk to blend.  Whisk in buttermilk, milk, vanilla extract, and zest.  Add buttermilk mixture to dry ingredients; whisk just to blend.  Stir in frozen blueberries.
    2. Divide batter among liners.  Bake cupcakes until a tester inserted into center comes out clean, 23-27 minutes. Transfer cupcakes to racks; cool.
    3. Beat butter in electric mixer with whisk attachment until creamy.  Add about 1/2 the sugar slowly.  Add 2 tbsp of the blueberry puree and continue whisking to blend.  Add the last of the sugar and whisk to blend. Taste, and add more blueberry puree if desired.  You want the consistency to be like a loose buttercream; easy to spread but also easy to control (you don't want it running down the sides of your cupcakes).
    4. When the cupcakes are nearly cool, brush them lightly with the glaze.  You will find that the glaze will harden nicely in about an hour.
    5. Keep stored at room temperature in an air-tight container.
    Read More

    happy, happy day

    Andrea

    Last year at this time I was posting regularly about our backyard vegetable patch. I’d shared potato salad with our sugar snap peas, an earthy, herby frittata, and a rosy beet risotto. The garden was, while a bit overgrown, orderly and walkable. I visited it every day, scurrying through the gate in the morning after my runs to pick raspberries for breakfast, losing myself to daydreams as I stood with a hose each afternoon and soaked the soil under the tomatoes and peppers. I was oh-so-proud of our little plot, and oh-so-excited to share its progress with you all.

    In December, after harvesting the last of the carrots for our Christmas dinner, Brian and I mourned the fact that those were probably the last vegetables we’d see come from our current backyard. We were planning to move this Summer, and didn’t think it would be very smart to put a lot of time, money, or energy into a piece of land that would no longer be ours in just six months’ time. It made me sad. Very, very, sad.

    March came and went without us ordering organic compost to till into soil already rich from three years of amendment and gardening. There was no sprinkling of lettuce, kale, carrot, or beet seeds; no elaborate map drawn to show the exact location of each plant to come. May 15th, the last frost date for our part of Virginia, rolled by without us spending a Saturday planting tiny tomato, cucumber and pepper plants. The weeds grew, and grew, and grew...and I just let them.

    Multiple friends who don’t know our plans to move, but do know the joy we get from growing our own food, have asked “how’s that garden of yours?”. This single question, innocent as it is, elicits a panicked look from Brian, who tries to change the subject before I can launch into our sorrowful (to me) tale. About how, no, we didn’t plant any vegetables in our backyard this year. And no, we don’t think we’ll be moving into a new house in time to establish a new garden. And yes, I am devastated that we’re not spending a portion of our weekends weeding and watering and planting and harvesting. Harumph.

    In hindsight, we should have planted summer veggies. Things never move as quickly as anticipated, and our putting the house on the market was no exception. By now we could have been eating our own lettuce, cucumbers, sugar snap peas, and beets. Instead we’re buying them at the farmer’s market, which is the next best thing, but still not quite as satisfying. I’m getting over it. Really.

    However...our berries have been AMAZING this year. Strawberries, red and golden raspberries, gooseberries, blackberries. Thank goodness for hardy perennial fruit that grows no matter the neglect it’s received! Those shots at the top of the page are from my visit to the garden last Friday morning, when I first noticed that the blackberries are starting to ripen. I did a little dance, hurried back inside for my camera and a bowl, and proceeded to pick every single fully-black berry on the vine. Happy, happy day.

    This cake was actually made with blackberries that we grew last summer and froze. We had 8 quarts in our own freezer, and many more were given to friends. I'm betting that our harvest will be doubled this year, and we're not moving until I am proven right.  Stubborn?  Not me.

    Even if you have fresh blackberries on hand, you should still freeze them for at least 4 hours before adding them to the batter. The frozen berries, with the help of the syrup, will stay firmly rooted to the bottom of the pan without rising to the top (which will become the bottom) of the cake.

    The whole wheat flour provides the cake with a dense crumb, perfect for picking up between two fingers.  I made it for dessert, but I think it is even better for breakfast.  Not too sweet, hearty with whole grains, a nice compliment to a cup of coffee.

    Blackberry Upside-Down Cake

    from Sweet and Natural Baking, by Mani Niall serves 10 Ingredients fruit
    • 1/3 cup liquid fruit juice concentrate (or, agave nectar)
    • 2 tbsp canola oil
    • 3 cups frozen blackberries
    cake
    • 3 large egg whites, at room temperature
    • 3/4 cup liquid fruit juice concentrate (or, agave nectar)
    • 2/3 cup skim milk
    • 1/3 cup plus 1 tbsp canola oil
    • 2 tsp vanilla extract
    • 2 cups whole wheat pastry flour
    • 2 tsp baking powder
    • 1/4 tsp fine sea salt
    Method
    1. Position a rack in the center of the oven and preheat the oven to 350 degrees. Spray a 10-inch ovenproof skillet or springform pan with vegetable oil spray.
    2. For the fruit:  In a small saucepan, bring the fruit juice concentrate and oil to a simmer. Reduce the heat to low and simmer for 2 minutes. Pour into the prepared pan. Immediately arrange the blackberries in the pan in a single layer. Work quickly, as the syrup will harden rapidly. Place in the freezer while preparing the batter. (This will keep the fruit from floating to the top of the batter while baking.)
    3. For the cake:  In a medium bowl, using a handheld electric mixer at high speed, beat the egg whites until soft peaks form. Gradually beat in the fruit juice concentrate, beating until stiff peaks form. Reduce the speed to low and add the milk, oil and vanilla, mixing until well combined.
    4. In another medium bowl, whisk the flour, baking powder, and salt until combined. Add to the liquid ingredients and whisk until smooth. Remove the pan from the freezer and pour the batter over the fruit.
    5. Bake until a toothpick inserted in the center comes out clean, 35 to 40 minutes. Cool on a cake rack for 10 minutes. Run a knife around the inside of the skillet or springform to loosen the cake. Invert onto a serving plate. Let stand for 5 minutes so that the cake can absorb the juices. Remove the skillet of release the sides of the spring form and carefully lift off the bottom. Serve the cake warm or at room temperature.
    Read More

    perfect as they are

    Andrea

    Last month, at the very beginning of May (where did you go, sweet May?) Brian and I went strawberry picking. I’d received the email days before that shouted against a bright green backdrop “strawberries are here!”.   I anxiously await this announcement each year.  Not only does it mark Spring’s firm hold on this time in Charlottesville, it also foreshadows the other emails to come reporting the arrival of cherries(!) and peaches(!!) throughout the summer. (I'll add that, since it has taken me so very long to share this post and recipe with you, I've already received both the "cherries are ready!" and "peaches are early, and ready!" emails.  I'll try to do better this month with timely posting...)

    And so Brian and I hopped in the car that Friday and drove out to the country to fill a flat with ten pounds of bright and beautiful berries. Never mind the fact that we have a garden on the side of our house that is absolutely FULL of strawberry plants. Plants that have well exceeded their raised bed boundary and tumbled into the aisles of what was once a very organized patch. Plants that, during the time we were heading towards the orchard with windows down and music blaring, were completely covered with star-shaped flowers and tiny green fruit.  But those country strawberries, they were ready RIGHT THEN, and I just couldn’t wait another week for ours to ripen.

    There is something very special about moving slowly between those neat rows of plants, bending down to push emerald leaves aside, revealing the ripe and ready gems hiding in their shade.  The berries come off their stems with the most satisfying "snap!", and if popped in your mouth at that exact moment are one of the most delicious treats to ever touch your tongue.  Warmed by the sun, the fruit seems to explode in the mouth as vibrant juice seeps into every nook and cranny. It is so overwhelmingly good that you must close your eyes, tilt your face up towards the sky and slip into a little food dance of happiness.  Yes, I do that.

    Once home, I set to work finding recipes for our bounty.  I thought about pie and jam and cobbler, but in the end decided that the berries were perfect just as they were.  And so I rinsed them all and placed most in a large colander in the fridge, ready for breakfast yogurt and cereal, afternoon snacks and ice cream topping.  The pint that I set aside was slated for tiny tarts, the raw berries sliced thinly and laid across a filling of cooked rhubarb within a crisp, buttery shell.

    The marriage of rhubarb and strawberry is timeless, like that of chocolate and peanut butter, or coconut and lime.  One will never tire of the other, and folks will undoubtably continue to enjoy their combined company for years to come.  In these tarts, the rhubarb is cooked down in a process that resembles the making of jam, and the end result is quite similar to the classic jarred spread.  The tartness of the rhubarb is gently subdued by the sugar it is reduced with, but still punchy enough to provide nice balance to the sweet berries.

    The best part of these tarts is the strawberries themselves, kept raw and firm and perfectly sweet on their own.  Find the freshest fruit possible and you can't go wrong.

    Rhubarb Strawberry Tarts

    from The Greyston Bakery Cookbook makes one 9-inch tart or six 4-inch tarts Ingredients
    • 1/3 cup sugar
    • 1/2 cup water
    • 1-1/4 pounds fresh rhubarb, trimmed and cut diagonally into 1/4"-thick pieces (about 5-6 cups)
    • 1 pint strawberries
    • 1 fully baked 9" Tart Pastry (see recipe below), cooled
    Method
    1. In a heavy saucepan, combine the sugar and water.  Stir over medium-low heat until the sugar dissolves. Add the rhubarb, increase the heat, and bring to a boil.  Reduce the heat to medium-low, cover, and simmer for 5 minutes, or until the rhubarb is just beginning to soften.  Remove the pan from the heat.  Let stand, covered, for 10 minutes, or until the rhubarb is tender.
    2. Set a mesh strainer over a medium bowl and drain the rhubarb, reserving the liquid.  Allow the rhubarb to cool completely.  In a small saucepan, simmer the reserved liquid over medium-low heat for 5 minutes, or until it is reduced to a thick syrup.  Set the syrup aside and allow it to cool completely.
    3. Meanwhile, wash and hull the strawberries.  Thinly slice the strawberries lengthwise.
    4. Spread the cooled rhubarb evenly over the bottom of the tart shell.  Arrange the strawberry slices in concentric circles over the rhubarb filling, covering it completely.  Brush or spoon the cooled syrup over the top of the strawberries.  Chill before serving.

    Tart Pastry

    Ingredients
    • 1-1/4 cups all-purpose flour
    • 2 tbsp sugar
    • 1/4 tsp salt
    • 7 tbsp unsalted butter, cut into very small pieces and chilled
    • 1-3 tbsp ice water, as needed
    Method
    1. In a bowl, whisk together the flour, sugar, and salt to blend thoroughly.  Using a pastry blender, metal pastry scraper, two knives or your fingers, cut or rub the butter in the dry ingredients until the mixture resembles a coarse meal.
    2. Using a fork, stir in the water, 1 tbsp at a time, adding just enough for the dough to hold together without becoming wet.  Gather the dough into a ball and then flatten it into a disk.  Wrap the disk of dough in plastic wrap and chill for 1 hour.
    3. Remove the dough from the refrigerator.  Using a rolling pin on a lightly floured board, roll the dough to form a rough circle about 1/4" thick.  Carefully transfer the dough to a 9" fluted tart pan (or six 4" pans) with a removable bottom.  Press the dough lightly but firmly into the edges of the pan, allowing the excess dough to hang over the edges of the pan.  Roll the rolling pin over the top of the pan to trim the excess dough from the pan rim.  Pierce the bottom of the dough several times with the tines of a fork.  Chill for at least 30 minutes before baking.
    4. Position a rack in the center of the oven and preheat the oven to 400*F.  Line the chilled shell with foil or parchment and fill with pie weights, dried beans, or raw rice.
    5. Bake the shell for 12 minutes, or until the pastry is set and golden.  Carefully remove the foil or parchment and weights and continue to bake the shell another 10 to 15 minutes (a little less if you use the smaller pans), or until the pastry is golden brown.  If the edges start to brown too much, cover them with strips of foil or piecrust shields.  Cool on a rack.
    Read More

    the fallen plate

    Andrea

    Hello friends. Things have been a little bare around here lately, haven’t they? I am having a hard time believing that April slipped by with only two posts on Bella Eats. Two posts? How did that happen? We’ve been cooking and eating, I assure you, and I have a long list of recipes that I was planning to share last month. The photographs are all edited, and most are even loaded into drafts in my Wordpress dashboard. So what, you ask, is the deal?

    I’ll spare you the list of excuses because really, what it comes down to, is that life is just plain busy. I’ve tried my best to become a very good juggler, to keep all of the plates soaring high above my head with a flick of my wrist and the occasional impressive behind-the-back catch but, alas, one of those plates fell.

    The Bella Eats plate is a tough one to keep in the air when time is running short at the end of the day, mostly because of the words that accompany each meal that I share here. My time for writing comes after work, after running and yoga, after dinner and dishes, after free-lance photography edits and marketing projects. Lately when that time is upon me, the time to sit behind my computer and let the words seep from the well in my brain, down my arms and out through my finger tips...I find myself with an empty well.

    And so I go to bed. I cuddle in next to Brian with the sheets wrapped around my shoulders and two dogs crowding my feet. The ceiling fan whirs overhead and I attempt to match my breath to its subtle rhythm, incorporating techniques from my yoga practice in an effort to fall asleep as quickly as possible. But my mind, the mind that failed me for an entire hour prior to my giving in and coming to bed is now racing. There are 'to do' lists and emails to write and recipes and workout plans swirling around on their own paths, making a terrible knot of jumbled thoughts that only the clarity of morning will untangle.

    When sleep finally overtakes my body it is not without its own side effects. Suddenly my mind, not deterred by slumber, has all kinds of ideas about writing and work and life, weaving intricate stories through my dreams that are exciting and fascinating and inspiring.  The scenes are so vivid that I find myself waking up multiple times in the night, tossing and turning as characters new and familiar wind their way in and out of predicaments that oh-so-loosely resemble my waking hours. I find myself hitting 'snooze' on the alarm multiple times each morning, trying to catch the tail-end of these thoughts before they fizzle out and leave me with only a hazy shadow of something that I think, maybe, if I could just remember, might have been good. It seems that this is the only time I have for creative wandering, the only time not bogged down by obligations and responsibility. I relish in it, until I realize the time and jump from bed in a panic, beginning the daily process all over again.

    These extended 'snooze' sessions have caused me to rely heavily on grab-and-go breakfasts. The kind that, after hastily rising from bed and jumping in the shower, darting around the house looking for this shirt or that shoe, feeding dogs and packing a lunch allow me to simply reach into the freezer or pantry for a single item to stash in my bag and eat at the office. Gone are the mornings of leisurely breakfasts that involve turning on the oven and dirtying a pot, bowl and spoon. These days I am simply happy that I thought to freeze the leftover Carrot and Pineapple muffins I made weeks ago, and hopeful that soon, very very soon, my schedule will slow down to its normal pace. I am ready for that Bella Eats plate to soar again, to form high arcs above my head as words flow from my fingertips into this little space on the 'net.

    Until then, thanks for being here.  I am so happy you're reading.

    These muffins are incredibly moist, even after a 3-week stay in the freezer. They have a hearty crumb fortified by the whole wheat flour, and a subtle sweetness provided by the pineapple and the agave nectar. I find them quite filling when paired with a piece of fruit or a cup of yogurt for breakfast.

    Carrot Pineapple Muffins

    makes 12 whole grain, no added fat, naturally-sweetened muffins adapted from Sweet and Natural Baking, by Mani Niall Ingredients
    • 2-1/2 cups whole wheat pastry flour
    • 3 tbsp oat bran
    • 3/4 tsp baking soda
    • 1/2 tsp ground cinnamon
    • 1/4 tsp ground ginger (I will bump this up to 1/2 tsp next time)
    • 1/4 tsp salt
    • 4 large egg whites
    • 1/2 cup light agave nectar
    • 1/2 cup skim milk
    • 1-1/3 cups grated carrots (I peeled the carrots into long ribbons first, then chopped them finely)
    • 3/4 cup diced pineapple (I used canned, but will definitely use fresh next time)
    • 12 chunks of fresh or canned pineapple, about 1 x 1 x 1/2 inch in size
    Method
    1. Preheat oven to 350*.  Lightly spray a standard 12-cup muffin pan with vegetable oil spray.
    2. Sift together the flour, bran, baking soda, cinnamon, ginger and salt into a medium bowl and make a well in the center.
    3. In another medium bowl, using a handheld electric mixer set at high speed, beat the egg whites with all the agave nectar until soft peaks form.  Reduce the speed to low and gradually beat in the milk.  Pour into the flour well and stir with a wooden spoon just until combined.  Stir in the carrots and the diced pineapple.
    4. Spoon the batter into the muffin cups, filling about 3/4 of the way full.  Top each muffin with a pineapple chunk.  Bake the muffins until a toothpick inserted in the centers comes out clean and the tops spring back when pressed with a finger, 20 to 25 minutes.  Cool for 2 minutes, run a knife around the inside of the cups to release the muffins, and remove from the cups. Serve the muffins warm or at room temperature.
    To freeze, wrap each muffin individually in plastic wrap or aluminum foil.  Place the muffins in a Ziplock bag in the freezer. They should keep for up to 3 months.
    Read More

    a lovely ending

    Andrea

    Last week, while sharing lunch with a friend, standing in line at the post office, answering phones at work, passing a stranger on the sidewalk, Charlottesville folks were discussing snow. Big snow...at least for our little city. The forecasters were predicting another huge storm, rumored to rival the December 19th event that pushed its way into the #4 slot on Charlottesville’s list of historic snowfall totals. It was all very exciting, and a tad bit scary. We were warned of the heaviness of this snow, expected to be so much wetter than the last accumulation. We were told to prepare for power outages and potential roof collapse, to be ready to spend days in our homes and to have the supplies required to get us through that time.

    The city was a flurry of activity (ahem...pun intended) as residents scrambled to buy stores out of their supply of milk, eggs, and toilet paper. Snow shovels were a hot commodity, with those shops that managed to receive shipments putting a one-shovel-per-customer limit on purchases. We bought ice melt and candles, bread and cans of tuna, charcoal for our grill and meat and potatoes to place over the flame should we lose power and the use of our oven. We settled in, prepared for the worst, ready to weather the storm.

    In the end we wound up with nearly 15 inches of snow, 10 inches less than predicted after sleet clinked against our windows and prevented substantial accumulation for most of Friday night. We were lucky enough to lose power only once, and then for only an hour. Although the city did a fine job of clearing primary roads during and after the storm, we still chose to remain at home, warm and cozy, for the entire weekend.

    Brian and I have become quite adept at preparing for long periods of isolation in our house. We stock up on the necessities already mentioned, along with certain items that help to keep us entertained and pass the time - wine, multiple disks of Entourage, magazines and books, baking supplies. The last is the most important for me, as I take comfort in the fact that even if the sky were to dump 48 inches of snow across our lawn and we were to lose power for 7 full days, I could still make bread and cookies in our Big Green Egg. Also, I really like to bake, and the thought of three, uninterrupted days to do so makes me very, very happy.

    And so, along with the necessary non-perishables and paper goods, my grocery bags contained milk and eggs, flour and yeast as I left the market Thursday afternoon. I browsed through my cookbooks that evening, imagining each one of my mixing bowls tucked into various corners of the kitchen, plastic wrap stretched tight across their tops, plump balls of dough slowly rising within. Brian requested something sweet, a dessert-ish bread to smear soft butter across as an after-dinner snack. Not one to ever pass on the suggestion of something sweet, I dove right into thoughts of a bread swirled with cinnamon and sugar, laced with figs and walnuts, the crumb sweetened by a touch of honey.

    The loaf I was hoping for emerged from the oven just as the snow started to lighten Saturday evening. The intoxicating mélange of fresh-baked bread, sultry cinnamon, earthy walnuts and syrupy figs will forever bring to mind the vision of a silver-cloaked sun setting behind frosty trees, their limbs glimmering with a mask of tiny diamonds. A lovely ending, indeed.

    Cinnamon Fig Walnut Bread

    adapted from The Bread Baker's Apprentice, by Peter Reinhart, with inspiration from Tara of Seven Spoons

    makes two 1-1/2 pound loaves

    Ingredients

    • 1/2 cup buttermilk (or whole milk), at room temperature
    • 2 tbsp honey
    • 3-1/2 cups unbleached bread flour, plus extra
    • 1-1/4 tsp salt
    • 2 tsp instant yeast
    • 1-1/4 tsp ground cinnamon
    • 1 large egg, slightly beaten
    • 2 tbsp vegetable shortening, at room temperature
    • 3/4 cup water, at room temperature
    • 1 cup dried figs, chopped
    • 1 cup walnuts, chopped
    • 1/2 cup turbinado sugar (for cinnamon sugar swirl)
    • 2 tbsp ground cinnamon (for cinnamon sugar swirl)
    • 2 tbsp butter, melted
    Method
    1. Dissolve the honey in the buttermilk by heating both over low heat.  Allow to cool to room temperature.
    2. Sift together the flour, salt, yeast and cinnamon in a large mixing bowl.  Add the egg, shortening, buttermilk mixture and water. Stir together with a large spoon (or mix on low speed in a stand mixer with the paddle attachment) until the ingredients come together and form a ball.  Adjust with flour and water if the dough seems too sticky or too dry and stiff.
    3. Sprinkle flour on a counter and transfer the dough to the counter.  Knead (or mix on medium speed with the dough hook).  The dough should be soft and pliable, tacky but not sticky.  Add flour as you knead (or mix), if necessary to achieve this texture. Knead by hand for approximately 10 minutes (or by machine for 6 to 8 minutes). Sprinkle in the figs and walnuts during the final 2 minutes of kneading (or mixing) to distribute them evenly. If you are kneading with a mixer, you'll want to finish kneading by hand to avoid crushing the figs and walnuts, and to be sure to distribute them evenly.
    4. Lightly oil a large bowl and transfer the dough to the bowl, rolling it to coat it with oil.  Cover the bowl with plastic wrap and allow to ferment at room temperature for approximately 2 hours, or until the dough doubles in size.
    5. Mix together the 1/2 cup turbinado sugar and 2 tbsp ground cinnamon.  Set aside.
    6. Butter two 4x8 loaf pans.
    7. Divide the dough into 2 equal pieces.  On a lightly floured surface, roll one piece into a 5x8 rectangle. Sprinkle half of the cinnamon sugar mixture over the dough, leaving a small border around the edge of the dough.
    8. Starting at the short end, carefully roll the dough into a tight log*, sealing the seam as best you can. Tuck the ends up towards the seam, sealing as best you can. Place the log in a buttered loaf pan, seam-side down. Repeat with the second piece of dough. Spray the tops of the loaves with spray oil and cover loosely with plastic wrap.  Place in a warm, draft-free location to proof for 60 to 90 minutes.
    9. Preheat the oven to 350* with the rack in the middle of the oven. Uncover the loaves and brush the tops with melted butter.  Sprinkle the tops with turbinado sugar.
    10. Bake the loaves for 20 minutes. Rotate the loaf pans 180 degrees and continue baking for another 20 to 30 minutes, until the loaves are golden brown on top and lightly golden on the sides and bottom. They should make a hollow sound when thumped on the bottom.
    11. Immediately remove the loaves from their pans and cool on a rack for at least an hour before slicing and serving.
    *I'm guessing that my loaf pulled apart along the swirl because it wasn't rolled tightly enough. It is still perfectly textured and delicious, the slices just don't hold together well as you bite into them.

    The landscape during and after a winter storm is an amazing sight, always changing, different from one minute to the next. Every few hours I piled on layers of warmth, tucked my jeans into my boots, forced a hat over unruly hair, and trudged outside in the swirling snow to capture some of the magic.

    Read More

    a respite from gray skies

    Andrea

    Coconut and Lime.  A combination that brings to mind a stretch of white sand, bright hot sunshine, palm trees swaying in a warm ocean breeze, the scent of sunscreen permeating salty air.  From the vantage point of a low-seated, brightly-striped beach chair I can see the topaz water spread before me, a lovely backdrop for my fuchsia-coated toenails.  On my right a fruity cocktail with a lemon-hued umbrella waits patiently for my next sip.  In my lap rests a delightful book, set aside for a moment while I take in the view before me.

    A tropical island.  Are you with me?  I hope so.  Pull up a chair, apply your sunscreen, grab a drink and settle in for a nice long chat.  We need this, don't we?  A respite from gray skies that threaten to pour ice and snow over grass that has just recently emerged from underneath the last snowfall.  An opportunity to replace bulky sweaters, scarves and overcoats with swimsuits, gauzy tops and sandals.  An excuse to make Mojitos and Margaritas instead of Hot Toddies and Irish Coffee.

    If only I could escape to such a place.  Right now.  Just hours before the first few flakes of the impending snowstorm start to fall. Unfortunately, neither my bank account nor my work schedule can afford such a jaunt to the South at a moment's notice. Instead, I pushed my weekly grocery trip up by one day, stocking up tonight on items needed for a Saturday to be spent testing recipes as snow softly falls outside the kitchen window.

    Rather than a polka-dot bikini and broad-rimmed hat I'll be shuffling around in slippered feet and comfy sweats.  On the agenda? Spicy sausage and potato soup, some sugar cookies, a chickpea salad.  All are good cold weather fare, but I can't help but think that maybe I should be thinking a little differently. That maybe I should be whipping up another pan of these Coconut Lime Bars that cured my Winter woes two weeks ago.

    How does a tropically-themed dinner party in the middle of Winter sound?  That's not such a bad idea, is it?  We'd gather some friends, make a pan of enchiladas, a bright salad, some guacamole, and a tangy citrus dessert. We could pull the last few limes off of our little indoor tree (the only way citrus could possibly survive a winter in Virginia) and shake up some zippy margaritas.  I'll load the iPod with Jimmy Buffett and Bob Marley and turn the heat way up.  We'll chat about food and travel and books until the 'ritas kick in and folks start climbing on my dining table to belt out "one love...one heart...let's get togeeeeether and feel alllll right!" with their arm slung across their neighbors shoulder for support.  And nobody is allowed to mention the snow outside. Nobody.

    Would you come?  I hope so.  These bars might just be worth your trip.

    I made these gluten-free and dairy-free for a friend that shared them with us two weeks ago.  Feel free to substitute all-purpose flour and regular butter for my ingredients.

    Coconut Lime Bars

    adapted from Gourmet, January 1995 makes 9 bars For Crust
    • 3/4 cup plus 2 tbsp gluten-free all-purpose blend flour (or regular all-purpose flour)
    • 3/4 stick (6 tbsp) Earth Balance vegan butter (or regular unsalted butter)
    • 1/3 cup unsweetened flaked coconut, toasted and cooled
    • 1/4 cup confectioners' sugar
    • 1/4 tsp salt
    For Custard
    • 4 large eggs
    • 1 cup granulated sugar
    • 1/3 cup gluten-free all-purpose flour (or regular all-purpose flour)
    • 1/2 cup plus 2 tbsp fresh lime juice (from about 5 limes)
    • 1 tbsp freshly-grated lime zest (from about 2 limes)
    • 1/3 cup unsweetened flaked coconut, toasted and cooled
    Method
    1. Preheat oven to 325* and butter and flour an 8-inch square baking pan, knocking out excess flour.
    2. In a medium-sized bowl blend together flour, butter substitute, 1/3-cup coconut, confectioners' sugar and salt until mixture resembles coarse meal.  Pat mixture into prepared pan and bake in middle of oven for 25-30 minutes, or until golden brown.  Allow to cool for 10 minutes before pouring custard in.
    3. Reduce oven temperature to 300*.
    4. In a medium bowl whisk together eggs and granulated sugar until combined well.  Stir in flour, lime juice and zest.
    5. Pour mixture over crust and bake in middle of oven for 20-25 minutes until just the center of the custard is not set.  Top custard with 1/3 cup toasted coconut and bake for an additional 5-10 minutes until all of custard is just set.
    6. Cool in pan on rack for 1 hour, then chill in refrigerator for 1 hour before serving.
    Read More