You can edit the text in this area, and change where the contact form on the right submits to, by entering edit mode using the modes on the bottom right.
Form Block
This form needs a storage option. Double-click here to edit this form, and tell us where to save form submissions in the Storage tab.
Learn more
123 Street Avenue, City Town, 99999
(123) 555-6789
email@address.com
You can set your address, phone number, email and site description in the settings tab. Link to read me page with more information.
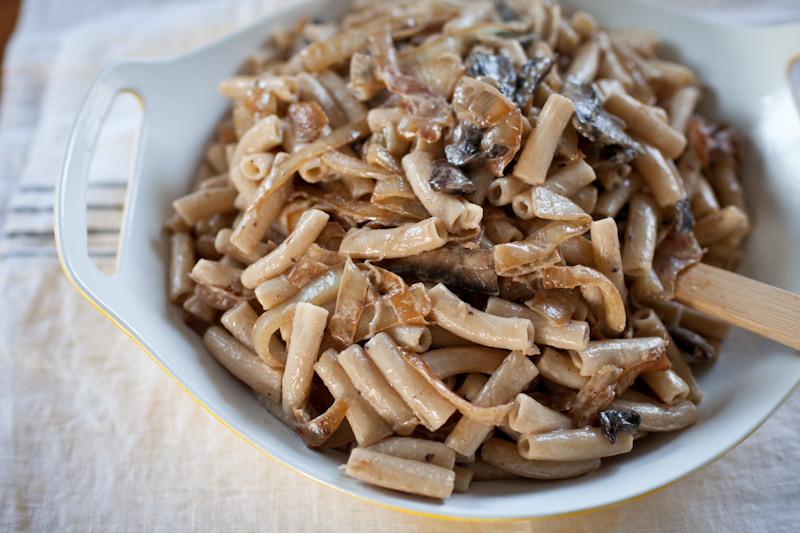
Goodness, I am not doing so well in the beauty department with the recipes I've shared in 2012. But again, this one is worth trying even with the overall brownness of the dish. It is relatively quick and involves inexpensive ingredients that we typically have every day. With little flecks of green parsley it is even more tasty and just a tad prettier but, as you can see, parsley wasn't in my fridge when I prepared this meal (for the 3rd time in a month, I'll add) and it was still really wonderful. Maybe not 'share with company' delicious, but perfect for a weeknight with family, or with friends who are family.
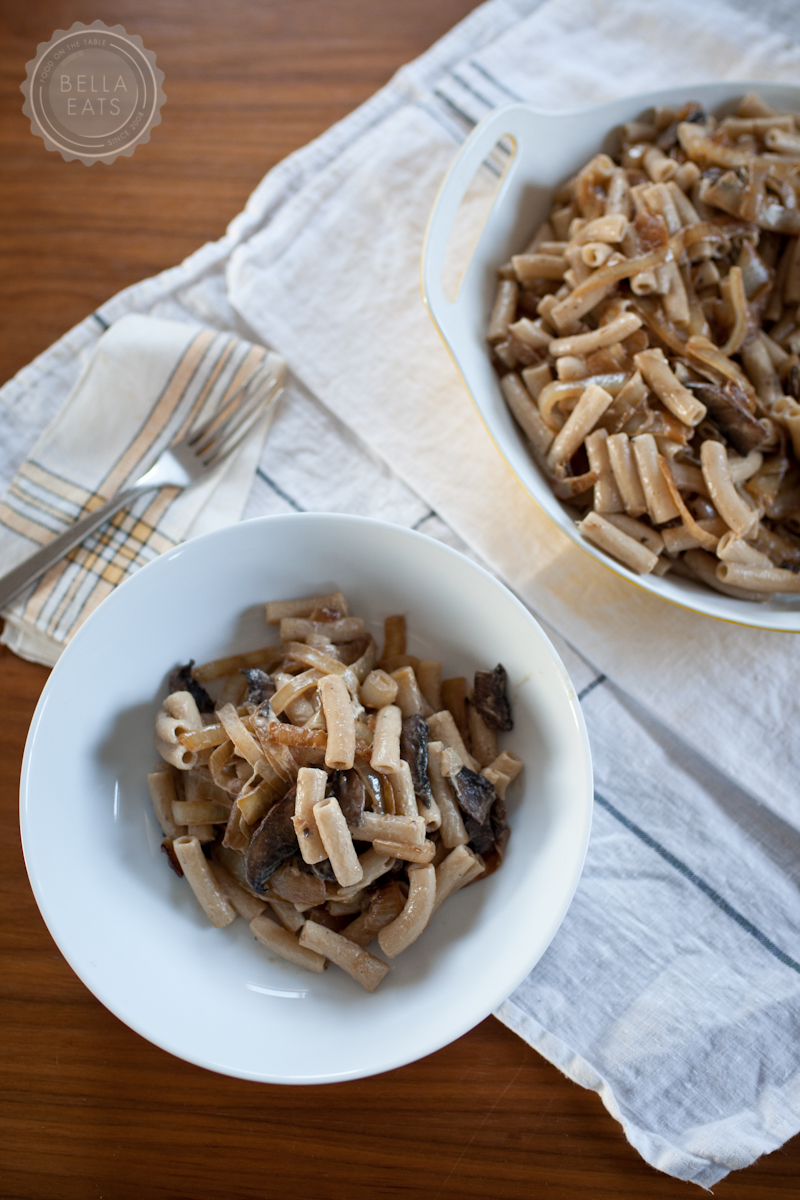
Virginia is in a weird, in-between phase of weather right now. One day we'll have sleet and snow dust and misty skies, the next sunshine and fluffy clouds and crocuses peaking from beneath fallen leaves. Mother Nature can't decide if she should buckle down and get serious about Winter or skip on ahead to Spring. I'll take either, but the back and forth is really throwing me off. I waver between wanting a thick + meaty stew for dinner or a light salad with citrus. Grocery shopping is nearly impossible since the chances of my craving what I actually buy are slim, given that the weather is bound to drastically change 2 days later. I am falling back on old staples; meals that have proven themselves worthy no matter the time of year. Like this one, which I'll either fill my bowl to the brim with (cold, Winter day) or pair equally with a fresh salad (warm, Spring day). Either way it's a winner, and sure to stay in our rotation year-round.
Ziti with Portobello Mushrooms, Caramelized Onions, + Chevre
1 lb portobello mushrooms, stems removed, caps halved and then cut into 1/4-inch slices
3 tbsp chopped fresh parsley
1/4 tsp fresh-ground black pepper
3/4 lb ziti (we use brown rice pasta in our house...just as silky as semolina, but whole grain)
3 oz soft goat cheese, crumbled
3 tbsp grated parmesan cheese, plus more for serving
Method
In a large sauté pan, melt 1 tbsp of the butter with 2 tbsp of the oil over moderate heat. Add the onions, 1/2 tsp of the salt, and the sugar and cook, stirring frequently, until the onions are well browned, about 20 minutes (I let them go for closer to 30). Remove from the pan.
In the same pan, melt the remaining 1 tbsp butter with 1 tbsp of the oil over moderate heat. Add the mushrooms and 1/4 tsp of the salt and cook, stirring occasionally, until tender and brown, about 8 minutes. Add the reserved onions, the parsley, the remaining 1/4 tsp salt, and the pepper.
In a large pot of boiling, salted water, cook the ziti until just done. Reserve 3/4 cup of the pasta water and drain. Toss the ziti and 1/2 cup of the reserved pasta water with the mushroom mixture, the remaining 1 tbsp oil, the goat cheese, and the Parmesan. If the pasta seems dry, add more of the reserved pasta water. Serve with additional Parmesan.
I know what you're thinking...this isn't a very exciting way to kick off 2012. A mash-up of cauliflower, tomatoes + chickpeas served over rice...what's the big deal? The deal is, I have consumed this dish forty-two times in the last week, or close to it, and am still not tired of it. This mildly spicy recipe is fast, healthy, cheap, and makes a TON of leftovers. I've wanted to share it with you for, oh, nearly 3 years now, but have never been able to get a decent photograph to share. Finally, I've accomplished a task that has been on my list for far to long. And THAT, my friends, is an excellent way to kick off the new year.
We usually have the canned ingredients in our pantry, and pick up a cauliflower every few weeks when I know we're going to have some busy nights on the calendar. At this time of year when we're all working towards goals of healthy habits and more quality time with our families, recipes like this one are so valuable. The stew isn't too spicy, but if you're not a fan of heat I would use regular canned tomatoes rather than those laced with green chiles. We like to serve the stew over brown rice.
Gosh, I seem to have been in some kind of post-Thanksgiving funk these past 2 weeks! There was that big push to get recipes out to you before the holiday, and then I stopped cooking. Seriously, I was proud on nights that I picked up prepared sauce and fresh fettucini from the local pasta shop and managed to throw together a salad for the side. It has been a busy couple of weeks for our household, with me finishing up a bunch of photography projects and Brian wrapping up his most complicated website build yet. Hopefully life will return to a regular schedule these last weeks of 2011 (ha! when are the weeks before and after Christmas ever regular!) and I'll manage to get some holiday baking slipped onto my schedule!
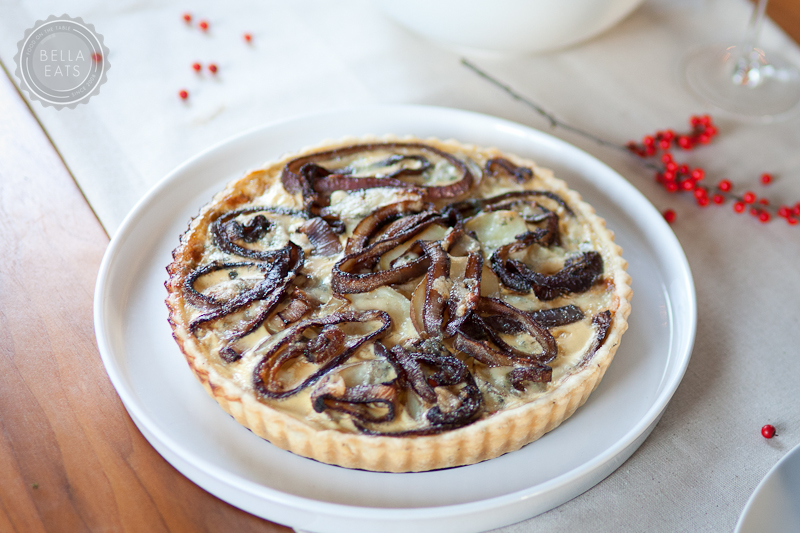
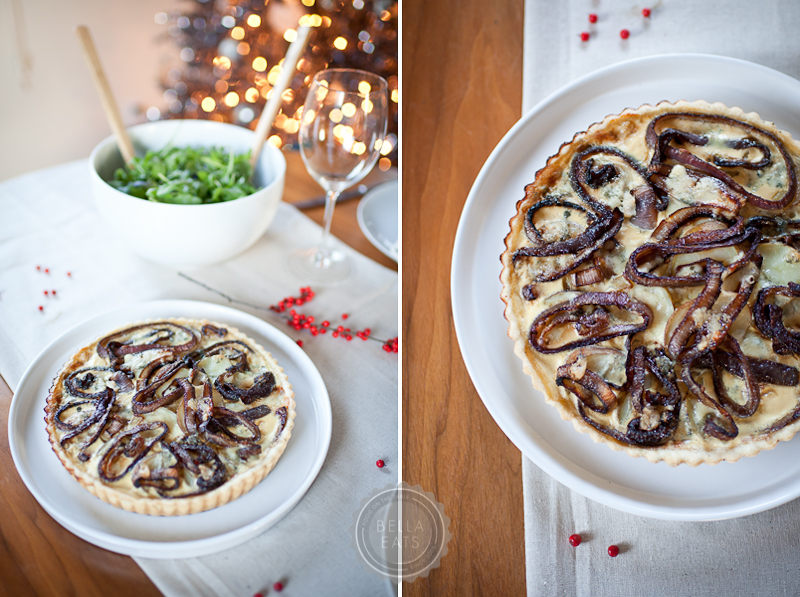
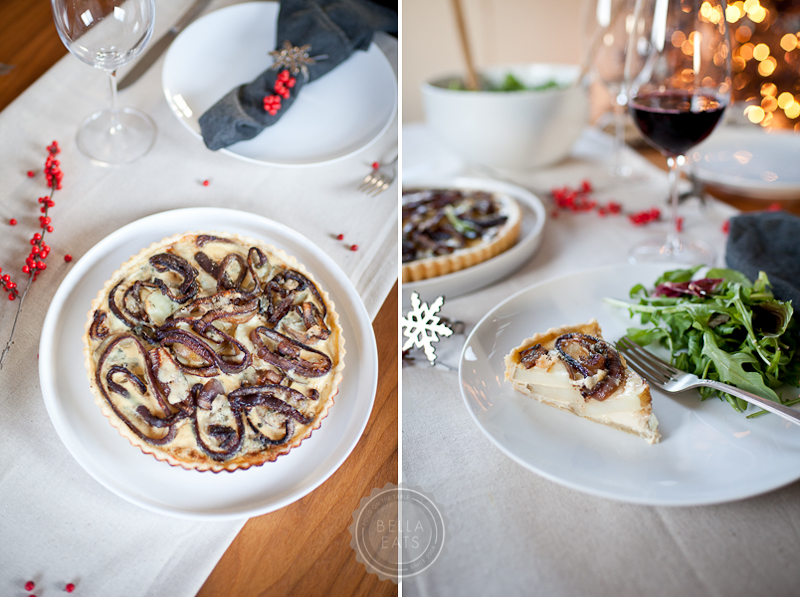
This tart recipe has been on my list for, oh, about 3 months now. I'm not really sure why it popped into my head, but one day the idea of a potato tart with caramelized red onions and stinky blue cheese landed and stuck. Last Friday I finally got around to experimenting, first doing a little research to see how others had tackled similar recipes. I wasn't sure whether the potatoes should be cooked first etc., and luckily found a similar dish to launch mine from over at Smitten Kitchen. I can't even tell you how amazing this tart smelled as it was finishing its time in the oven. If only there were some way to bottle scent and upload it here on my Charlottesville computer, to be distributed to you all through your own computer speakers. Come on Apple, why haven't you figured that one out yet?
I guess you'll just have to make it yourselves, and I'm thinking a holiday potluck could be the perfect excuse. You know you have a few of those on your calendar...
I am so glad that I found the foundation recipe on Smitten Kitchen because I was alerted to the fact that the filling for the tart doesn't set up as solidly as a quiche would. Good to know, because this cook likes to make sure her eggs are good and done, and I definitely would have over-cooked the tart had I not been warned.
Crust Ingredients (this is my favorite, all-purpose savory tart crust)
1-1/4 cups all-purpose flour
1/2 tsp salt
1/2 tsp chopped rosemary
8 tbsp unsalted butter, cut into 8 pieces
4-5 tbsp cold water
Filling Ingredients
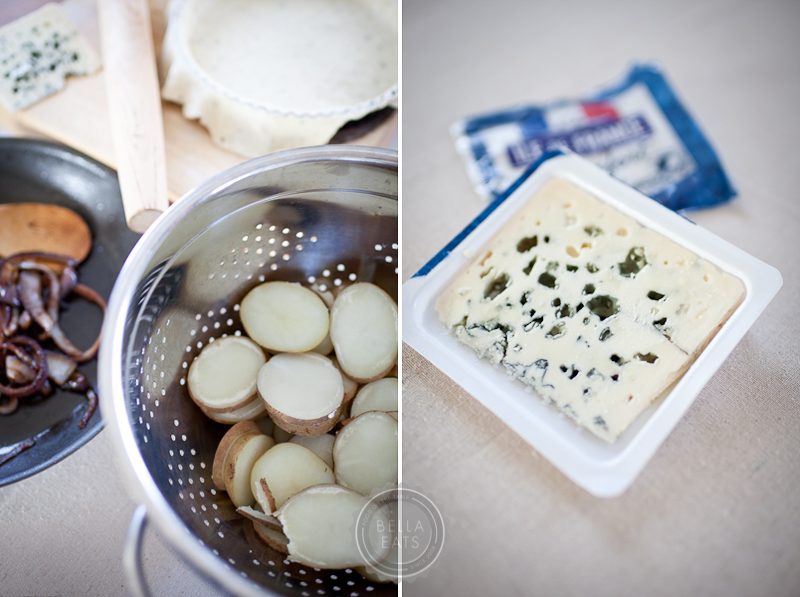
about 1 pound of potatoes (I used russet, but red potatoes would be fantastic too)
1 large red onion, sliced to 1/4-inch rings
1 tbsp olive oil
1 cup milk (I used 1%)
2 egg yolks
1/4 cup crumbled blue cheese (I used Ile de France Roquefort, which was sent to me as a sample to try)
salt + pepper
Method
First, make the crust dough (about 1 hour before you're ready to assemble the tart). Place the flour, salt, and rosemary in a food processor and pulse several times to combine. Add the butter and pulse until the mixture resembles pea-sized crumbs, about ten 1-second pulses. Add the water, 1 tbsp at a time, and pulse briefly after each addition. After 4 tbsp of water have been added, process the dough for several seconds to see if it will come together. If not, add the remaining 1 tbsp water. Process just until the dough comes together in a rough ball. Do not overprocess or the dough will not be flakey. Transfer the dough to a lightly-floured work surface and knead briefly to for a smooth ball. Flatten the dough into a 5-inch disk and wrap it in plastic wrap. Refrigerate the dough for at least 1 hour and up to 2 days. Note: My dough was very sticky with just 4 tbsp of water, so I wound up adding some flour to help it to come together. The final dough should be smooth and supple before refrigerating. Also, if you don't have a food processor, you can still make the dough by using forks or a pastry blender to cut the butter into the flour mixture, then add your water.
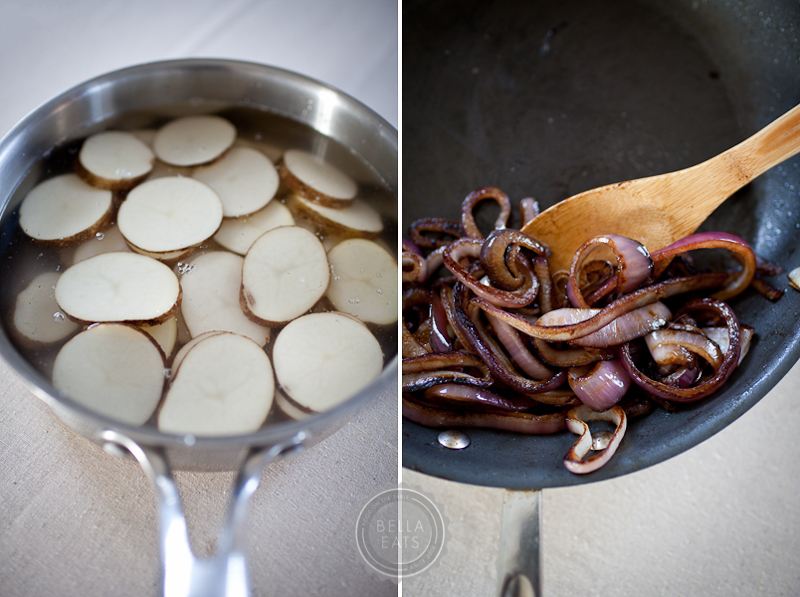
While the dough is chilling, prepare the filling ingredients. Scrub the potatoes and remove any eyes or rough patches, leaving most of the skin in place. Slice potatoe into 1/4-inch thick rounds. Place in a large pan and cover with water. Bring to a boil, and simmer for about 10 minutes until the potatoes are just tender. Drain and set aside.
Meanwhile, heat the olive oil over medium-high heat in a large skillet. Add the onion rings and stir to coat with oil. Drop heat to medium-low and allow unions to caramelize, stirring occasionally, for 20-30 minutes. Remove from heat and set aside.
Whisk together the milk and egg yolks, set aside.
Preheat oven to 350℉.
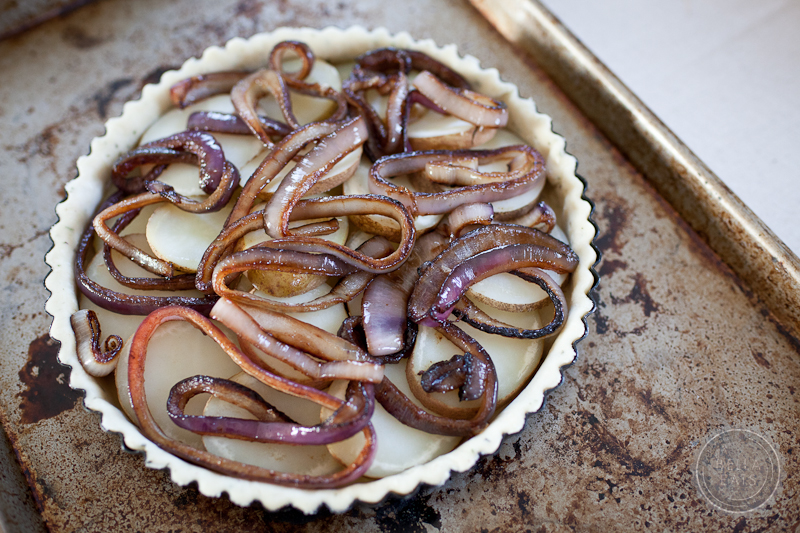
After an hour, remove the dough from the refrigerator. Roll to a round about 12 inches in diameter. Place the dough in a 9-inch tart pan with removable bottom. Press the dough to the bottom and sides of the pan, and remove excess dough from around edge of pan.
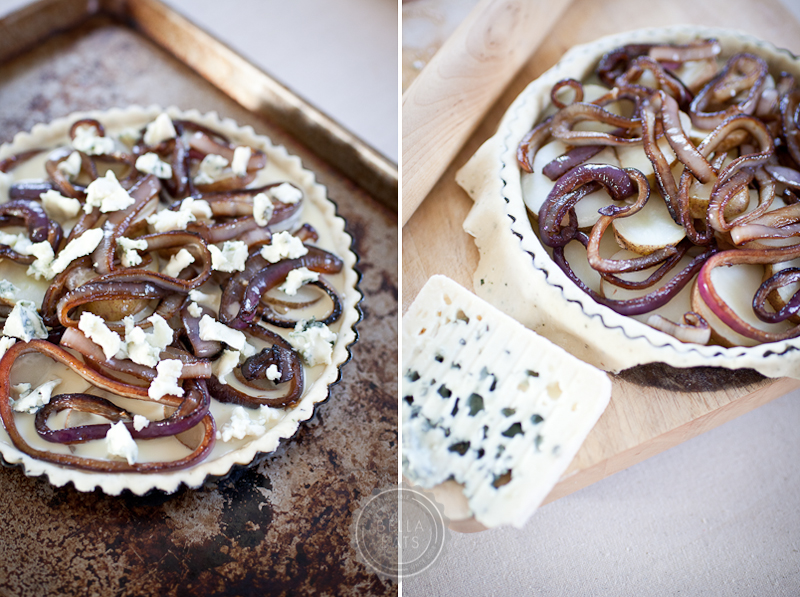
Place cooked potatoes in concentric rings along the bottom of the pan, overlapping and adding layers until pan is full. Distribute the caramelized onions across the tops of the potatoes. Pour the milk/egg mixture over the potatoes and onions. Drop bits of blue cheese evenly across the surface of the tart. Sprinkle with sea salt and freshly ground pepper.
Bake the tart for 45-55 minutes, until browning at edges. Filling will still be slightly jiggly, as the milk to egg ratio doesn't allow for it to set as a quiche would. The final consistancy should be creamy.
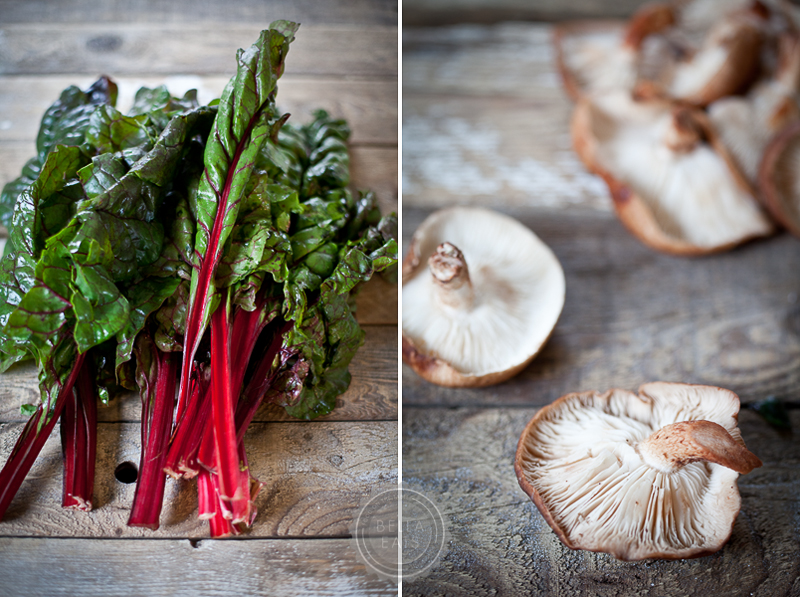
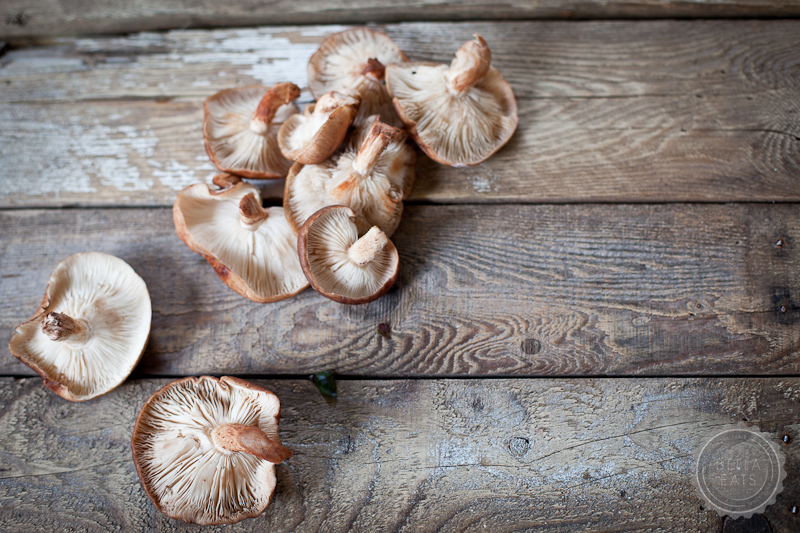
Amidst the turkey, sweet potatoes, regular potatoes, stuffing, and rolls, the color green is often lost on the Thanksgiving table. I love this casserole as a hearty alternative to turkey for vegetarian guests, cut into small squares to serve as an appetizer, or simply served alongside a nice slice of savory bird. The fried shitake mushrooms are a wonderful touch, lending a nice kick of flavor to the mild greens. I appreciate that this dish comes together very quickly, and could even be made the day before and reheated in the oven as the turkey is finishing. Or it would be really easy to transport to another house if you've been tasked with bringing a side dish to a family gathering. Quick, simple, easily transported, filling, and delicious...what more could you ask for out of one recipe?
I have mixed feelings about swiss chard. Its fine, really, but that's about it. However, in this recipe it provides a nice earthy base from which the shitake mushrooms really shine. I think this casserole would also be lovely with lacinato kale, my favorite hearty green.
½ pound shitake mushrooms, stems discarded and caps sliced
kosher salt
½ cup panko
¾ cup parmesan cheese
10 large eggs
½ tsp cayenne pepper
2-½ pounds swiss chard, stems discarded and leaves thinly sliced (I like to stack the leaves and roll them tightly, then slice the roll crosswise to make quick work of this task)
Method
Preheat the oven to 350℉ and butter a shallow 9x13 ceramic baking dish. (I altered quantities some and used a 9x9 square dish…it is very easy to divide or double).
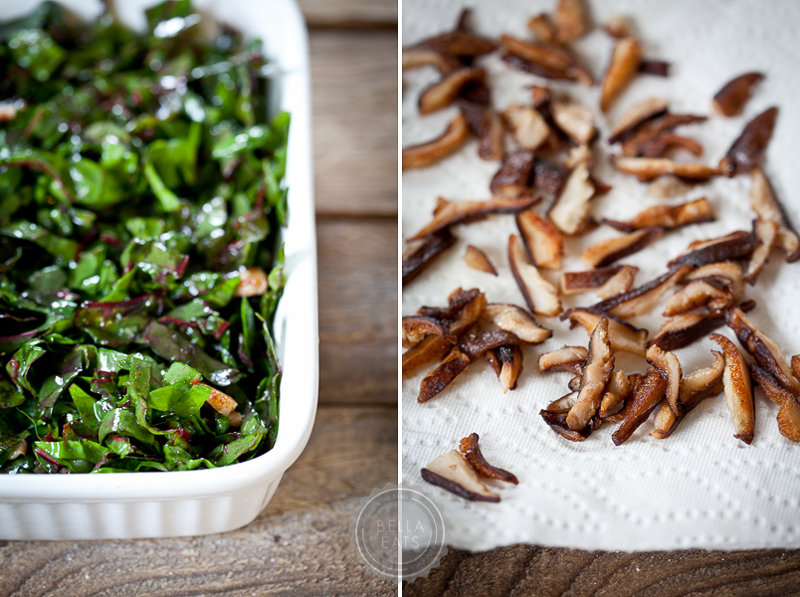
In a large skillet, heat the oil until shimmering. Add the mushrooms and cook over high heat, turning once, until golden and crisp, about 5 minutes. Season with salt and transfer the mushrooms to a paper towel-lined plate.
In a small bowl, toss the panko with ¼ cup of the cheese.
In a large bowl, whisk the eggs with the cayenne, 1 tsp of salt, and ½ cup of cheese. Stir in the swiss chard and mushrooms. Scrape the mixture into the prepared dish and bake for about 20 minutes, until the eggs are just set around the edges.
Sprinkle the panko on top of the casserole and bake for about 10-15 more minutes, until the casserole is fully set and the topping is lightly browned. Let stand 10 minutes before serving.
Thanksgiving is just one week away. One week! So shocking. I have a list of recipes queued up and ready for you all, all dishes that would accompany a roasted turkey beautifully. In order to get them out to you in time for your big trip to the grocery store, I am going to march them out day after day through Monday. 5 recipes in 5 days. I do believe that will be a new record here at Bella Eats!
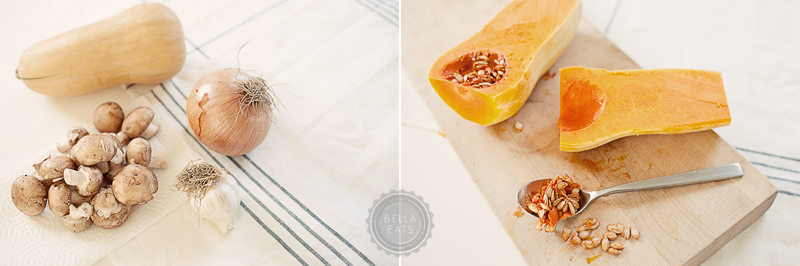
I am starting with a Fall staple in our house. Butternut squash is the very first Autumn ingredient that I buy each September, always in anticipation of this recipe. If we were hosting Thanksgiving dinner at our house again this year I would absolutely put this creamy dish on our menu, and can't quite figure out why it has never made it there before. I think it would make a great substitute for the sweet potato casserole that typically winds up on the table. Especially because I just discovered my favorite sweet potato dish ever, and its a dessert, and I don't think I could take two sweet potato courses in one meal. Don't worry, I'll be sharing that one too.
I tried something new this time, adding mushroom broth to the risotto instead of standard vegetable. We loved the earthy depth it added, and have permanently altered our recipe. If you don't have mushroom base, vegetable or chicken broth is good too.
Preheat oven to 425°F. Cut the butternut squash in half and scoop out the seeds. Lay the halves cut-side up on a rimmed baking sheet lined with foil. Place a thin sliver of butter inside the bowl of each half, and another on the flat part of the squash. Place a small sage leaf over top of each sliver of butter. Sprinkle with sea salt and fresh pepper. Roast the squash for 20-30 minutes, until a fork can pierce the flesh with only a bit of resistance.
Remove the squash from the oven and set aside to cool until you can handle it comfortably. Use a small paring knife to peel the skin from the squash, and dice it into ½-inch chunks. Set aside.
Melt 1 tbsp of butter in a large skillet over medium heat. Add the onion and let sauté for about 3 minutes, until it is starting to soften. Add the garlic and the rest of the sage leaves and sauté for an additional 3 minutes. Add the arborio rice and stir to combine for 1 minute, until the rice starts to crackle. De-glaze the pan with the white wine, stirring to get any brown bits off of the bottom of the pan. Add the squash and stir so that it is evenly distributed with the rice.
Add broth one ladle at a time, stirring constantly so that the rice doesn't stick to the bottom of the pan, and only adding the next ladle when the previous has been absorbed. Continue until all broth is gone and rice is creamy, about 25 minutes.
Add the remaining butter (about 1 tbsp) to the pan, along with the parmesan cheese, and stir until distributed evenly. Salt and pepper to taste.
Charlottesville and Richmond folks...Relay Foods beat me again! Richmond, your one-click recipe is here, and Charlottesville yours is here.
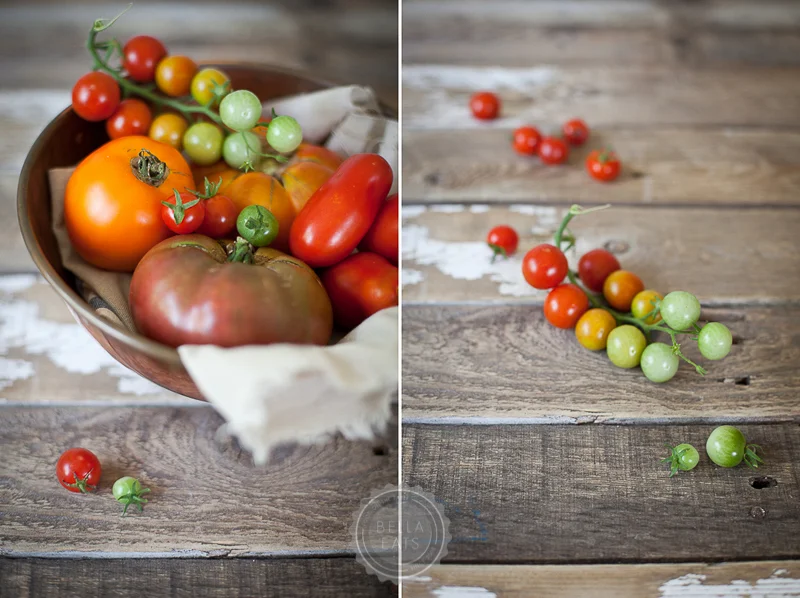
Summer. Tomatoes. Summer tomatoes. Summer tomatoes summer tomatoes summer tomatoes. The two words belong together, do they not?
With a high of 101° in Charlottesville today (real feel 115° to 120°...um, when did we move to the equator?!?), I am not finding a whole lot to be happy with Summer about at the moment. Except for tomatoes. We are overrun with summer's favorite fruit right now...big ones, little ones, red ones, orange ones. All picture frames and candles have been removed from my dining room sideboard to make way for our bounty from the farm. It is the official tomato storage and ripening spot in our house, a constantly revolving inventory of heirloom varieties. I've made pints of marinara to store away for winter, and have plans to can soups and salsas in the coming weeks. But still, my very favorite way to consume a perfectly ripe tomato is thickly sliced, with sea salt. It just doesn't get much better than that. Unless you sandwich one of those slices between two hunks of bread with some bacon...that's pretty darn good too.
Most of our meals this week involved, you guessed it, tomatoes. In sauce over pasta, in salsa on fish tacos, sliced with fresh mozzarella on pizza, the 'T' in our BLTs. And this lovely, simple, rustic tart. It breaks my 'don't turn on the oven' rule, but at least it isn't the stove top.
First, I have to say again how much I love Jack Bishop's book, A Year in a Vegetarian Kitchen. I have shared several recipes from there, here, and cannot praise it enough. We have been thrilled with every single dish we've made between its covers, and love how simple and quick they always are. This tart is no exception. The crust dough comes together beautifully and is so easy to work. The filling ingredients are simple. The whole tart is finished with just 15 minutes of prep time, which I love. If the crust weren't so butter-full we'd have this meal multiple days each week.
Be sure to only make this tart when tomatoes are at their peak...a pink and grainy 'mater just wouldn't do...
6 oz fresh goat cheese, crumbled (about 1-1/3 cups)
3 medium, delicious tomatoes, cored, sliced crosswise 1/4-inch thick, and blotted dry between paper towels*
1 tbsp extra-virgin olive oil
salt + freshly ground black pepper
Method
First, make the crust dough (about 1 hour before you're ready to assemble the tart). Place the flour, salt, and rosemary in a food processor and pulse several times to combine. Add the butter and pulse until the mixture resembles pea-sized crumbs, about ten 1-second pulses. Add the water, 1 tbsp at a time, and pulse briefly after each addition. After 4 tbsp of water have been added, process the dough for several seconds to see if it will come together. If not, add the remaining 1 tbsp water. Process just until the dough comes together in a rough ball. Do not overprocess or the dough will not be flakey. Transfer the dough to a lightly-floured work surface and knead briefly to for a smooth ball. Flatten the dough into a 5-inch disk and wrap it in plastic wrap. Refrigerate the dough for at least 1 hour and up to 2 days. Note: My dough was very sticky with just 4 tbsp of water, so I wound up adding some flour to help it to come together. The final dough should be smooth and supple before refrigerating. Also, if you don't have a food processor, you can still make the dough by using forks or a pastry blender to cut the butter into the flour mixture, then add your water.
Move an oven rack to the middle position and heat oven to 375°.
Unwrap the chilled dough and roll it into a 12-inch circle on a lightly floured surface. Lay the dough over a 10-inch tart pan with a removable bottom, fitting the dough into the bottom and sides of the pan. Run the rolling pin over the top of the tart pan to trim the excess dough. Prick the bottom of the tart shell all over with a fork.
Finally, fill and bake the tart. Scatter the goat cheese evenly across the bottom of the tart shell. Arrange the tomatoes over the cheese in two rings, one around the outside edge of the tart pan and another in the center, overlapping them slightly. Drizzle the tomatoes with the olive oil and sprinkle with salt and pepper to taste.
Bake until the edges of the crust pull away from the sides of the pan and are golden brown, 45 to 50 minutes. Cool the tart on a wire rack for at least 10 minutes. Cut the tart into wedges and serve. Also, it is really good at room temperature so feel free to make this ahead and let it cool for several hours.
* To dry tomatoes, lay 3 layers of paper towels on a flat surface. Place your tomato slices on the paper towels, and then cover with 3 more layers of towels. Gently press your hands over the tomatoes to extract as much liquid as you can without crushing the tomatoes. When you lift the slices from the towels, many of the seeds should stay behind. This will keep your tart crust from becoming soggy.
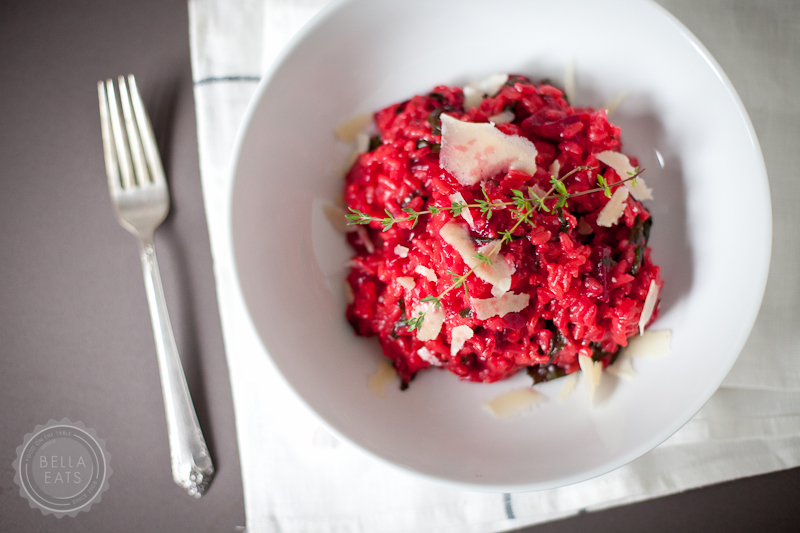
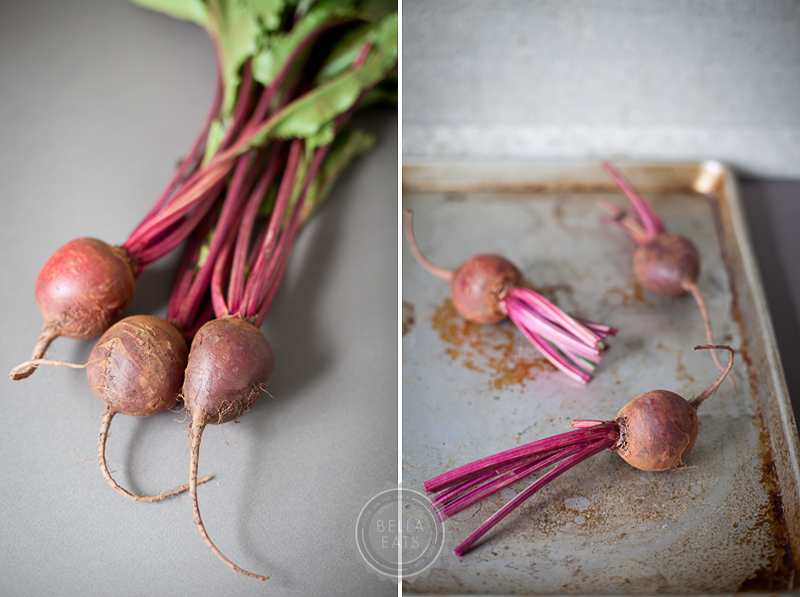
I do believe that beets are my very favorite spring vegetable. They are quickly overshadowed by tomatoes in Summer, but in May and June I could eat beets every other day. Typically I am a fan of simply roasting the globes and tossing them on a salad with chevre and a light vinaigrette. But every now and then, when I am feeling the need for something a bit more toothy and substantial I'll whip up a batch of risotto. I love the sweetness that roasted beets lend to the savory dish, and of course the vibrant hue that even a picky toddler wouldn't be able to resist.
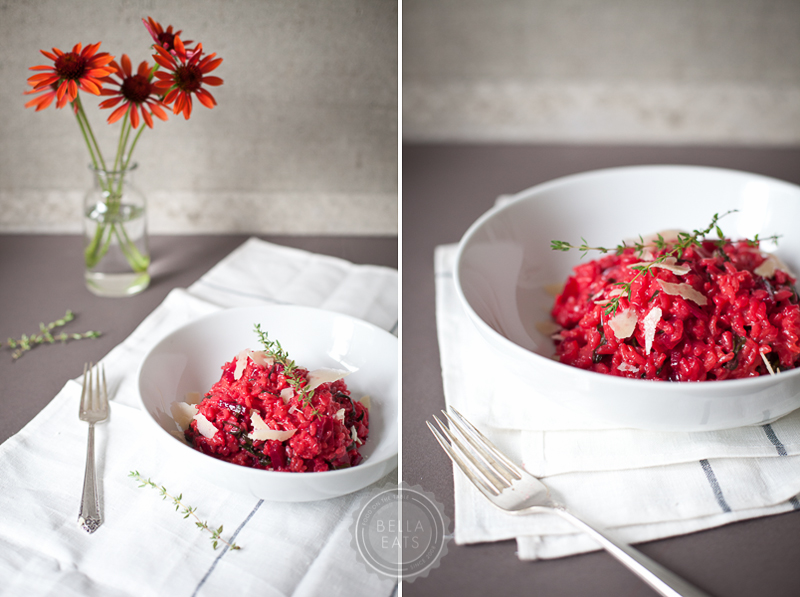
I"ll admit...I've already written about red beet risotto here, years ago, when we were growing beets in our very own garden. The recipe has changed a bit, and the photographs have certainly improved, but I still love that first post because of its words about our little veggie patch. We're still growing beets this year, although out on Maple Hill Farm rather than just to the side of our house. And this recipe is still a favorite, one that I felt was appropriate to bring up again now that we're at the height of beet season here in Charlottesville. Plus, I just couldn't resist the urge to re-photograph the dish in all of its neon-pink glory, in proper lighting, with less distraction. It deserves to be the star of the show!
These days, I'm adding the beet greens directly to the risotto, rather than cooking them up on the side. They don't add much flavor to the dish, but I do like the additional texture and all of the nutrients packed into the deep green leaves. Thanks to the New York Times for that little suggestion.
1 bunch beet greens, stemmed and washed (from your beets, if fresh and unwilted. leave them out if they are past their prime)
6 to 7 cups chicken or vegetable stock, as needed
2 tbsp extra virgin olive oil
1/2 cup finely chopped onion
1-1/2 cups arborio rice
2 garlic cloves
1/2 cup dry white wine
salt
freshly ground pepper
1/2 cup parmesan cheese, grated
2 tbsp finely chopped flat-leaf parsley
Method
First, roast the beets. Preheat your oven to 400°. Wrap the beets in aluminum foil and place on a baking sheet. Roast for about 20 minutes, until the beets are easily pierced with a fork. Remove from oven and allow to cool, then peel and dice the beets. The skin should slide off easily.
Slice the greens into 1-inch strips, set aside.
Place the stock in a medium sauce pan and bring to a simmer, then reduce heat to low.
In a large, wide, heavy-bottom saute pan, heat the oil over medium. Add the onion and stir while cooking until it starts to soften, about 3 minutes. Add the rice and the garlic and stir while cooking until the rice is separate and starting to crackle, about 3 minutes.
Stir in the wine and cook over medium heat, stirring constantly. When the wine has just about evaporated, add in 1 ladleful of stock (about 1/2 cup) just to cover the rice. The stock should bubble slowly (adjust heat). Cook, stirring occasionally, until the stock is nearly absorbed, then add another ladleful. Continue to cook in this fashion, not too fast and not too slowly, stirring often and adding more stock when the rice is dry, for about 10 minutes.
Stir in the diced beets and sliced greens. Add more stock and continue cooking as before, for another 10-15 minutes, adding stock when the rice is dry. The rice should be tender but not mushy, with no hardness at the middle. When it has reached the correct consistency, season with salt + pepper. Add the parmesan cheese and the parsley, and stir to combine. The rice should be creamy, if it is not, add another 1/2 cup of stock.
I have big, big plans for picnics in 2011. Last summer, I think, Brian and I were cheated...busy lives kept us from really taking the time to relax on weekends and enjoy each other's company on weekday evenings. Life is still moving quickly, but this year we've adjusted our priorities. And picnics are close to the top of my new list. Nothing quite says summer like packing a basket of simple foods, folding up your favorite quilt, and driving out to the country. Or, if you really want to get your picnic quota up, simply walking out to the backyard and plopping down on a patch of shady grass. That can happen any old day, and this year I plan to make it happen quite often.
A few weeks ago I started a list. My 'foods fit for a picnic' list, as I call it. On this piece of gridded paper I placed edibles such as 'not-too-crumbly biscuits' and 'pulled pork' and 'spicy coleslaw'. Also, there were 'buttermilk cookies' and 'dill pickles' and 'egg salad'. These were all recipes that I wished to research and experiment with, to really nail down so that I would be prepared for outdoor eating at any point between April and October. As of this week, I've crossed one off.
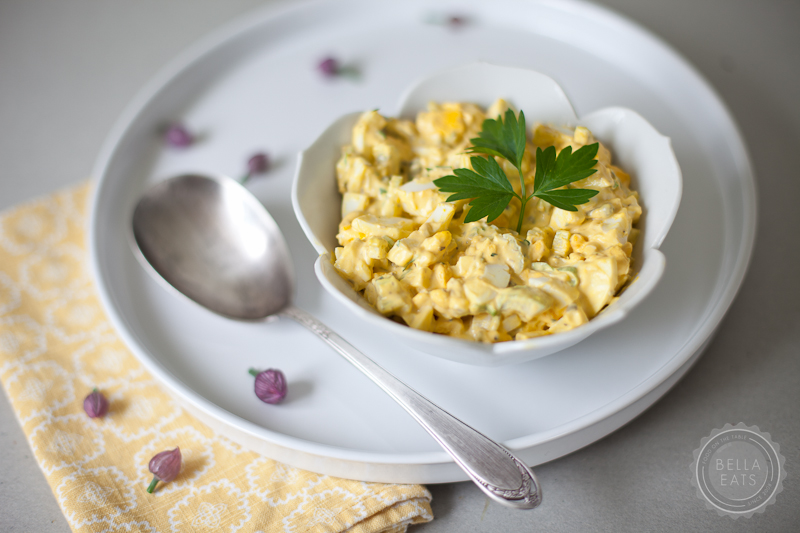
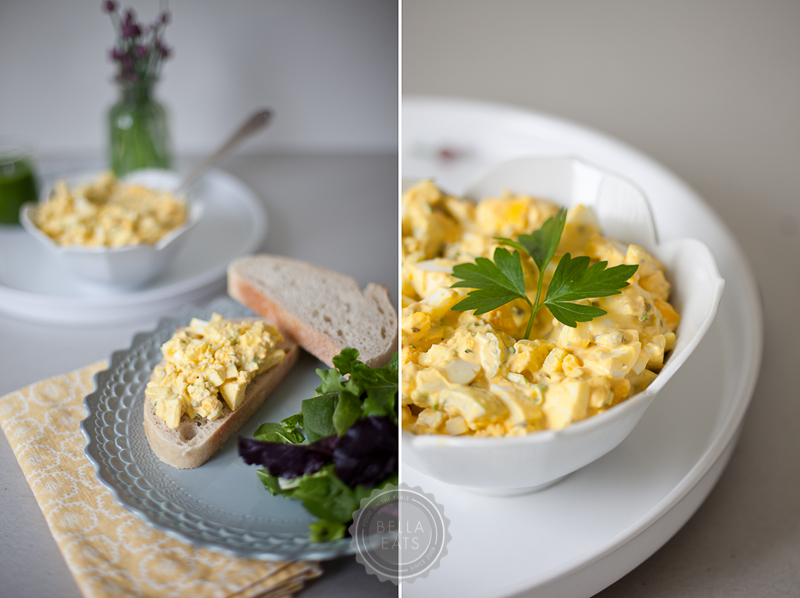
For some reason I've always had a thing for egg salad. Most versions I've ever had have been very bland, and I am never fully satisfied after choosing it for a sandwich over deli meat or roasted veggies. Regardless, for all these years, I've told myself and others "I really love egg salad!" And so when it made an appearance on my 'foods fit for a picnic' list (because of course, egg salad belongs at a picnic) I immediately started thinking about creating a fantastic herbed pesto that I could drizzle over top. You know, to make the egg salad more interesting.
Armed with this Alice Waters recipe recommended by a friend, I set about preparing what was to be the ultimate picnic sandwich...egg salad drizzled with chive pesto served on artisan bread. I smeared one slice of bread with the pesto, piled a heap of egg salad on another slice, and debated how to photograph my creation. While debating, I sampled the salad...and kept eating. This salad is so delicious, the exact opposite of bland, that the beautiful, emerald-toned pesto was immediately packed up and stashed away. Chopped eggs tossed with mayonnaise mixed with fresh chives, dijon mustard, and capers requires no accompaniment aside from a thick slice of good bread. Its the capers that make the salad, truly. I'll never eat egg salad without capers again. That would be like having a whole summer go by without a picnic, and that just won't do.
I really like cookbooks. Sit me down on the couch with a glass of wine, sticky notes, and a thick book full of beautiful and evocative culinary images and I am one happy girl. Dissecting recipes can entertain me for hours, methods and timing dancing through my head as I imagine this ingredient melded with that one. But it is a very special book that holds my attention for the space between recipes, where the author's true voice emerges in the stories behind the dishes compiled. When my stepfather, Joe, handed me his copy of The Italian Country Table by Lynne Rossetto Kasper and said "You can borrow it, but only for a little while. And you MUST read the chapter about tomatoes." I had a feeling it would be just that kind of book. I immediately curled up in the corner of my parents' L-shaped couch and sank into that tomato chapter, which begins like this:
"I must begin this chapter with a confession: There is nothing, absolutely nothing that pleasures me more than a bowl of pasta and tomato sauce. When I want to reach out with all my love to my husband, a dish of pasta and tomatoes is almost always in my hands. When I am worn out and the world isn't such a nice place to be in, I make tomato sauce and pasta. When time is short but dear friends must be fed with joy and not pressure, I make pasta with tomato sauce. Never are any two of these pastas alike, because for me, this is the food of instinct."
And...I was hooked. My own copy arrived back home in Virginia the very next week and I immediately began plotting an "Italian Month" on Bella Eats. It didn't happen because, well, life got busy, but we've cooked and loved several of the recipes and I've very much enjoyed getting lost in the spaces between them.
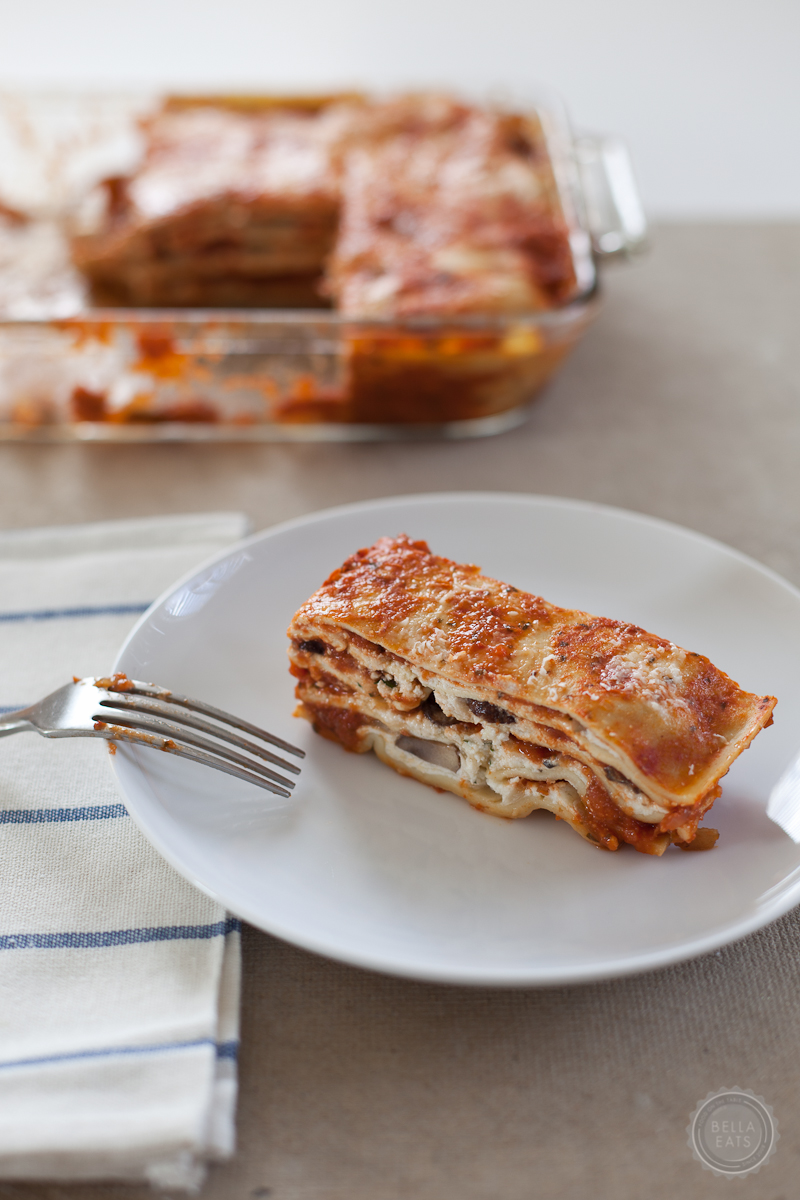
I made this lasagna last month for very good friends we hadn't seen in many weeks and I must say, it was the perfect dish for a mini-reunion. Simple ingredients create a complex marriage of flavors and textures that you just can't stop eating. We sat around our table for hours catching up, the pan of lasagna between us enticing each of us to a second serving.
The pasta, cheese, and canned tomatoes were purchased at our local pasta shop, Mona Lisa Pasta. It shouldn't be a problem for you to find them in most grocery stores, but do seek out the highest quality cheeses and tomatoes you can. The simplicity of this lasagna allows their flavors to shine. I did a little happy dance when those sheets of fresh pasta were brought out to me in the shop, soft and supple and brushed with semolina. I'd been contemplating making my own, but with limited time was pleased to have this option. If you can, use fresh pasta, but if not dried will do as well.
Also, the sauce is delicious. It is worth keeping a can of san marzano tomatoes in your pantry for an emergency batch of fresh sauce whenever it may be needed.
1-3/4 to 2 pounds high-quality, creamy ricotta cheese
1/2 pound fresh mozzarella cheese, shredded
8 scallions, trimmed of root ends
2 tightly packed tbsp fresh basil leaves
1 tightly packed tbsp fresh Italian parsley leaves
1 tsp fresh oregano leaves
2 cloves garlic
salt and freshly ground black pepper
1 medium large onion, cut vertically into strips about 1/4 inch wide
1/2 pound cremini mushrooms, cleaned and sliced (optional)
extra-virgin olive oil
1 pound dried lasagna pasta (or, homemade pasta. or, if you're very lucky, fresh pasta from your local pasta shop.)
Method
Prepare the tomato sauce by mincing together the herbs and chopped onions. Heat the oil in a 12-inch skillet over medium-high heat. Saute the onions and herbs to golden brown. Add the garlic and cook a few seconds, then stir in the cherry tomatoes and the canned ones with their juices, crushing them with your hands as they go into the pan. Boil, uncovered, over high heat until thick, stirring often. Add the water and cook a few moments more. Stir in the sugar and season with salt and black pepper and red pepper flakes to taste. Cool briefly, then pass the sauce through a food mill or puree in a processor or blander. Cover and set aside.
Holding pack 2 tbsp of the parmesan, blend the cheese in a bowl. Mince together the scallions, basil, parsley, oregano, and garlic. Stir into the cheeses, seasoning to taste with salt and pepper.
Toss the onion strips and mushrooms with a little olive oil, salt, and pepper. Heat a saute pan over high and saute until the onion is starting to brown and the mushrooms have released their liquid. Turn out of the pan.
If you're using dried pasta, cook in fiercely boiling water, stirring often, until barely al dente (it should be underdone). Drain in a colander and hold in a bowl of cold water. Fresh pasta does not need to be cooked.
Preheat the oven to 350°F. Oil a shallow 2-1/2-quart baking dish. Drain the pasta and pat dry. Moisten the bottom of the dish with sauce. Cover with a single layer of pasta. Daub with one quarter of the cheese mixture and one quarter of the browned onions + mushrooms. Moisten with one sixth of the remaining sauce. Top with a layer of pasta and continue layering, topping the fifth layer of pasta with the remaining sauce. Cover lightly with foil.
Bake for 40 minutes, or until heated through. Sprinkle with the reserved 2 tbsp parmesan. Let rest 10 minutes in the turned-off oven with its door open, then serve.
Happy Friday, friends! What are you up to this weekend? We will be getting our hands dirty in our garden, prepping the beds for a sprinkling of lettuce seeds to hit the soil next week. So exciting! Nothing says "Spring!" like a Saturday spent in the yard. I've got my fingers crossed, hoping that the blue sky I see outside of my window sticks around!
Looking ahead at all of the fresh, green produce arriving in the next couple of months made me realize that I've been holding out on you. I really couldn't let Winter completely slip away without sharing this favorite recipe with you all. This hearty little risotto has made an appearance on our table multiple times these last few months and we just can't seem to get enough of it! In fact, there are leftovers in the refrigerator right now, and I am very much looking forward to lunch.
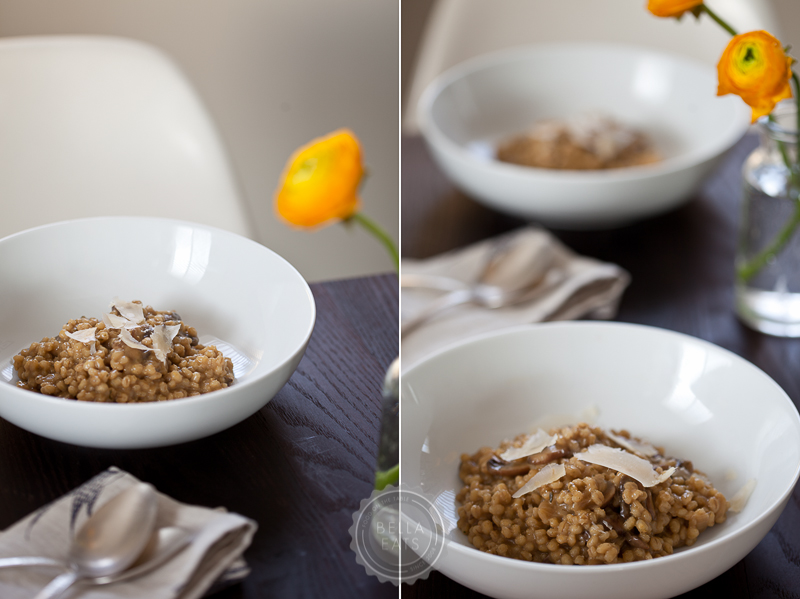
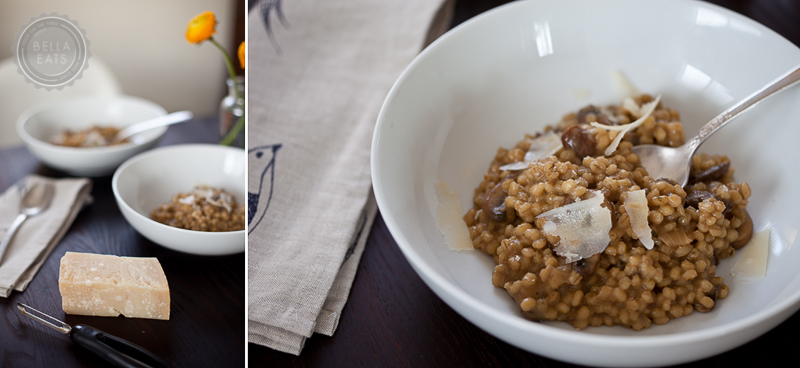
Mushrooms and I got along very well this Winter. That's a change for me, as I've never been a big fan of the stinky fungi. Not that I had anything against them, but I didn't actively seek them out for recipes. Something happened this year, though, and I found myself picking up a half-pound of fresh Cremini mushrooms nearly every week. Usually they were for this risotto, but also for empanadas, and veggie burgers, and a lasagna I haven't yet shared. What I love about the mushrooms in this recipe is that they really are the perfect mate for barley, which replaces the arborio rice typically found in risotto. Both lend an earthiness to the dish that you expect, but they also complement each other texturally. The barley remains a bit firm, providing the slightest resistance as you chew, while the mushrooms are silky and smooth and nearly melt on the tongue. The whole process is relatively quick and simple, not requiring the constant stirring like a traditional risotto, but also makes an impressive side dish for company.
Enjoy the weekend...get outside!
Mushroom Barley Risotto
serves 4
Ingredients
2 tbsp olive oil
1 cup chopped onion
8 ounces cleaned and sliced crimini mushrooms
1/2 cup dried shitake mushrooms, rehydrated and chopped
3 tbsp chopped fresh parsley
1 tbsp chopped fresh thyme
2 cloves garlic, minced
1 cup pearl barley
6 cups chicken or vegetable broth
1 tbsp butter
1/2 cup parmesan cheese, shredded
Method
Heat oil in a large, heavy-bottomed saucepan over medium heat. Saute' onion until starting to brown, about 5 minutes.
Add all mushrooms and saute' until golden brown, about 10 minutes, adding 1 to 3 tbsp water if they start to stick.
Stir in herbs and garlic, then add barley and stir for 1 minute. Add 4 cups of the broth and bring to a boil.
Reduce heat to simmer, cover, and cook for 15 minutes, stirring occasionally, until most of liquid is absorbed. Remove lid and add more broth, 1/2 cup at a time, stirring until each addition is absorbed, until barley is tender but still slightly firm. You may not use all of the broth, but you will use most of it. This whole process, from the time you add the first broth, should take 35-40 minutes.
Remove pan from heat and add butter and cheese, stirring until incorporated. Season with salt and pepper, to taste.
Mother Nature has been so fickle lately, flitting between gray, dreary, and frigid one day to 63* and sunny the next. She's a tease, I tell you, and I am ready for her to make up her mind. I've spent the last two months hoping for a big, big snowstorm, eager for a Winter as entertaining as last. But now that we're into February with no more than a few inches on record, I'm over it. Spring can dig in her heels and stay permanently, as long as she brings sunshine, warmth, and backyard barbecues with her. There are only so many casseroles and stews and butternut squash one can take in one season!
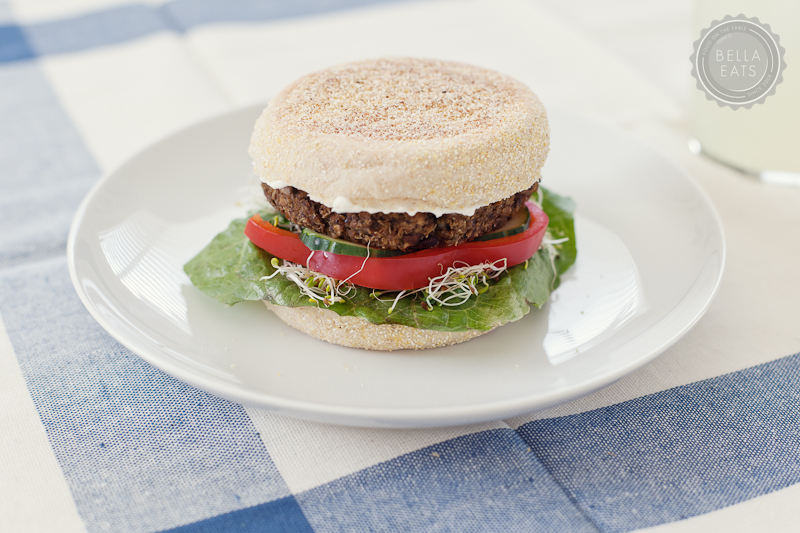
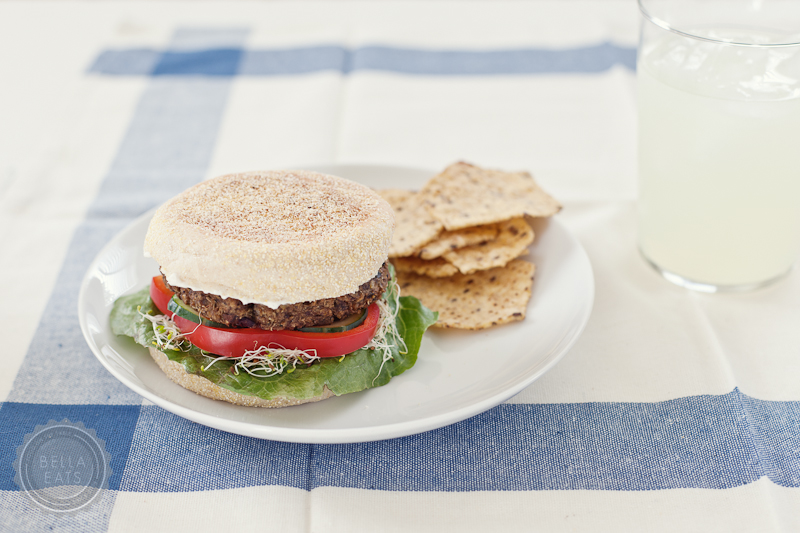
Last weekend I grew tired of waiting and took matters into my own hands when I made our weekly menu. I've had veggie burgers on the brain for over a year since discovering my favorite veggie patty, ever, at Boylan Heights here in Charlottesville. I am not a vegetarian, but I do eat a mostly vegetarian diet and am a fan of beef only on the rarest of occasions. What I love about that Boylan Heights veggie patty, and now this veggie patty, is that it doesn't try to imitate the taste or texture of meat. Instead, the actual ingredients of the patty are allowed to shine - in this case mushrooms, lentils, and Kalamata olives. Yum.
For an extra-summery feeling, try serving the patties on english muffins adorned with lettuce, red bell pepper, alfalfa sprouts, sliced cucumber, and tzatziki. I promise you'll feel better about the state of the weather, at least for the evening. Also, if you read through the comments on the Post Punk Kitchen post linked in the recipe below, you'll find many variations and substitutions for the ingredients in this burger. Just in case mushrooms or olives aren't your thing.
This is not similar in taste or texture to the Boylan Heights veggie patty, and that is not what I was going for. If you're interested in the BH recipe, you can find it here. I'll make it eventually, but it seems a bit complicated/time consuming and at this point I am happy to just visit the restaurant and let the chefs there make it for me. Plus, their sweet potato fries are the best around.
Lentil, Olive, + Mushroom Veggie Burgers from post punk kitchen serves 6
Ingredients
1 tbsp olive oil
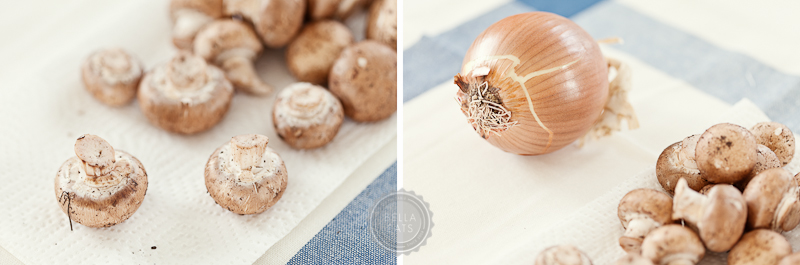
1 small onion, diced medium (about 1 cup)
1/2 pound cremini mushrooms, cleaned and thinly sliced
3 cloves garlic, minced
fresh black pepper
1/2 tsp dried thyme
1/2 tsp dried parsley
1/2 cup pitted kalamata olives
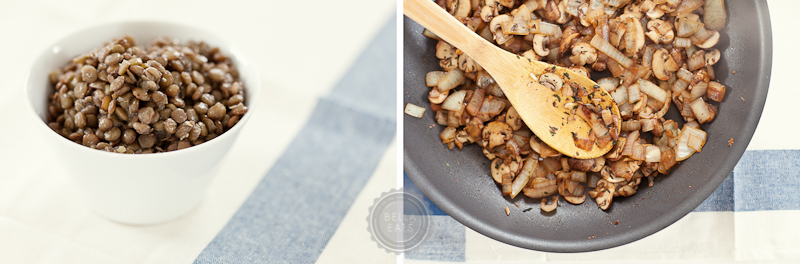
1-1/4 cups lentils (I used dried lentils cooked in veggie broth, but the original recipe calls for canned)
1 cup breadcrumbs, divided (I used panko)
2 tbsp soy sauce
2 tsp fresh lemon juice
cooking spray
Method
Preheat oven to 350*F.
Heat a large, non-stick pan over medium-high heat. Saute the onion for about 3 minutes with a pinch of salt. Add mushrooms, garlic, black pepper, thyme, and parsley and saute for 7 to 10 minutes, until mushroom is cooked.
While mushroom mixture cooks, place the olives in a food processor and pulse until finely chopped. Remove from food processor and set aside.
When mushroom mixture is cooked, add to the food processor. Add all of the other ingredients EXCEPT 1/2 a cup of the breadcrumbs. Pulse until mostly smooth, but there should still be some texture. Transfer to a large mixing bowl. Add the remaining 1/2 cup breadcrumbs to the burger mixture, along with the chopped olives, and thoroughly combine.
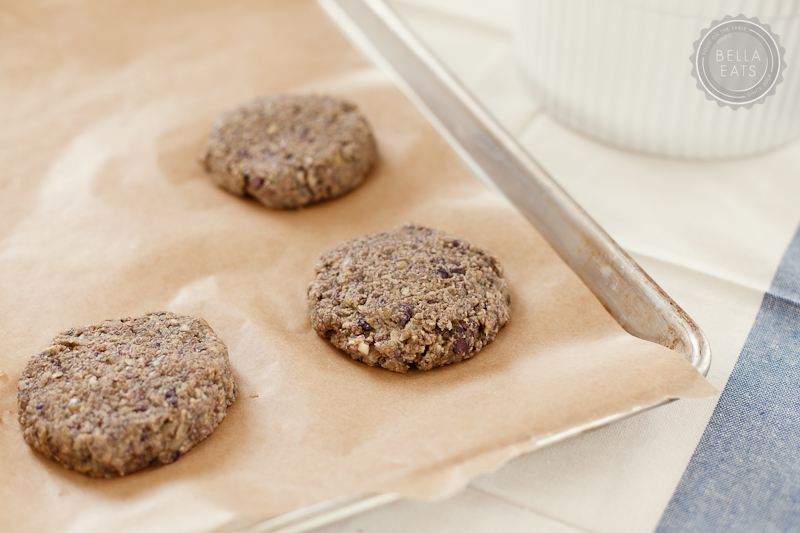
Divide the burger mix into 6 equal pieces. Line a baking sheet with parchment paper and spray with cooking spray. Form mixture into patties, spray with a little more cooking spray and bake for 15 minutes. Flip burgers and bake for 12 to 15 more minutes, until nicely browned. (I also pan-fried these instead of baking them, which was tasty too).
I think I owe you all this one. Something healthy, hearty, warming, and veggie-full. If I were you I'd be a little upset with me, returning after 3 months away with sticky buns. And empanadas. And cake. Especially with all of those resolutions floating around at the back of your mind, begging to be broken by a lemon-scented, butter and cream-filled dessert. That's just wasn't fair of me, was it?
So, here you go; my new favorite soup. A version of which I've been making for many years...but there is just something so right about this particular one. Perhaps it is the incredibly frigid winter we're having in Charlottesville; a January full of gray skies that threaten, but haven't truly delivered, a good snow. Cheerful orange soups are especially good during months like that. Or maybe it is the fact that I work out of my home office now, and that every now and then as I sit at my computer, blanket and cat warming my lap, fingers nearly frozen, I'll think "soup would be wonderful for lunch". And then I get up and go to the kitchen and make this one. Soup cooked under those circumstances tastes just a little better, I think, and I'm liking that perk of self-employment very, very much.
Even made in the evening this soup is a big hit. Smooth and rich without the addition of cream, hearty and earthy and rosemary-scented, quick and easy and made in one pot. What's not to like? Please try it, I'd love to hear what you think.
Butternut Squash + Sweet Potato Soup serves 4
Ingredients:
(1) small butternut squash, about 1.5 pounds, diced (1/2-inch)
(2) sweet potatoes, peeled and diced (1/2-inch)
1 medium onion, diced
3-inch sprig of fresh rosemary
2 tbsp butter
6 cups vegetable broth
salt + pepper
Method:
Melt butter in large pot over medium-high heat. Add vegetables and rosemary and stir to coat. Cover pot and allow veggies to sweat for 10 minutes, stirring occasionally.
After 10 minutes, add broth. Bring to a boil then drop heat to moderate simmer. Let soup simmer for an additional 20 minutes, until potatoes and squash are quite tender. Remove rosemary sprig. Using an immersion blender or a regular blender, puree' soup until smooth and creamy. Salt and pepper to taste.
It may seem odd to be posting a recipe for empanadas in the dead of Winter. To me empanadas are a Summer food, or maybe Fall; plucked up from a street vendor or taco stand, wrapped in waxed paper, eaten as you walk an outdoor festival or Charlottesville’s downtown pedestrian mall. They are perfect on-the-go, warm weather, sandals and short sleeves food; self-contained pockets of goodness you can eat as you walk. Outside. In the sunshine. So why, then, am I sharing these with you in the gray and bitter cold of January?
Well, for one, I am long overdue in posting this recipe on Bella Eats. Had I uploaded the images of empanadas just after making them, at the beginning of October, when butternut squash was just starting its weekly appearance on our menu, there would still be Fall festivals and backyard BBQs to attend. I wavered with whether or not to even publish this one, thinking that I’d lost its window of opportunity along with that of a handful of apple dishes I’d prepared, until I received an email from a friend on Saturday. She and her husband were on their way to Bali. Bali! In January! How lovely.
Shortly after reading that email I watched Eat, Pray, Love (which, it turns out, is not nearly as good as the book) and stared longingly at the beaches and bike riding and sundresses of Indonesia, the warmth of it all seeping from the screen. That is what I crave this time of year, the ability to escape to someplace warm and tropical, if even for just one meal. If you’re at all similar to me then a dish like these empanadas, which are made up of Winter-ish ingredients but convey the spirit of warmer times, will be just what you’re looking for this January.
Unless, of course, your resolutions for the new year include limiting luxuries like butter in your diet. To that I say, “everything in moderation” and “invite some friends over”! These rich, savory, chock-full-of-butter pockets certainly are not something to have on hand for multiple days at a time, and so are really the perfect thing to make and experiment with when you have plans to eat with a group of people. Just as empanadas are an excellent walking food, they also work well at a mostly-standing, “lose the Winter blahs with tequila in one hand” party. I have a feeling that we will all be looking to add one of those gatherings to our calendars towards the end of this gray and dreary month, so keeping this recipe close will be handy. Trust me.
Butternut squash roasted with mushrooms and wrapped in a delicate, butter-full pastry has all the makings for a hearty Fall-Winter meal. The fresh tomatillo sauce, however, does throw me off. In a space where I try to share mostly seasonal recipes, anything that calls for tomatillos in the heart of January seems a bit hypocritical, does it not? Luckily, there are some good options for jarred tomatillo salsa out there, any of which would be an excellent (and much less time-intensive) addition to the empanadas. I would, however, keep this sauce in mind next Summer when tomatillos are available, and think about making and putting some away for the Fall and Winter months ahead.
Butternut Squash + Mushroom Empanadas with Tomatillo Sauce from Gourmet, October 2002 makes 8 empanadas
Filling
1 cup diced (1/4 inch) butternut squash
1/2 cup finely chopped white onion
6 small garlic cloves, minced
2 tbsp olive oil
2 (2 to 3 inch) fresh jalepeño chiles, seeded and ribs discarded, finely chopped
1 pound fresh exotic mushrooms, trimmed and coarsely chopped (I just used cremini mushrooms, because I had them)
Sauce
1 dried pasilla de Oaxaca chile (I used a canned chipotle chile in adobo sauce, also, because I had it) chopped finely
3 garlic cloves, left unpeeled
1 pound fresh tomatillos, husks discarded and tomatillos rinsed and quartered
1/4 cup finely chopped white onion
1/4 cup water
1/2 tsp salt
Empanada Dough (from Gourmet, October 2004 - makes enough for 12 empañadas)
2-1/4 cups unbleached all-purpose flour
1-1/2 tsp salt
1 stick (1/2 cup) cold unsalted butter, cut into 1/2 inch cubes
1 large egg
1/3 cup ice water
1 tbsp distilled white vinegar
Egg Wash
1 large egg beaten with 1 tbsp water
Method
First, make empanada dough. Sift flour and salt together in a large bowl. Blend in butter with your fingertips or with a pastry blender until mixture resembles course meal with some (roughly pea-size) butter lumps.
Beat together egg, water, and vinegar in a small bowl with a fork. Add to flour mixture, stirring with fork until just incorporated (the mixture should look shaggy).
Turn out mixture onto a lightly floured surface and gather together, then knead gently with heel of your hand once or twice, just enough to bring dough together. Form dough into a flat rectangle and chill, wrapped in plastic wrap, at least one hour.
Next, make filling. Preheat oven to 400˚. Combine together the squash, onion, garlic, jalepeño, and mushrooms. Toss with olive oil and a good sprinkling of salt and pepper, and spread in an even layer on a baking sheet. (The Gourmet recipe differs here, boiling and sauteing the vegetables. I love the flavor that is brought forth with roasting, so chose to cook the filling using this method instead.) Roast for 25-35 minutes, until the squash is tender and the mushrooms have released their liquid, stirring every 10 minutes or so. Remove from oven and cool in pan on rack.
Meanwhile, make the sauce. Heat dry, non-stick pan over moderately high heat until hot, then toast unpeeled garlic until lightly blackened, 2 to 3 minutes on each side. Cool garlic and peel.
Simmer tomatillos, onion, garlic, chile, water, and salt in a large saucepan, covered, until tomatillos are very tender, about 20 minutes, and cool slightly. Puree sauce in a blender (or with an immersion blender) until smooth (use caution as liquid is VERY hot). Return sauce to pan and season with salt.
Finally, assemble the empanadas! Keep the oven heated to 400˚. Divide dough into 12 equal pieces and form each into a disk (you will only need 8 of these pieces, the rest can be stored in the freezer for up to 1 month). On a floured surface, roll out one disk into a 6 to 7 inch round. Spoon about 1/3 cup of filling onto center and brush edge of pastry with egg wash. Fold dough in half to form a half-moon, enclosing filling, and press edges together to seal. Crimp edge decoratively and move empañada to a large baking sheet. Make 6 more empañadas using the same method.
Lightly brush empanadas with remaining egg wash and sprinkle tops with coarse sea salt. Bake on middle rack of oven until golden, 25-30 minutes.
While empanadas are baking, reheat sauce. Cut each empanada in half when slightly cooled, and drizzle about 3 tablespoons of sauce around them. The sauce will keep for about a week in an airtight container in the refrigerator, and is wonderful as a salsa or drizzled over burritos, fish, or chicken.
Last Monday I sat on a plane at Louis Armstrong International Airport, Brian’s hand in mine as we taxied down the runway and lifted off, on our way home to Charlottesville. Out the window I watched a city that I love dearly fall away, nostalgic and missing New Orleans already.
We’d arrived Friday morning to heat and humidity that we won’t (hopefully) see in Virginia for another two months. After checking bags at our hotel, changing into shorts and slathering on sunscreen we set out into the city with two friends who’d joined us for four days of exploring, absorbing, listening and, most importantly, eating. As the veteran visitors, Brian and I had laid out an agenda based on food - our nine meals were carefully scheduled and the rest of the trip was woven loosely around their locations.
As New Orleans disappeared beneath a bank of hazy clouds last Monday I found myself thinking that we could live there, Brian and I, in a cute Creole cottage just downriver from the French Quarter. We’d paint our home in shades of blue and grey with a vibrant yellow, or maybe eggplant, accent around the windows and doors. There would be bikes leaned up against the side of the house, one with a basket, ready at a moment’s notice to be ridden into the Quarter for lunch or to the Crescent City Farmer’s Market for fresh, local seafood and produce. Our yard would be tiny, just big enough for a vegetable garden and a stone terrace with an umbrella-covered picnic table. We’d string lanterns from the trees and host crawfish boils on that terrace, invite guests who would wear jaunty hats and sip frosty cocktails as they unconsciously swayed to the sounds of Doreen’s clarinet wafting from the stereo.
It is a lovely dream, one that I could see becoming a reality one day if we could just find a way to get used to the stifling heat. And the cockroaches - complete terror only scratches the surface of the affect that those little buggers have on me. And the city’s status as the murder capital of the USA... Minor details, since I already have the biggest obstacle solved - vegetables. Did you notice that my list of traditional NOLA fare does not include even a hint of green? While we happily consumed fried / buttered / sugared food for four full days, I believe that four days must be the limit. For as I dreamt about our little blue Creole cottage and crawfish boils and lanterns strung from trees and clinking glasses of frosty beverages, I managed to squeeze a giant bowl of homegrown greens onto the linen-covered table in the middle of that backyard terrace.
A vegetable garden would be an absolute necessity to our New Orleans lifestyle.
The next day, back at work in Charlottesville and fully submerged in reality, Brian and I met a friend for lunch at Feast. I ordered a mixed salad plate, and while I couldn’t stop talking about the wonderful food in New Orleans, my mind was distracted by how amazingly satisfying the plate full of veggies in front of me was. And on Saturday, at our own City Market, we filled our basket with all the green we could get our hands on - two heads of lettuce, two bunches of both kale and collards, two pounds of asparagus.
I plan to share some of our favorite New Orleans-inspired dishes here on Bella Eats in the next month or two (along with some photographs from our trip!), but just had to give our systems a break this last 10 days. I'd originally thought that a full month of NOLA fare on this little blog could be fun, but have decided instead to spread those rich, indulgent dishes out, to balance them with recipes like this side of wilted spinach tossed with fresh peas, garlic and scallions. It's better this way, I promise.
Tangles of earthy spinach play well with the sweet peas in this dish. The mild flavors are complimented nicely by the subdued bite of sliced garlic and a generous handful of scallions. Serve alongside a fillet of white fish dressed simply with lemon, sea salt and herbs for a healthy, feel-good-to-the-core meal.
1 bunch of scallions, dark and light green parts diced (about 1/4 cup)
3 garlic cloves, sliced
2 cups of fresh or frozen peas
1 cup white wine
4 large handfulls of spinach, tough stems removed
sea salt and pepper
Method
Heat olive oil and 1 tbsp butter in deep skillet over medium heat. Add the scallions and sliced garlic, stirring to coat with oil and butter. Let saute' for 2-3 minutes, not letting the garlic brown.
Add the peas, and saute' for another 2-3 minutes, until the garlic starts to turn golden brown. Add the wine, and bring to a boil. Reduce to a simmer and allow to cook for another 2-3 minutes. If using fresh peas, be sure to test one before adding the spinach to be sure that it is cooked.
Add the spinach, stirring to coat with liquid. Allow spinach to heat through and wilt, 2-3 more minutes. Add last tbsp of butter and salt and pepper to taste.
As Spring quickly approaches, I’m finding that the evening meal has become a very relaxed affair. With daylight extending itself to an hour that allows for chatting with a glass of wine on the back deck after work, thoughts of dinner don’t start to cross the mind until the sun dips behind the trees and the temperature drops to a point that requires either a move inside or the addition of a lightweight sweater. It is only then that we notice the clock (and our bellies!) telling us that it is past 7pm, and time to pull something together in the kitchen.
I haven’t been planning our meals very far in advance, something that is unusual to my character. Typically our weekly menu is fully laid out by Saturday afternoon, neatly written in bright-white across our pantry doors coated with black chalkboard paint. I consider the menu carefully before finalizing my grocery list, receiving feedback from Brian and swapping days according to the longevity of ingredients to be purchased. The planned meals may vary slightly after Sunday’s trip to the store, when I discover that there are perfect golden beets that I hadn’t counted on calling my name, or that red cabbage has been particularly popular lately, and therefore its typical spot in the produce department is empty save for one sad, wilted purple leaf.
Lately our trips to the grocery have been more rushed than usual, the product of two very busy schedules finding only slivers of overlap in which to make the drive to and wander the aisles of the market. Oftentimes we wind up stopping in on our way to or from other errands, on days not typically designated as ‘grocery days’, leaving me standing in the middle of the produce department, overwhelmed and without a list. And so we rely on stand-by ingredients, items we purchase most weeks religiously, and add in whatever else looks or sounds good at that moment. I quickly assemble meals in my head, substituting ingredients in and out of pastas and soups, making sure that we’ll be able to use whatever we purchase and not be left with a bag full of yellow brussels sprouts at the end of the week. It still happens occasionally, but at least I try.
Which brings me back to the weeknight, post-7pm. Brian and I stand in our kitchen, him ravenous and me a little chilly, peering into the pantry and refrigerator, pulling out ingredients to assemble a spontaneous meal together. Our preferences are changing with the season, moving from heavy and hearty to light and bright. 'Quick' is a new requirement now that we’re getting started on preparation later in the evening, and 'warm' still plays a role for me after having been outside, barefoot and sweater-less, after the sun has set. The results have been fantastic; pasta tossed with leftover chicken, local ham and a light parmesan broth; a mélange of roasted chickpeas, potatoes and brussels sprouts; an on-a-whim creamy soup of potatoes, parsnips and asparagus.
The best part has been creating these recipes, together, according to our own at-that-moment preferences rather than the recommendations of a book, magazine or blog. It is easy, when I have a plan, to lose myself in the kitchen to the preparation of dinner, excusing Brian to take care of one of the many items on his ever-growing ‘to do’ list. But when there is no plan, and the task is to create quickly, we come at it from both sides, each tossing in our own suggestions to make a dish that is so much more than the sum of its parts.
I’ll admit that this egg drop soup is a recipe that has been in our repertoire for years, but it is so simple and satisfying, and we nearly always have its ingredients in our kitchen, that it is perfect for a spontaneous lunch or dinner. It is not enough on its own, which lead to the creation of the vegetable fried rice variation below, on a whim.
Egg Drop Soup
serves 2
Ingredients
4 cups chicken or vegetable broth, divided
chunk of fresh ginger root, 1/4-inch thick by 1-inch diameter
2 tbsp chopped fresh scallions
¼ tsp salt
4 tsp cornstarch
2 eggs
1 egg yolk
Method
Reserve 3/4 cup of the broth, and pour the rest into a large saucepan. Add the salt, ginger and scallions, and bring to a rolling boil.
In a cup or small bowl, stir together the remaining broth and the cornstarch until smooth. Set aside.
In a small bowl, whisk the eggs and egg yolk together using a fork. Drizzle the egg a little at a time from the fork into the boiling broth mixture. The egg should cook immediately.
Once all of the egg has been dropped, stir in the cornstarch mixture gradually until the soup is the desired consistency.
This dish was nearly spontaneous, the only forethought being that I made extra brown rice a few days prior, so that it would be ready and waiting in the fridge for some version of fried rice that had yet to be determined. It just so happened that the night we decided to make egg drop soup was also the night that the leeks were starting to look a little haggard, and I wanted to use the brussels sprouts before they reached that same state. Thus, a new star was born.
Fried Rice with Leeks and Brussels Sprouts
serves 6
Ingredients
2 tbsp peanut oil, divided
2 medium leeks, sliced thinly
1 pound brussels sprouts, ragged outer leaves removed, sliced thinly (a food processor is a wonderful tool for this task)
4 large eggs, lightly beaten
4 cups steamed brown rice, cold (ideally, leftover from the night before)
sea salt and pepper to taste
Method
Heat 1 tbsp of oil in a large nonstick skillet over medium-high heat. Add the sliced leeks and brussels sprouts, and saute' until tender and bright green, about 5 minutes. Remove from pan and set aside.
Wipe skillet clean, then heat over high heat, until a drop of water vaporizes upon impact. Add the remaining 1 tbsp peanut oil, swirling to coat pan evenly, and heat until just starting to smoke. Add eggs, tilting pan and swirling eggs to form a thin, even layer, and cook for 30 seconds. Add rice and stir-fry, breaking up eggs and letting rice rest several seconds between stirs, until rice is hot, about 2-3 minutes.
Add the brussels sprouts and leeks, stir-frying to combine and heat through. Add salt and pepper to taste.