red beet risotto
Andrea
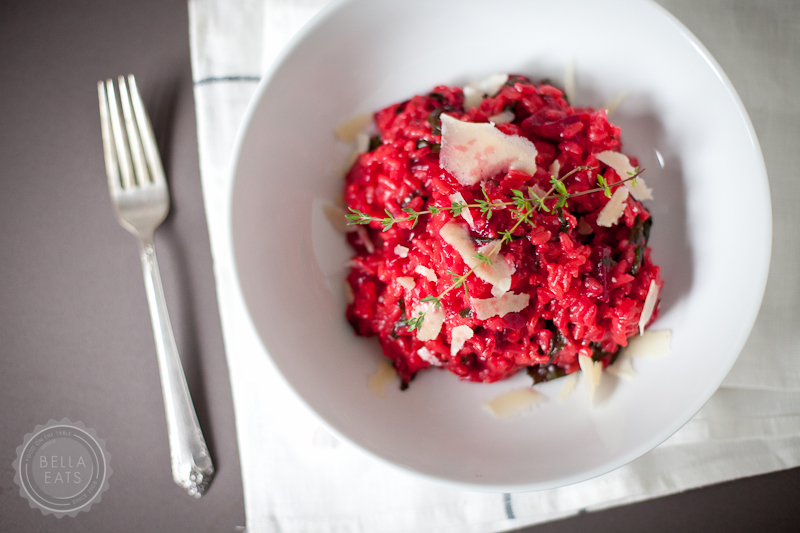
I do believe that beets are my very favorite spring vegetable. They are quickly overshadowed by tomatoes in Summer, but in May and June I could eat beets every other day. Typically I am a fan of simply roasting the globes and tossing them on a salad with chevre and a light vinaigrette. But every now and then, when I am feeling the need for something a bit more toothy and substantial I'll whip up a batch of risotto. I love the sweetness that roasted beets lend to the savory dish, and of course the vibrant hue that even a picky toddler wouldn't be able to resist.
I"ll admit...I've already written about red beet risotto here, years ago, when we were growing beets in our very own garden. The recipe has changed a bit, and the photographs have certainly improved, but I still love that first post because of its words about our little veggie patch. We're still growing beets this year, although out on Maple Hill Farm rather than just to the side of our house. And this recipe is still a favorite, one that I felt was appropriate to bring up again now that we're at the height of beet season here in Charlottesville. Plus, I just couldn't resist the urge to re-photograph the dish in all of its neon-pink glory, in proper lighting, with less distraction. It deserves to be the star of the show!
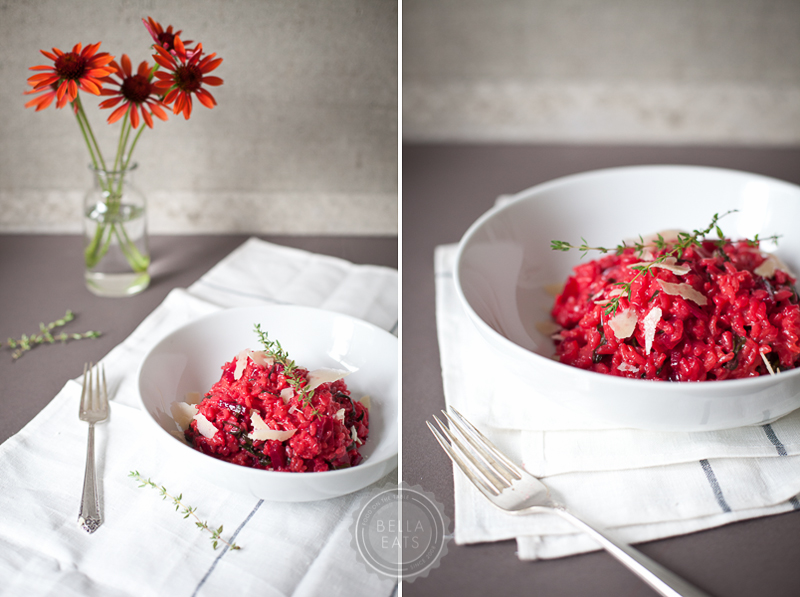
These days, I'm adding the beet greens directly to the risotto, rather than cooking them up on the side. They don't add much flavor to the dish, but I do like the additional texture and all of the nutrients packed into the deep green leaves. Thanks to the New York Times for that little suggestion.
Red Beet Risotto
from the new york times
serves 4 as a main course
Ingredients
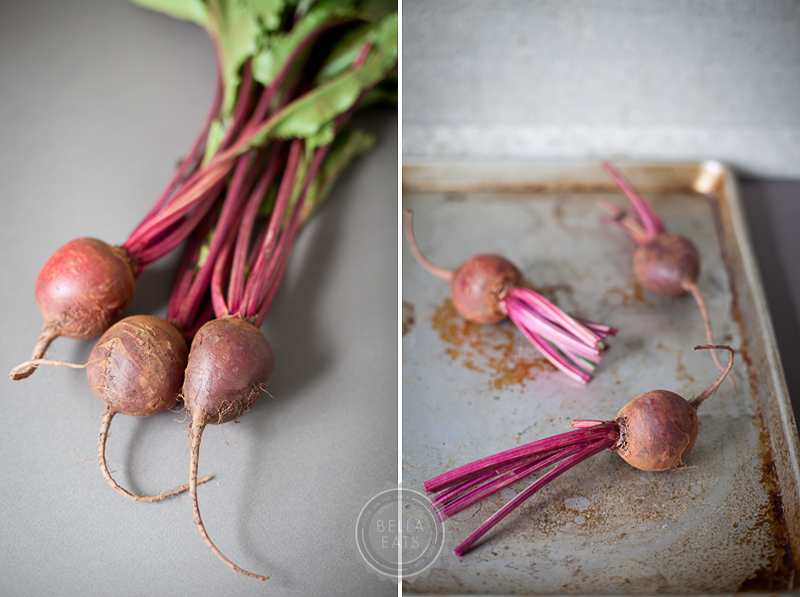
- 3/4 pound beets (1 small bunch of 3 to 4)
- 1 bunch beet greens, stemmed and washed (from your beets, if fresh and unwilted. leave them out if they are past their prime)
- 6 to 7 cups chicken or vegetable stock, as needed
- 2 tbsp extra virgin olive oil
- 1/2 cup finely chopped onion
- 1-1/2 cups arborio rice
- 2 garlic cloves
- 1/2 cup dry white wine
- salt
- freshly ground pepper
- 1/2 cup parmesan cheese, grated
- 2 tbsp finely chopped flat-leaf parsley
Method
- First, roast the beets. Preheat your oven to 400°. Wrap the beets in aluminum foil and place on a baking sheet. Roast for about 20 minutes, until the beets are easily pierced with a fork. Remove from oven and allow to cool, then peel and dice the beets. The skin should slide off easily.
- Slice the greens into 1-inch strips, set aside.
- Place the stock in a medium sauce pan and bring to a simmer, then reduce heat to low.
- In a large, wide, heavy-bottom saute pan, heat the oil over medium. Add the onion and stir while cooking until it starts to soften, about 3 minutes. Add the rice and the garlic and stir while cooking until the rice is separate and starting to crackle, about 3 minutes.
- Stir in the wine and cook over medium heat, stirring constantly. When the wine has just about evaporated, add in 1 ladleful of stock (about 1/2 cup) just to cover the rice. The stock should bubble slowly (adjust heat). Cook, stirring occasionally, until the stock is nearly absorbed, then add another ladleful. Continue to cook in this fashion, not too fast and not too slowly, stirring often and adding more stock when the rice is dry, for about 10 minutes.
- Stir in the diced beets and sliced greens. Add more stock and continue cooking as before, for another 10-15 minutes, adding stock when the rice is dry. The rice should be tender but not mushy, with no hardness at the middle. When it has reached the correct consistency, season with salt + pepper. Add the parmesan cheese and the parsley, and stir to combine. The rice should be creamy, if it is not, add another 1/2 cup of stock.
- Adjust seasonings and serve.


 Would you look at that? The garden has gone wild! To enter one must blindly reach through the blackberries to the latch on the gate and, once the latch is found and opened, duck underneath the new growth that won’t bear fruit until next summer. Tomatoes have broken free of their cages, the strawberries are taking over our pathway,
  Once inside you embark on what feels like a treasure hunt, pecking through the ever-bearing strawberry patch for the tiny, sweet fruit and pulling blackberry branches aside to reveal purple berries as big as my thumb. The tomatoes are plump and just starting to ripen, moving from a deep apple green through shades of yellow, peach and pink before finally settling into deep rosy reds (romas and brandywine), golden yellows (hawaiian pineapple) or dusty purples (cherokee princess).
 The cucumber vines have been prolific, providing us with more bounty than we’ve been able to handle, and the okra is just starting to bear its strangely-shaped pods. We’ve definitely moved from spring crops into summer, having already said our goodbyes to the
  Beets are a newly acquired vegetable on my list of top ten favorites. I was introduced to them just a year or two ago, in the roasted form and mixed with a medley of potatoes, carrots, pearl onions and brussels sprouts. Having only had experience with the canned and pickled varieties in the past, I was pleasantly surprised when I took my first bite of fresh roasted beet and discovered its delightfully sweet flavor and firm texture. Ever since, beets have made it into most of our roasted veggie dishes and made select appearances in
  Most recently I tried beets in a creamy risotto, and was extremely pleased with the final result. I based the recipe on a butternut squash risotto that I've been making for many years, thinking that the beets would make an easy substitute in level of sweetness and overall texture. The beets do take longer to tenderize than butternut squash, so my method resulted in a creamy risotto with bits of slightly firm beets. If you'd prefer your beets to be very soft, I suggest roasting them with a splash of olive oil for 10-20 minutes before adding them to the skillet.
Oh! And if you're lucky enough to purchase (or grow!) beets that still have their greens attached, and those greens are still crisp and brightly colored, cook them up like you would
Most recently I tried beets in a creamy risotto, and was extremely pleased with the final result. I based the recipe on a butternut squash risotto that I've been making for many years, thinking that the beets would make an easy substitute in level of sweetness and overall texture. The beets do take longer to tenderize than butternut squash, so my method resulted in a creamy risotto with bits of slightly firm beets. If you'd prefer your beets to be very soft, I suggest roasting them with a splash of olive oil for 10-20 minutes before adding them to the skillet.
Oh! And if you're lucky enough to purchase (or grow!) beets that still have their greens attached, and those greens are still crisp and brightly colored, cook them up like you would  I think that barley would be a fantastic whole-grain substitute for the arborio rice in this recipe, we were just all out. Make sure to use pearl barley if you try it - quick-cooking barley doesn't allow for the slow release of the starches that provide the creaminess risotto is known for.
Red Beet Risotto
serves 4 as a main course
Ingredients:
I think that barley would be a fantastic whole-grain substitute for the arborio rice in this recipe, we were just all out. Make sure to use pearl barley if you try it - quick-cooking barley doesn't allow for the slow release of the starches that provide the creaminess risotto is known for.
Red Beet Risotto
serves 4 as a main course
Ingredients:
 Interested in reading other posts about our garden?
 However, when you’re throwing a party and only contributing a few key dishes to the event, the pressure is on to make those dishes shine. Especially if your name is Andrea and you write a food blog. It isn’t outside pressure; its completely internal. I do it to myself, and not because I feel the need to impress my guests (which is a nice bonus, if it happens), but simply because I don’t get many opportunities to cook for that many people. Smoking a 10-pound pork shoulder for 10-12 hours isn’t something that Brian and I do every weekend, as nice as that sounds. And I certainly wouldn’t make
  The pulled pork was an easy decision, we’d been wanting to try something similar for quite some time. I left Brian in charge of consulting with the local farmer that supplied the shoulder (Double H Farm - fabulous people and Big Green Egg owners as well!) and finding the right vinegar-based barbeque sauce recipe to go along with it. The
  Many thanks to
 Such as how strawberries make a lovely addition to a simple salad, especially when you drizzle poppyseed dressing over the top. And how sugar snap peas are a fine enhancement for that same salad with their delightful crunch and sweet flavor. Oh, and that lettuce and spinach? Fresh from our garden as well. All the rain we've had this year has kept our lettuces very happy, we didn't have nearly the bounty in 2008 as we've had this summer.
 And I can't forget to mention that a strawberry rhubarb syrup is delicious spooned over a lemon bundt cake, a recipe I'll share with you as soon as I can weed through the gazillion other drafts waiting (im)patiently in my drafts folder.
 And what about the blackberries? They've multiplied exponentially this year, completely taking over the southern edge of the garden and providing respite from the afternoon sun for the tender herbs, onions and lettuces in their shadow.
 Even as I write this post, these pictures I am about to share with you are already inaccurate. For now, the blackberries have started to turn a rosy red. In just a few weeks they will morph into plump purple berries the size of my thumb and provide endless possibilities for jams, pies and ice creams. I can't wait. I really can't.
 But the sugar snaps, they are our greatest accomplishment yet this season. In years past we've started the seeds to0 late, so that just as the plants are starting to produce the heat zaps them and they crumple to the ground, leaving us with just enough peas to munch on in the garden but never enough to make it back to the kitchen. This year though, we've got more peas than we know what to do with. Each day I am bringing a bowl-full inside after popping half a dozen into my mouth while picking. They are delicious in salads and added last-minute to a stir-fry. The less you cook them the better - you don't want them to lose their wonderful crunch.
 My latest use for sugar snaps comes from the June 2009 issue of Bon Appetit. The peas added a nice sweetness to a salad that threatened to be overwhelming with its spicy radishes, red onions and caesar dressing. I loved the textures as well - the crunchy sugar snaps and radishes were a nice compliment for the softer potatoes. Its a nice addition to any picnic or cook-out, and if you make it just for you there will be plenty for lunch all week long.
 I decided to make this salad the day before we were to join some friends for dinner, thinking that potato salad is always more delicious after having sat overnight in the fridge. And it was delicious the second day, although no more so than the first, and certainly less beautiful. The vibrant colors you see below were captured just after the salad was assembled, with the potatoes still slightly warm. The next day all of the colors mellowed and meshed together, leaving a not-nearly-as-nice presentation. I won't make the mistake again.
 Caesar Potato Salad with Sugar Snap Peas
from Bon Appetit, June 2009
Ingredients:
Caesar Potato Salad with Sugar Snap Peas
from Bon Appetit, June 2009
Ingredients:
 It was perfect weather for wandering around the local garden center, picking up spring-harvest seeds and dreaming about how, if only I had my own
  On Saturday I bought lettuce and spinach, beets, peas and broccoli, all seeds that can go in the ground in the next couple of weeks and provide a harvest in as few as 45 days. In May, after danger of Virginia frost, I'll be sowing green beans and okra seeds to be harvested in July. Baby tomato, cucumber, bell pepper and squash plants will go into their assigned beds and parsley, basil and dill will join the perennial chives, thyme and oregano already starting to show some green.
 I think I am most looking forward to growing our own broccoli, although each veggie has a special place in my heart and becomes my instant favorite the minute it is ripe. But broccoli...it gave us trouble last year, or at least the squash bugs that enjoyed most of the harvest gave us trouble. And I enjoy a challenge. We will persevere with broccoli this spring and when we do we will make it
  There are a few things about this recipe that I need to share, things I will do differently when I make it again. First, I used whole coriander but will definitely use ground next time. Biting into the occasional coriander seed was an intense, unpleasant experience for me. If you love coriander feel free to use whole seeds, but I think spreading the flavor more evenly by using ground would be more enjoyable.
 Second, the tofu needs to go in the oven first. I put the tofu and broccoli in at 425* together, and the broccoli was done well before the tofu. To speed things up I wound up removing the tofu from the oven and quickly pan-frying it, but I think it would be really good roasted. I've specified in the recipe below to put the tofu in first and roast it until golden brown on one side before flipping it and adding the broccoli for the last 20 minutes.
 Roasted Broccoli with Glazed Tofu
inspired by the
Roasted Broccoli with Glazed Tofu
inspired by the  A few notes:
First, my cousin Kelly (
A few notes:
First, my cousin Kelly (