Contact Us

Use the form on the right to contact us.

You can edit the text in this area, and change where the contact form on the right submits to, by entering edit mode using the modes on the bottom right. 


123 Street Avenue, City Town, 99999

(123) 555-6789

email@address.com


You can set your address, phone number, email and site description in the settings tab.
Link to read me page with more information.

Blog

Filtering by Category: snacks

spicy cheese straws

Andrea

I love finding quick, delicious, impressive snacks to make on a whim. It can be dangerous, sure, to have an arsenal of last minute recipes from which to choose whenever the mood strikes you for a salty or sweet treat. But, you'll never regret having those favorites when you recieve an impromptu invitation to dinner at a friend's abode. I've got quite a few on the 'sweet' side of the list, but the salty side was lacking until I found these spicy cheese straws over at Smitten Kitchen. I've made them twice in the two weeks since seeking out the recipe for an editorial assignment, and have no doubt they'll make an appearance many more times in the coming weeks. I even discovered that the dough makes an excellent cracker, especially when paired with sweet/tart apples and a little bubbly champagne. And maybe a little Harry Potter and the Sorcerer's Stone with a girlfriend on a Monday evening. Hey, who said Mondays had to be dreary? These fiery cheese straws/crackers will certainly help to spice things up. Har-de-har. 

Cheese Straws or Crackers

from Smitten Kitchen

Ingredients

  • 1-1/2 cups shredded sharp cheddar cheese
  • 4 tbsp unsalted butter, cut into pieces
  • 3/4 cup flour, plus more for dusting
  • 1/2 tsp kosher salt
  • 1/2 tsp crushed red pepper flakes
  • 1 tbsp milk

Method

  1. Preheat oven to 350℉.
  2. In a food processor, combine the cheese, butter, flour, salt, and pepper, pulsing until the mixture resembles coarse crumbs. Add the milk and process until the dough forms a ball.
  3. On a lightly floured surface, roll the dough to an 8x10 rectangle about 1/8-inch thick. Cut the dough into 1/4-inch wide strips, or 1-inch crackers. (I used a pizza cutter and a pastry cutter to make easy work of this.) Gently transfer the strips or crackers to an ungreased cookie sheet, spacing 1/4-inch apart. You can twist the straws as I did, if you like.
  4. Bake the straws/crackers in the middle rack of the oven...about 12 minutes for the straws and 15-18 for the crackers, until they turn golden brown.  Remove from oven and transfer to cooling rack.
  5. Straws/crackers will keep in a sealed container in the refrigerator for 2 days.  I highly suggest multiplying this recipe for a party, as two people can easily finish these off as a meal. It may have happened at our house...

caramel apples

Andrea

Caramel apples. The perfect Fall treat, bringing to mind images of carnivals and festivals and Halloween parties. I've made a few variations of candied apples in the past but this version is by far my favorite. This caramel is heavy and dark, laced with mollasses and dark corn syrup for an earthy undertone and not-overly-sweet flavor. If you're not a fan of molasses I'd avoid this recipe as, while not overpowering, the molasses does play a significant supporting role in the dance across the tastebuds. I loved this subtle difference from regular carnival candied apples that can sometimes make your teeth ache with sweetness.  That's not to say that this particular caramel isn't sweet, because it is, it is just balanced nicely by that molasses addition.

I'm not feeling too wordy today, friends, but felt the need to get this recipe out to you while there are still some orange and yellow leaves clinging to the trees.  Especially to all of you northeasterners who are facing the first nor'easter of the year.  What the heck?!?  I assume there will be some time spent indoors this weekend, lamenting the loss of Autumn so early.  Why not spend that time making the perfect Fall treat?

Hello, Winter? Could you back off please?

Happy weekend, friends!

Caramel Apples

from simply recipes

makes 12

note that you will need an accurate candy thermometer for this recipe

Ingredients

  • (1) 1-pound box dark brown sugar
  • 1 cup (2 sticks) unsalted butter, room temperature
  • (1) 14-oz can sweetened condensed milk
  • 2/3 cup dark corn syrup
  • 1/3 cup pure maple syrup
  • 1/2 tsp vanilla extract
  • 1 tsp dark mollasses
  • 1/4 tsp salt
  • 12 sturdy lollipop sticks, chopsticks, or twigs (these aren't great for holding, better for apples you plan to cut into slices)
  • 12 medium apples

Method

  1. Combine sugar, butter, condensed milk, corn syrup, maple syrup, vanilla, molasses and salt in a thick-bottomed 2-1/2 or 3-quart saucepan. Stir with a wooden spoon on medium-low heat until all of the sugar dissolves. You can test this by rubbing a little bit of the caramel between your fingers (let it cool on a spoon a bit first!!!). There should be no grittiness.  Brush down the sides of the pan with a wet pastry brush to dissolve any sugar crystals that might form on the pan sides.
  2. Attach a clip-on candy thermometer to the pan and cook the caramel at a rolling boil until the thermometer reaches 236℉, stirring constantly and slowly with a wooden spatula.  Be sure to scrape the bottom of the pan as you stir, so that the caramel doesn't stick.  Once it sticks it will burn, and you'll have to start over.  Continue to occasionally brush the sides of the pan down with a pastry brush.  Carefully pour the caramel into a metal bowl and allow it to cool until the temperature lowers to 200℉, at which point you are ready to dip the apples.
  3. While the caramel is cooling, prepare a large baking sheet, covering it with parchment paper, butter aluminum foil, or a silpat. Insert your sticks into each apple core (I used a chopstick to poke the holes for the twigs).
  4. When the caramel has cooled enough for dipping, dip the apples in, one by one, by holding on to the stick, and vertically lowering the apple into the caramel, submerging all but the very top of the apple. Pull the apple up from the caramel and let the excess caramel drip off from the bottom back into the pan, then place the apple on the prepared baking sheet. The caramel will pool a little at the bottom of each apple. Place the sheet in the refrigerator to chill for at least 15 minutes.  At this point, if you'd like to add toppings, do so.  Otherwise, allow the apples to chill for at least one hour.
  5. I recommend, after chilling, storing the apples at room temperature.  Otherwise the caramel is hard as a rock.

citrus popsicles for grown-ups

Andrea

Two weeks ago I collaborated on a photography session with Soiree. and Rock Paper Scissors. Actually, it was a 6-week process of planning, shopping, meeting, envisioning, and shopping some more. The result was this Mid-Century Modern Wedding concept shoot that I shared on Andrea Hubbell Photography today, and I couldn't be more proud of what we created! I've said it before, but I love my job!!! These adult popsicles were created to help set the mood for a fun afternoon wedding and meal, meant to cool down energetic dancers when they step off the floor. 

I've only recently discovered Aperol, an Italian aperitif similar to Campari, but with more sugar and less alcohol. It is a blend of bitter orange, gentian rhubarb, and an assortment of herbs and roots. It happens to complement grapefruit juice beautifully, and adds a nice kick of color to a classic greyhound, or these popsicles that required an extra bit of orange to fit in with our 'wedding' decor. 

You have no idea how hard it is to find a simple, cylindrical popsicle mold! So, instead, I used double shot glasses and 'cookie sticks' bought at a craft store. The shot glasses worked really well, provided a place to wrap the fun pattern created by Rock Paper Scissors, and looked adorable!

Aperol Citrus Popsicles (fit for a wedding...)

Ingredients

  • 1 cup sugar
  • 1 cup water
  • 3 cups grapefruit or orange juice (pulp free...fresh is best)
  • 1/2 cup Aperol

Method

  1. Mix the water and sugar together in a small pan over a low heat, and bring up to boil until the sugar dissolves. Allow the simple syrup to boil for 4 minutes, remove from heat and cool (makes a little over 1 cup).
  2. Combine the citrus juice and Aperol and add 1 cup of the cooled syrup. Adjust to taste: for the grapefruit pops, you may want to add a tablespoon or two extra syrup if you prefer them less tart. Remember, the mixture will taste slightly sweeter in liquid form than it does when frozen.
  3. Pour into popsicle molds and freeze at least 8 hours or overnight. To remove, run the molds quickly under hot water, and gently pull out the pops.

at the market: kale

Andrea

Last Saturday was the opening weekend for the 2010 Charlottesville City Market. I awoke bright and early that morning, positively giddy with excitement, ready to greet old friends and fill our basket with local meat, cheese, eggs, coffee and greens. I not-so-gently shook Brian awake, bounced down the hall to brush my teeth and tame my hair, pulled on jeans and slipped into sandals all in the amount of time it typically takes me to fumble around groggily looking for the ‘snooze’ button on my alarm.

We arrived beneath a sky washed with shades of pink and blue, just as the cool morning air was pierced by golden sunbeams slipping between historic brick buildings.  Our bodies cast long shadows on the sidewalk as we made our way towards the parking lot full of rainbow-hued tents, listening to the chatter of vendors and patrons mingled with the strum of a banjo and the bark of a dog.  The intoxicating smell of sizzling, smokey breakfast sausage wafted our way as the folks from Babes in the Wood grilled plump links for the line of people curled around their booth, ready to get their fill of a market favorite missed for the last four months.

We made our way down the already-crowded aisles, stopping to admire a booth of freshly cut tulips resembling painted Easter eggs swaying atop fluorescent green stems.  Our first destination, always, is Double H Farm, where we're sure to receive a big bear-hug from Richard and a bright, happy smile from Jean.  It was no different last Saturday, and even though we saw each other every few weeks through the long, cold Winter, we greeted each other as if it had been months since our last visit, all so excited that Spring is finally here and we'll be able to catch up every week.

After a brief chat, our basket was filled with a dozen eggs, arugula, kale, sliced ham and a 6-pack of lettuce plants.  Goodbyes were said alongside "see you next week!" and Brian and I moved on to explore the rest of the market.  We stopped at the Shenandoah Joe booth for our morning cup of coffee and a pound of whole beans for the week, before moving on to Night Sky Farm for some samples of chevre and the purchase of fresh feta cheese.  We wandered between booths, waving to familiar faces and introducing ourselves to new vendors, until finally our basket was filled to the brim and our wallets were empty.

Once home I surveyed our purchases, planned our menu for the week and penned our grocery shopping list.  I love this time of year, when local, seasonal produce begins to inform our meal choices, when the trip to the grocery store happens only after a visit to the farmer's market.

Greens will play a prominent role in our diet for the next few months, until a greater variety of locally-grown produce becomes available.  I'm okay with that, as it seems that there are endless possibilities for the leafy, fiber and vitamin-full vegetables.  Last week we tried kale chips for the very first time, after seeing them pop up on many of my favorite blogs.  We used green curly kale and, although not as crispy as a potato chip, they were really quite tasty.  Next time we'll try lacinato kale, as it seems that the thicker leaves will make for a more substantial chip.

We also spread the baked kale across whole wheat pitas brushed with olive oil, and then topped the 'pizzas' with thinly sliced red onion and thick slices of fresh mozzarella.  Delicious, and such a healthy, quick dinner.

Baked Kale Chips

Ingredients
  • one large bunch of kale (I used the green, curly variety, but I think that Lacinato would be even better)
  • 1-2 tbsp olive oil
  • sea salt
  • freshly grated parmesan
Method
  1. Preheat oven to 350*
  2. Rinse and dry kale as best you can with paper towels or in a salad spinner.  Tear into bite-size pieces, discarding tough central stems.
  3. Toss kale with olive oil, just to coat very lightly.  Spread kale across baking sheets in one layer.  Sprinkle with sea salt and freshly grated parmesan.
  4. Bake at 350* for 10-15 minutes, until edges are starting to brown and kale gets mostly crispy.  Remove from oven and remove from tray, laying kale chips out on a wire rack to cool slightly.  Serve immediately.

Our City Market lost someone very dear this week.  John Coles, founder of the Virginia Independent Consumers and Farmers Association (VICFA), longtime food advocate and producer of incredible, artisanal goat cheese, has passed away.  His presence at the City Market and as a member of the local food community will be missed greatly.

You can read Joel Salatin's tribute to John here.

Read More

bella terra: 2009

Andrea

The time has come to say farewell to 2009, and HELLO 2010!!!!!!!!!!!!!  I've debated various recaps for the blog, a review of the year that could include the introduction of a new president, my trials and tribulations with running, a trip to New York city, Bella Eats on the local news, Bella Eats Pie Month and many other wonderful memories, but decided instead to keep things simple and give our garden, the source of so many great meals this year, a little tribute.

Brian and I started our garden in the spring of 2007, tilling up a 20-foot by 20-foot patch of lawn on the east side of our house.  We chose the location to take advantage of the southern light that hits the space for most of the day, bathing the vegetables, fruits, and legumes that we grow with plenty of sunshine.  Four cubic yards of topsoil and Panorama Paydirt were delivered to our driveway, on the other side of our house, and we spent an entire Saturday hauling wheelbarrow-load after wheelbarrow-load nearly 100-feet to amend the soil and break up the dense Virginia clay.  Post holes were dug and a fence was constructed, the bottom animal-proofed with chicken wire and a gravel trench.

We based the plan of the garden on Square Foot Gardening, creating 4-foot by 4-foot boxes from borate-treated lumber (which doesn't leach harmful chemicals in the soil, like pressure-treated wood) and divided those boxes into 1-foot by 1-foot squares with twine.  We left 2-foot paths between the boxes to allow for easy harvesting, and covered those paths with weed fabric and organic mulch in order to keep the maintenance as low as possible.  And then, the fun began.

Over the last three summers we've planted blackberries, raspberries, strawberries, tomatoes, cucumbers, every color of bell pepper, green beans, sugar snap peas, edamame, eggplant, corn, kale, yellow squash, collard greens, every type of lettuce, spinach, broccoli, brussels sprouts, red beets, onions, carrots, basil, thyme, oregano, sage, rosemary, chives, fennel, watermelon, cantaloupe and muskmelons, some of those with great success and others with complete failure.  All are grown from organic seeds or plants, and we don't use any sprays or chemicals.

Early each spring we spend a weekend covering each box with organic compost to prepare the soil for the seeds and plants that will grow through the next 8 months.

Bella Terra: Preparation

The chives are typically the first green in the garden, emerging from the protective cover the previous season's growth provided through the winter.

Bella Terra: Chives for a Mushroom and Herb Frittata and Cheddar Chive Biscuits and Cheddar Chive Cornbread, among other things. The other herbs follow shortly after. Bella Terra: Herbs for an Earthy Risotto, among other things.

The garden really started filling out by June, with the blackberry bush loaded down with little green berries and the herb and lettuce boxes overflowing.

The Sugar Snap Peas were one of our first vegetable harvests. Bella Terra: Sugar Snap Peas for a special Caesar Potato Salad and Spicy Pickles In July we saw some major progress, with the garden getting close to its peak season. Cucumbers. Tomatoes and Bell Peppers. Bella Terra: Beets for a Red Beet Risotto and many, many salads and roasted veggie medleys. Bella Terra: Greens for a Greens Salad with Roasted Vegetables, and lots of sauteed kale. Bella Terra: Cucumbers for a Guacamole-Inspired Salad.

Towards the end of July and into August, our berries, bell peppers and tomatoes exploded.  We had more than we knew what to do with, but luckily froze and preserved as much as we could to get us through the fall and winter months.

Bella Terra: Blackberries for many batches of Jam, and general munching. Bella Terra: Raspberries for more Jam, Raspberry Almond Muffins and Raspberry Buttercream Frosting. Bella Terra: Tomatoes for Creamy Tomato Soup and Slow-Roasted Tomatoes. Bella Terra: Peppers for Stuffed Peppers and Chile Rellenos.

Things slowed down through mid to late Autumn, as Brian and I weren't quite as on top of getting seeds and plants in the ground for a fall harvest.  We have eaten a lot of lettuce and greens, continued to use fresh herbs in most of our cooking and even pulled some carrots out from underneath 2-feet of snow for our Christmas dinner.

It was a great year for the garden, and it is coming to a close on a bittersweet note.  Brian and I are hoping to put our house on the market in the spring or summer, and so don't have plans to put much into the soil this year.  Instead we'll be getting a bunch of pots and whiskey barrels, and trying our hand at container gardening so that we can move plants with us when we find a new place.  I will be incredibly sad to say goodbye to the little patch of earth that has provided us with so much, but look forward to starting again in a different part of Charlottesville.

And now, for the final Bella Terra post of 2009...Rosemary. Our holiday meal was a festive event this year, with my Momma and stepfather in town and 6 additional friends here to share our table.  We decided on an Italian theme, with braised short ribs in a thick tomato sauce over fresh fettucini, brussels sprouts sauteed with pancetta, the carrots pictured above in a white wine and sage glaze, garlic-full mashed potatoes.  And, as a precursor to the actual sit-down dinner, we had rosemary roasted cashews alongside bacon-wrapped dates.  Everybody was pleased, and it was a very merry Christmas day. These nuts are salty and sweet, earthy and spicy.  They solve whatever craving you may have, and are gracing our table again this evening as we ring in a new year.

Rosemary Roasted Cashews

from the kitchen sink recipes Ingredients
  • 1-1/4 pounds cashew nuts (roasted, unsalted)
  • 2 tbsp coarsely chopped rosemary
  • 1/2 tsp cayenne pepper
  • 1 tbsp brown sugar, light or dark
  • 2 tsp kosher salt
  • 1 tbsp melted butter
Method
  1. Preheat oven to 375*.
  2. Place nuts on parchment lined baking sheet.  Bake for 10 minutes.
  3. Meanwhile, mix together rosemary, pepper, sugar, salt and butter in a large bowl.  Toss the warm nuts with the mixture until well coated.
Read More

happy birthday bella eats!

Andrea

HAPPY HALLOWEEN!

Across the nation, many dining tables have looked like this over the last week: pumpkin merge 1 
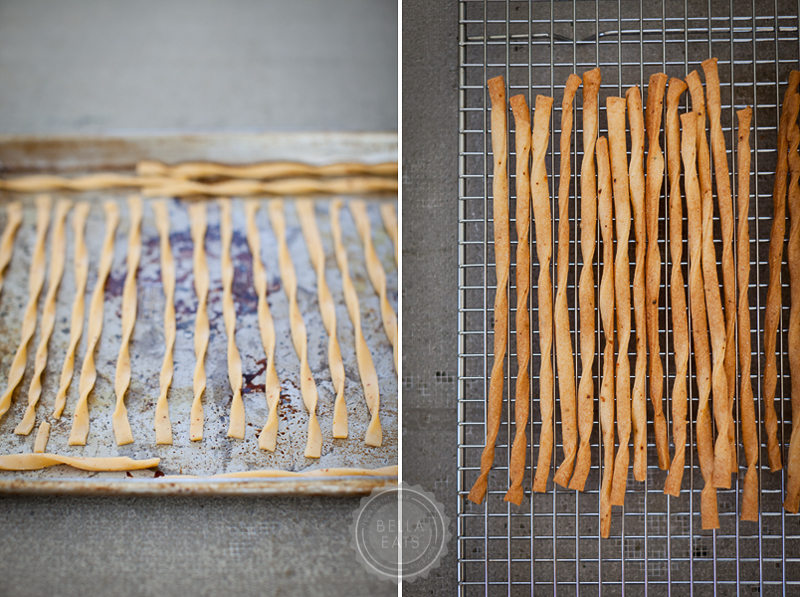
Today, Brian and I will join a few friends and make a similar mess as we celebrate Halloween and Bella Eats' First Birthday! There will be pumpkin carving and fondue makingapple dipping and kettle corn popping along with a tad bit of hard apple cider drinking.  We'll front porch-sit and hand out candy bars to costumed kids (from our friends' house, as the kiddos seem to skip our street every year) as we, or maybe just I, marvel at how quickly the last year has gone by. swiss pumpkin-4 I find it pretty hard to believe that it has been one year since I, on a whim one Friday evening, decided to start Bella Eats.  How time flies. Thank you to all of my old friends, those of you who stood by even after the big change from food diary to recipe blog.  Thank you to new friends, those who found their way here via TastespottingFoodgawker, and other esteemed food blogs.  Thank you to my family and local Charlottesville friends, many of whom have only recently learned of Bella Eats because for so long I was too shy to share it with you.  Thank you for reading. Thank you for sharing your comments.  Thank you for being here. swiss pumpkin-5 For you, dear readers, I have a recipe that you simply must make this Autumn.  In fact, I hope that you will read this in time to carve out a spare pumpkin today, on Halloween, to fill with strong swiss cheese, bread and heavy cream.  Its a grown-up spin on a classic favorite, warm and gooey and eye-rollingly good.  It is absolutely a dish that one shares with friends - nothing this good should be kept to oneself. Enjoy, and have a Happy Halloween! pumpkin merge 3 Don't forget to save your seeds.  They are delicious toasted with a dash of cayenne pepper for a little kick. Pumpkin Fondue from Gourmet, November 2008 serves 8 as an appetizer or side dish - the recipe is easily cut in half if you want to use a smaller pumpkin Ingredients:
  • 1 (7-lb) orange pumpkin
  • 1 (15-inch) piece of baguette, cut into 1/2-inch slices
  • 1/2 tsp salt
  • 1-1/2 cups heavy cream
  • 1 cup reduced-sodium chicken or vegetable broth
  • 1/2 teaspoon grated nutmeg
  • 2 1/2 cups coarsely grated Gruyère (6 oz)
  • 2 1/2 cups coarsely grated Emmental (6 oz)
  • 1 tablespoon olive oil
Mathod:
  1. Place rack in lower third of oven.  Preheat to 450*.
  2. Toast baguette slices on a baking sheet until tops are crisp (bread will be pale) for about 7 minutes.  Transfer to a rack to cool.
  3. Cut a 3-inch diameter hole from the top of the pumpkin.  Scrape the seeds and any loose fibers from the interior of the pumpkin with a large spoon.  Save the seeds for another purpose if you wish.  Season the inside of the pumpkin with 1/2 tsp of salt.
  4. In a small bowl, whisk together the heavy cream, broth, nutmeg, salt and pepper.  In a separate bowl, mixed together the grated cheese.
  5. Place a layer of toasted bread in the bottom of the pumpkin.  Cover with about 1 cup of grated cheese and 1/2-cup of cream mixture.  Continue layering bread, cheese and cream until the pumpkin is filled to 1/2-inch below opening.  Make sure to use all of the cream mixture, but you may have some bread and cheese left over.
  6. Cover pumpkin with top and place in foil lined roasting pan.  Rub the outside of the pumpkin with olive oil.  Bake until pumpkin is tender and filling is puffed, 60-90 minutes.  Let cool slightly before serving, making sure to scrape some pumpkin flesh into bowls with the bread/cheese mixture.
seeds-1 Spicy Pumpkin Seeds Ingredients:
  • fresh pumpkin seeds, rinsed and dried
  • spray oil
  • sea salt
  • cayenne pepper
Method:
  1. Preheat oven to 375*.
  2. Line a baking sheet with aluminum foil.  Spread seeds over foil and spray with oil.  Sprinkle with sea salt and cayenne pepper to taste.  Stir with spatula and spread seeds evenly across sheet.
  3. Toast seeds until golden brown, stirring occasionally, for 7-10 minutes.
Read More

a definite crowd-pleaser

Andrea

Have you ever tried pickling? I hadn’t either, until a couple of weeks ago. Hadn’t even really thought about it until finishing Molly Wizenburg’s A Homemade Life a couple of weeks before that. The timing was perfect. I’d been thinking about our upcoming barbeque, flipping through magazines and cookbooks trying to decide what to make. Our overall plan was simple - we would provide all of the makings for pulled pork sandwiches, some snackie appetizers and, of course, dessert. Our guests would each bring a side dish to share and beverages of choice.  Easy, cost-effective, everybody gets to contribute AND you learn about some great new salads for future summer parties. pickles merge 1 However, when you’re throwing a party and only contributing a few key dishes to the event, the pressure is on to make those dishes shine. Especially if your name is Andrea and you write a food blog. It isn’t outside pressure; its completely internal.  I do it to myself, and not because I feel the need to impress my guests (which is a nice bonus, if it happens), but simply because I don’t get many opportunities to cook for that many people. Smoking a 10-pound pork shoulder for 10-12 hours isn’t something that Brian and I do every weekend, as nice as that sounds. And I certainly wouldn’t make 24 cupcakes on a whim without a special occasion or at least an office full of male co-workers to take them to.   So, when given an excuse to prepare something indulgent or time-consuming, I jump.  And start planning weeks in advance. pickles 4 The pulled pork was an easy decision, we’d been wanting to try something similar for quite some time.  I left Brian in charge of consulting with the local farmer that supplied the shoulder (Double H Farm - fabulous people and Big Green Egg owners as well!) and finding the right vinegar-based barbeque sauce recipe to go along with it.  The cupcakes were much more difficult - I was emailing back and forth with my cupcake consultant the day before the party, still trying to determine the perfect frosting for those decadent cakes mere hours before I was planning to make it.  Luckily, I had decided on the "snackie appetizer" portion of our food contribution weeks prior, and the sugar snap peas and carrots had been nestled in their brine, resting in our fridge for a full five days. When I chose to make pickles, the idea seemed to jive well with my overly-indulgent, time-consuming criteria for recipe selection.   They were certainly delicious enough, and were crowd-pleasers that elicited impressed reactions from our guests ("you made pickles?!?").  But here's the thing...they were so incredibly easy to make.  So easy that I'm already brainstorming about all of the other vegetables I can pickle this summer, especially those that we are growing in our garden.  Cucumbers?  Check.  ...Beets?  Check...  Okra?  Check... pickles 5 Many thanks to Whitney for introducing me to the pickled sugar snaps recipe, and Molly for the carrots. Pickled Sugar Snap Peas recipe from smitten kitchen, who adapted from the joy of pickling via epicurious Ingredients:
  • 1-1/4 cups white distilled vinegar
  • 1-1/4 cups cold water
  • 1 tbsp kosher salt
  • 1 tbsp sugar
  • 1 pound sugar snap peas, ends trimmed and strings removed
  • 4 garlic cloves, sliced thinly
  • a few pinches of red pepper flakes
Method:
  1. In a non-reactive saucepan, heat the vinegar, salt and sugar until both are dissolved.  Remove from heat and stir in the cold water.
  2. When the vinegar mixture is cool, pack the sugar snaps, red pepper flakes and garlic into jars or a large bowl (I used three 1-pint jars) and pour the brine over them.  If you run out of brine (I was just short) mix together equal parts water and vinegar to add to the jars.  Cover with a non-reactive lid if using jars, or plastic wrap if using a bowl.
  3. Store in the refrigerator.  They will be lightly pickled after 24 hours.  We ate ours at the 5-day mark, and they were absolutely perfect.  The original recipe says to wait 2 weeks for them to reach optimum flavor, but they can (and probably will be) consumed long before that.
Spicy Pickled Carrots recipe from a homemade life, by molly wizenburg Ingredients:
  • 2 cups apple cider vinegar
  • 2 cups water
  • 1/4 cup sugar
  • 6 sprigs fresh thyme
  • 5 large garlic cloves, thinly sliced
  • 1-1/2 tsp black peppercorns, cracked
  • 1-1/2 tsp red pepper flakes
  • 1-1/2 tsp kosher salt
  • 1-1/2 tsp yellow mustard seeds (original recipe calls for brown, I only had yellow)
  • 1-1/2 pounds small carrots, or large carrots cut into matchsticks 1/2" thick by 3" long
Method:
  1. In a medium, non-reactive saucepan, bring 1-1/2 cups of vinegar, water, sugar, thyme, garlic, peppercorns, red pepper flakes, salt and mustard seeds to a boil over medium-high heat.  Reduce heat and simmer, stirring occasionally, for about 10 minutes.  Remove from heat and cool for 5 minutes.  Stir in remaining vinegar.
  2. Place the carrots in a large, heat-proof bowl.  Pour the warm brine over them and let sit until the brine cools to room temperature.
  3. While the carrots cool, clean your canning jars and lids in warm, soapy water (I used three 1-pint jars).
  4. Once the carrots are cool, arrange them in the jars so that they are nice and snug.  Feel free to use your fingers.  Using a ladle, distribute the brine evenly amongst the jars.  The carrots should be completely covered by brine.  If they are not then add a mixture of 2 parts vinegar, 1 part water.
  5. Seal firmly and refrigerate for at least 3 days.  We consumed most of them at the 5-day mark, and they were delicious, but I think they were even better after a full week.
pickles 6
Read More

road food

Andrea

I just couldn't resist getting a quick post in today before heading out to NC for the next 30 hours.  :) I've packed myself some snacks to help resist the urge of eating unhealthy meals on the road, and wanted to show you guys what I've eaten so far today.  More quick and easy favorites... Breakfast:  toasted ezekiel cinnamon raisin muffin with 1-1/2 tbsp natural PB and 1 small pink lady apple. [384 calories] 090130-b1 Lunch:  baked sweet potato with 1/4 cup wheat berries, 1 cup steamed broccoli, 2 tbsp edamame, 2 tbsp corn, sea salt [341 calories] 090130-l1 Snacks: [for today and tomorrow's road trips] small pink lady apple, clif bar, quaker true delights bar, walnut halves and dried turkish apricots.  These will be spread out over the next couple of days, and probably not all consumed.  But I've included calorie counts below so that I can pick and choose to make up my snacks while I'm out of town.  What do you pack for road trips? [apple = 80 calories, clif bar = 250 calories, true delights bar = 140 calories, 1/4 cup walnut halves = 215 calories, 1/2 cup dried apricots = 173 calories] 090130-s1 And I'm off!  Have a great weekend!!!  :)
Read More