black forest chocolate cookies + an old favorite
Andrea
Happy holidays, friends! Wow, they sure snuck up quickly this year. Brian and I are staying home in Charlottesville after having traveled to see family in Florida for Thanksgiving, and I truly thought that there would be all kinds of time for baking and hot cocoa and homemade marshmallows in the last few weeks. But here we are, days away, and I've baked exactly two kinds of cookies and drunk exactly zero cups of cocoa. To be clear, I use the term 'baked' loosely...one of them requires no heat whatsoever. I may feel that I've failed as a holiday baking goddess this year, but the presents are wrapped and shipped, the tree is up and trimmed, and Christmas music plays from my computer the majority of the time. And, as of tomorrow evening, I'll be unplugging for 4 full days to hang out with my honey. I. Can't. Wait. That right there is what the holidays are about; cherishing those you love and taking time just to be. But, having a few cookies laying around never hurts either. :)
All things merry to you and yours!!! xoxo.

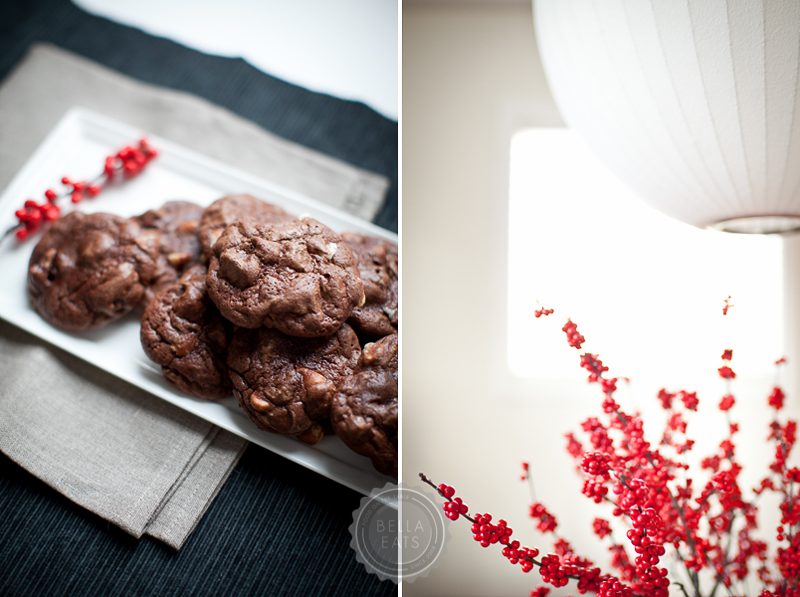
Brian is originally from Michigan, making the chocolate + cherry combination dear to his heart and stomach. I am always looking for recipes that combine the two, and this one from Baked in New York is quite perfect. The dough is very sticky and fudge-like, and the resulting cookies are super-moist and chewy. The dried cherries provide the perfect burst of tartness to counter the rich chocolate. I realized as I typed up the recipe that I completely left out the brown sugar, but the cookies were still delicious. In fact I think I like them better than what they should have been, as I really can't imagine them being any sweeter than the version I made.
Black Forest Chocolate Cookiesmakes 24 large cookies, or 48 small (1 tbsp scoop)accidentally modified from BakedIngredients
- ¾ cup all-purpose flour
- 1 tsp baking powder
- ½ tsp salt
- 16oz dark chocolate (60 to 72% cocoa), coarsely chopped
- 10 tbsp unsalted butter, cut into 1-inch pieces
- 6 large eggs
- 1-¼ cups granulated sugar
- 1 cup firmly packed light brown sugar
- 1 cup semisweet chocolate chips
- 1 cup white chocolate chips
- 1 cup dried cherries (we used tart cherries straight from Michigan)
Method
- Sift the flour, baking powder, and salt together into a medium bowl and set aside.
- In a large nonreactive metal bowl, combine the dark chocolate and butter. Set the bowl over a saucepan of simmering water and cook, stirring with a rubber spatula, until the chocolate and butter are completely melted and the mixture is smooth. Set aside to cool.
- In the bowl of an electric mixer fitted with the whisk attachment, beat the eggs and sugars on high speed until the mixture is pale and thick, about 5 minutes.
- Add the cooled chocolate mixture and the vanilla and beat until just combined. Scrape down the bowl and beat again for 10 seconds.
- Add the flour mixture and mix on low until just combined, about 10 seconds. Do not over mix.
- Using a spatula or wooden spoon, fold in the chocolate chips, white chocolate chips, and dried cherries. The dough will look very loose, but it will harden in the refrigerator. Refrigerate for 6 hours or overnight.
- Preheat oven to 375℉.
- Spread two cookie sheets with parchment paper. Using a 1 tbsp scoop or a spoon, place dough in rounded mounds on sheets, about 1-1/2 inches apart. Bake for 12-15 minutes until the tops of the cookies are beginning to crack. Let cool on sheet for 10 minutes and then move to a cooling rack to cool completely. Cookies can be stored in an airtight container for 3-5 days.

Speaking of Michigan (Brian's home state), this cookie comes from his Nana, and has been a staple since he was a little boy. I think that this may be his very favorite cookie recipe. I get the best reaction from him when I make a batch, way better than any layer cake I labor over for a full day. They take 10 minutes to whip up, another 20 to harden, and you're done. So simple. Plus, we always have the ingredients needed to pull these treats together, so they are perfect for last-minute guests or a holiday pot luck.

I tried once, years ago, to make these cookies healthier by substituting out the butter, using less sugar, etc. Big mistake. Just keep them as are and enjoy.
Chocolate No-Bake Cookiesmakes 4 dozen cookiesIngredients
- ¼ cup unsweetened cocoa powder
- 2 cups granulated sugar
- ½ cup butter
- ½ cup milk
- ½ cup peanut butter (go for the non-natural stuff…like Jif or Peter Pan)
- 1 tsp vanilla extract
- 3-½ cups instant oatmeal
Method
- Combine cocoa, sugar, butter, and milk in a medium-size sauce pan over medium heat. Simmer for 2 minutes and remove from heat.
- Add peanut butter, vanilla, and oatmeal to pan and stir to combine well.
- Spoon onto waxed paper in 1 tbsp lumps (a small ice cream scoop works well for this) and let sit until the cookies are set.
- Store in a sealed container for 3 days.


 Make sure to be quick with getting the marshmallow goo from your mixer to the pan and smoothing it out, it starts to harden pretty quickly. After we had our batches settled in their pans (we made 2, one vanilla flavored and the other peppermint), we let them sit overnight to set. In the morning, I released the marshmallow from the pan to cut it into little 'mallows.
 I tried several different methods of cutting, and didn't have any knives that worked for me. The hubb suggested that I use my stainless steel scraper, and it was perfect. The key is to push the blade straight down through the marshmallow, don't pull it through like you would cut a cake. The 'mallow is just too sticky and it deforms if you try to pull a cutting utensil through.
 They turned out beautifully, and are so amazingly good. You've never had a marshmallow if you've only had the store-bought variety...these are 100 times better.


 After cutting the marshmallows (and eating quite a few!) we moved on to
  The chopped cherries, walnuts and crystalized ginger were perfect compliments to the dark chocolate.
 The chocolate-y goodness spread out nicely on the sheet pan, but at this point I was still skeptical of how the bark would turn out. I was worried that when we cut it into individual pieces it would shatter into much smaller pieces than I was hoping for.
 But it came out perfectly. I was shocked at how easy it was to cut and how nicely it sliced into small pieces. And the flavors are amazing together, not too sweet.
 We also made


 This was so fun. I love doing projects like this with my hubb. It probably took us two full days with all of the candy making, shopping for ingredients + materials and assembly of the boxes, but it was so worth it. We've had great reactions from our friends and had such a great time putting the gifts together!
Ok lovelies, I'm off to another holiday party tonight, this one is for the hubb's office. And tomorrow morning, at a VERY EARLY 5am, we are loading the car up with luggage, presents and dogs for our 13 hour drive to FLORIDA!!! YAY!
Have a fabulous evening... :)
This was so fun. I love doing projects like this with my hubb. It probably took us two full days with all of the candy making, shopping for ingredients + materials and assembly of the boxes, but it was so worth it. We've had great reactions from our friends and had such a great time putting the gifts together!
Ok lovelies, I'm off to another holiday party tonight, this one is for the hubb's office. And tomorrow morning, at a VERY EARLY 5am, we are loading the car up with luggage, presents and dogs for our 13 hour drive to FLORIDA!!! YAY!
Have a fabulous evening... :)